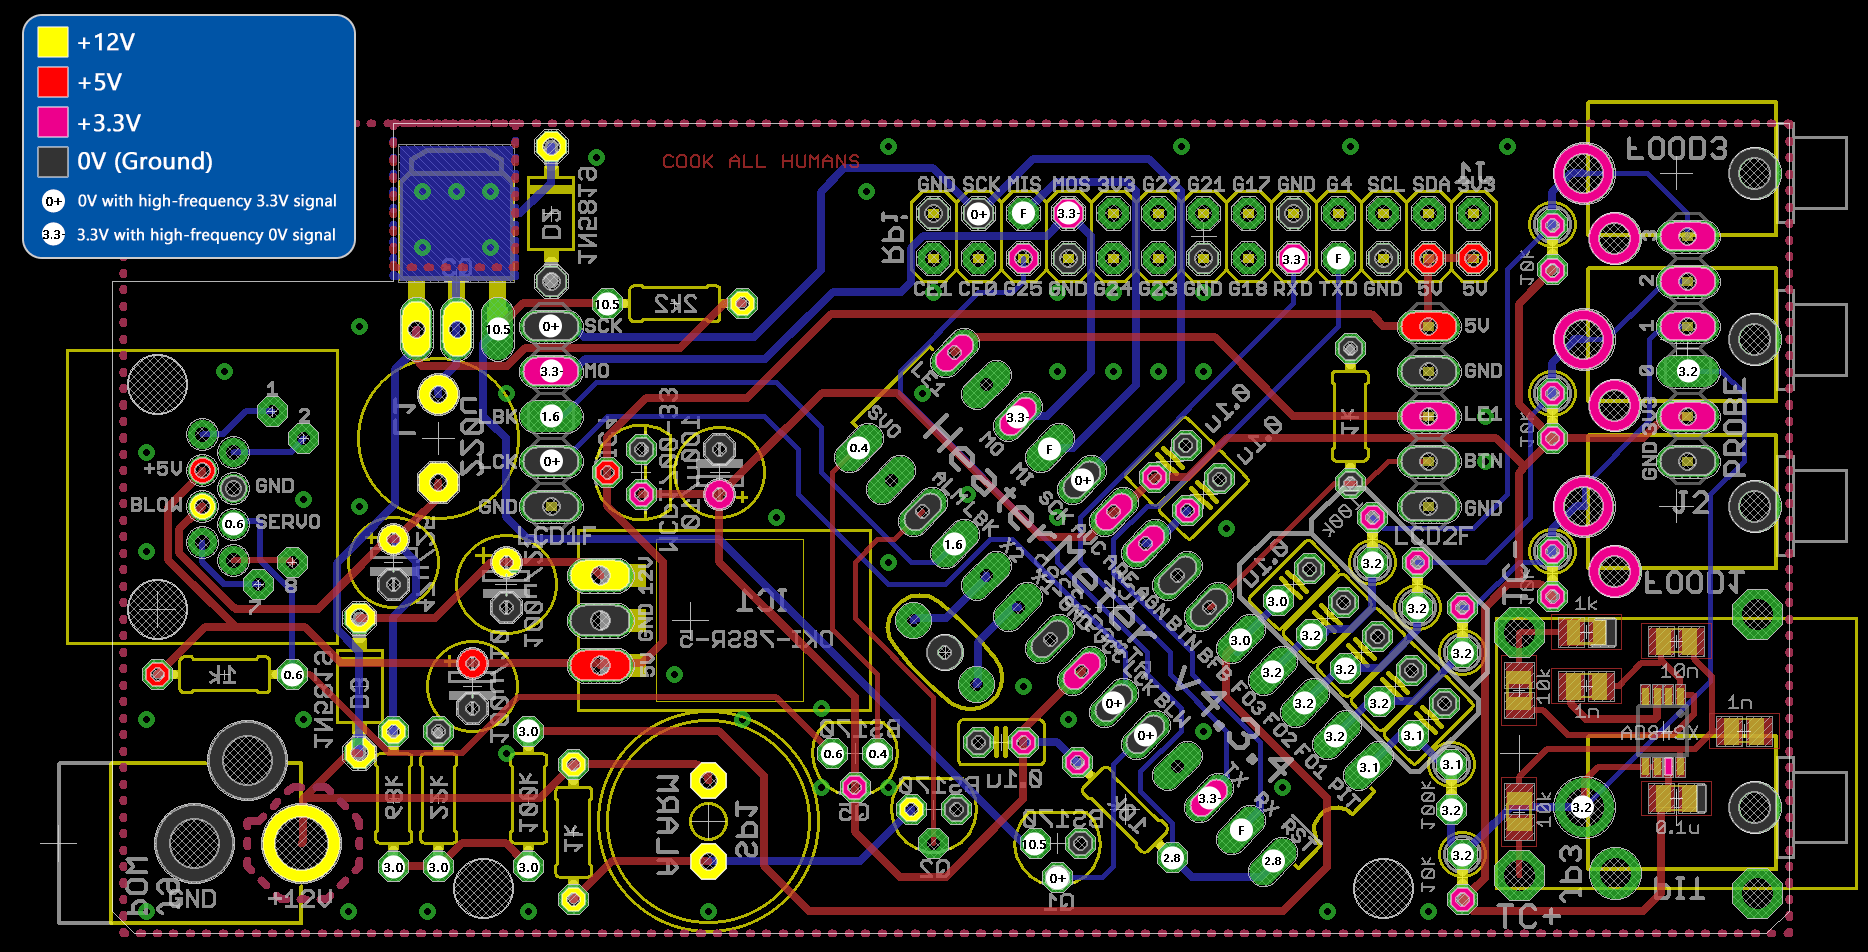
Actually I should have been more clear when I said "top left" and "top right" thermocouple pins. I was referring to the amplifier pins as they would be if pin 1 was top left, not its installed orientation. I think I made it more confusing so let me try again. The key is to not listen to me
")
and just look at the board image:
See the red lines that connect those pieces? Everything that has a red line connecting it should read as connected on the multimeter, and if a red line doesn't connect two things and they show as connected you've found a problem. Pins 2 and 3 of the thermocouple amp are in fact connected to ground even though it isn't shown on the image (they're connected to the top copper layer with little tiny pluses on their pad in real life).
Pin 1 - to right side of the 1n capacitor, left side of 10n, and bottom of TC- 10k
Pin 2 and 3 - GND
Pin 4 - Nothing
Pin 5 (bottom left in installed position) and Pin 6 - Big circle (3.2). This is the output
Pin 7 - 3.3V and left side of 0.1u capacitor
Pin 8 - Left side of 1n capacitor, right side of 10n, and top of TC+ 10k
The opposite sides of both 1n capacitors and the right side of 1k are GND.
The first two you can't use since they are digital and we need an analog output. Practically this will limit you to only using the AD8495 chip, as I don't think there are any others which have breakout boards available on eBay or Adafruit. Adafrult's AD8495
is here, and the bottom item you linked from eBay is also appropriate. Both of these have their output shifted up so you'll see that precision reduction and will need to enter an offset into the webui. To use them you just wire VCC to the 3V3 pin of J2, and GND to GND, and output to 0 (Probe 0) on J2. You'll need to disable your amplifier though because they both can't be active at the same time. You can do this by cutting the red trace going to the "3.2" circle, or removing your amplifier.

")

 I think the board was still hot from soldering) I've done something and it read a temp of 300 f then dropped slowly until it goes back to saying - No Pit Probe -