First Restoration- Need Advice - UPDATED *RESTORED*


JJecker

New member
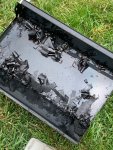
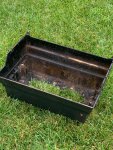
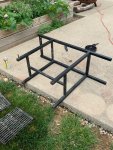
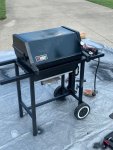
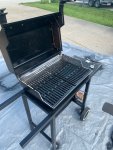
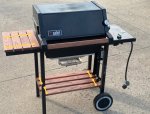
Hello, I picked this grill up recently with the intention of restoring it. The plan is to get rid of the plastic handle and side table as well as the wire shelf on the bottom and replace them all with stained wood. I also wanted to paint the lid red but after researching and reading other threads I see that this is probably a bad idea.

Does anyone have thoughts on what to do for the lid if not to paint? As you can see from the picture, the original black is pretty baked and faded. I guess the best way to describe it is being oxidized. Are there any products or techniques that can be applied to bring back the original shine?

Thanks!IMG_1764.jpg
 
Last edited:
There really is nothing you can do about the lid. Some have made it look a little nicer with some buffing/polishing and wax but it's not really doing anything as it's due to fading of the underlying dye used in the porcelain itself. Be aware porcelain is simply a glass like layer fired onto the raw steel. It cannot be repainted
 
There really is nothing you can do about the lid. Some have made it look a little nicer with some buffing/polishing and wax but it's not really doing anything as it's due to fading of the underlying dye used in the porcelain itself. Be aware porcelain is simply a glass like layer fired onto the raw steel. It cannot be repainted

Thanks, I guess I will clean it up as best can be and roll with the patina look!
 
Just roll with the lid you have for now. Keep an eye out for another 2 burner with a better lid and swap lids in the future. If you are going to use the grill its a good idea to have 2 lids. One for show and one for regular use
 
I agree, go with what you have and look for something else. I don't know if they made a red lid for the two burners or not, but even if they did, they are probably fairly hard to come by.
 
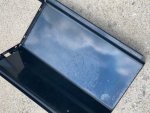
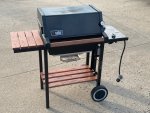
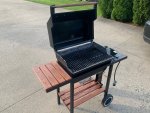
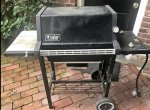
I'm in the middle of my first restoration too. My lid wasn't in quite as rough of shape, but I was pretty happy with how it turned out. I first cleaned the whole grill with oven cleaner, scraped and scrubbed the interior as much as possible. After I removed the lid assembly, I took off the lid end caps and the gave the porcelain 2-3 rounds of cleaning with #0000 steal wool and 409 followed by simple green degreasing soap to get as much grease and grime off it as possible. Between cleaning rounds I gave it a heavy rinsing, towel dried it then let it completely dry in the sun which made it easier to see where I missed grease spots. After I had it as clean I could, I used a turtlewax car polishing compound buffed on with a polishing adapter on drill, wiped the excess away with a micro fiber cloth. I followed that up by buffing on a couple coats of finishing car polish and wiping the excess polish away with a micro fiber cloth.

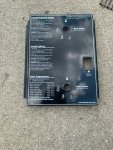
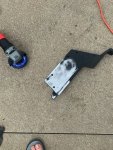
On the caps I removed the thermometer and it's bracket from the right end cap and cleaned it and both lid end caps with #0000 steal wool and degreasing soap a few times, then cleaned off the remaining soap residue with lacquer thinner. Afterwards, I masked off the interior surfaces with newspaper and painters tape and painted the caps and bracket with a couple coats of Rust-o-leum High Heat - Ultra Semi Gloss finish spray paint. Let the paint dry and put it back together. I cleaned the thermometer with lacquer thinner and took the petina off the thermometer bezel a 220 grit sand paper followed by a 1000 grit to restore the shine. There are still a couple of minor scratches in the lid that I couldn't buff out with compound but otherwise the exterior looks almost brand new.
 
That looks very cool - I need to do that wood shelving for my little 2-burner Spirit. How did you attach the wood slats to the frame and the thickness/width of the slats?
 
That looks very cool - I need to do that wood shelving for my little 2-burner Spirit. How did you attach the wood slats to the frame and the thickness/width of the slats?

The slats are 1 x 3 red oak which are held together using 1/4 x 2 underneath. I did not attach them to the frame but instead measured and placed the 1/4 x 2's very tight against the inside frame that runs parallel with them which gave an extremely snug fit. Even though they are just held in with friction I was able to get a snug enough fit that they do not easily come out. They actually need to be pushed down with a little force to get them to click in place.

The bottom is two separate pieces because of the horizontal support bar. One set of two slats in the back and one set in the front.

Here is a picture with the yellow representing where the 1/4 x 2's are placed on the bottom of each shelf.6-17-2020 1-16-30 PM.jpg


Back
Top