Heirloom Redhead Genesis 2000 Restoration


SClark

New member
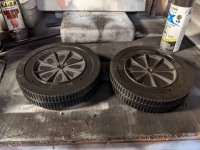
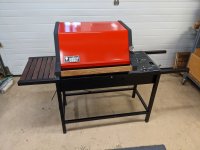
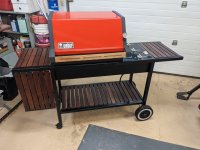
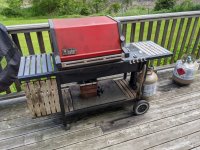
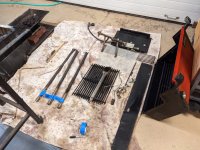
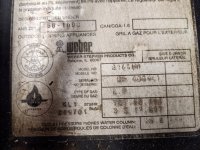
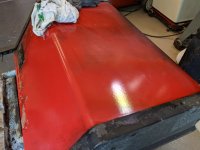
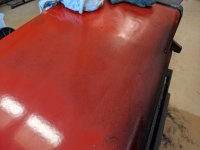
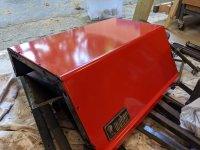
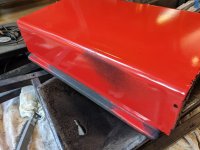
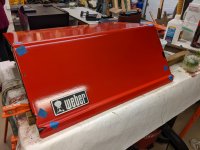
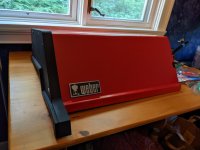
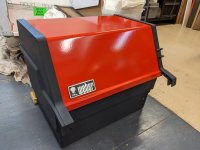
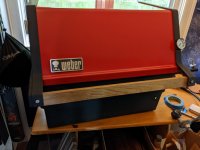
My dad was getting rid of the Weber that he's had for as far back as I can remember, so of course I said I would take it. It's lived in a screened in porch so hasn't seen as harsh weather as it otherwise might have but there is definitely still some work to do. According to the serial number this was initially a '96 1000, but it got combined with parts from a 2000 redhead about 10-15 years ago.

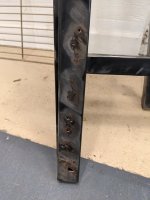
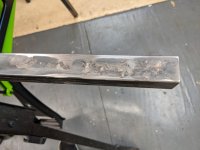
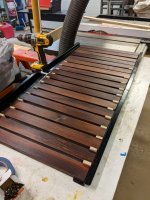
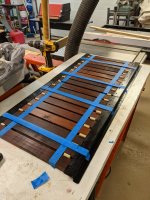
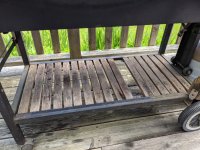
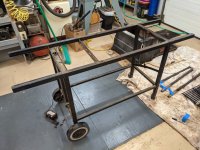
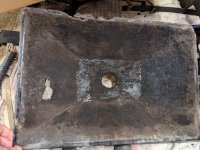
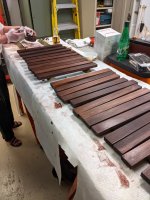
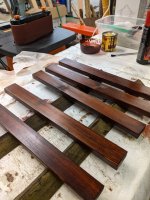
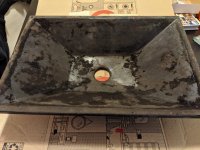
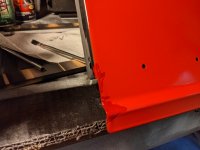
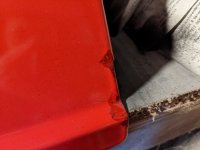
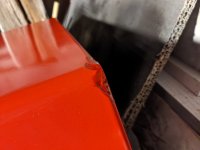
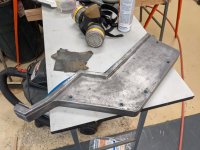
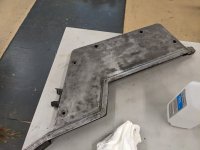
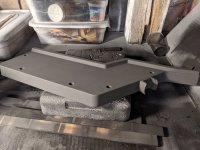
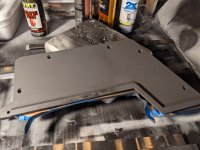
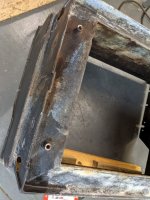
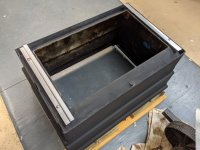
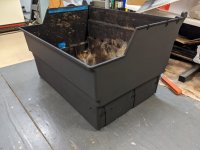
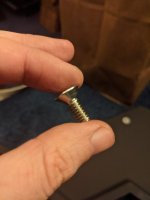
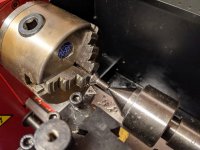
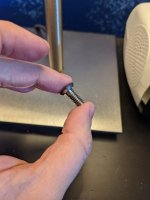
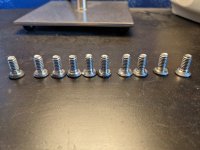
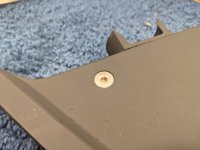
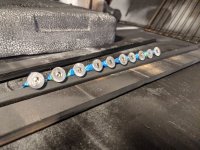
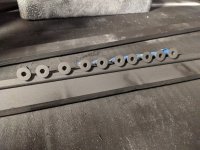
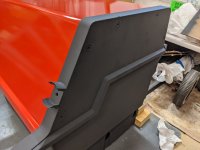
The slats need replacing, the drip pan has a hole in it, and there is some rust throughout. It is also missing one of the rails for the drip pan, and the screws for them were seized.
 

Attachments

  • PXL_20210514_193557697.jpg
    PXL_20210514_193557697.jpg
    247 KB · Views: 61
  • PXL_20210514_193804591.jpg
    PXL_20210514_193804591.jpg
    215.9 KB · Views: 58
  • PXL_20210516_215421826.jpg
    PXL_20210516_215421826.jpg
    192.1 KB · Views: 55
  • PXL_20210516_215424977.jpg
    PXL_20210516_215424977.jpg
    202.4 KB · Views: 62
  • PXL_20210601_195727530.jpg
    PXL_20210601_195727530.jpg
    238.2 KB · Views: 65
  • PXL_20210601_194828520.jpg
    PXL_20210601_194828520.jpg
    190.5 KB · Views: 68
Last edited:
So first up, I cut, stained, and applied finish to around 42 wooden slats... Not sure how I ended up with so many, I hadn't planned for extras. Not a bad thing to have, though!

The slats are red cedar, and stained with Minwax Red Mahogany stain. I've then finished them with a mix of Spar Varnish, Teak Oil, and Mineral Spirits.

While waiting for the stain and finish to dry, I got to work on the lid. It took a lot of scrubbing, but the recommendation of simple green and #0000 steel wool works well.

I also managed to find someone on craigslist selling a used drip pan for $25, which had been stressing me out.
 

Attachments

  • PXL_20210523_202238664.jpg
    PXL_20210523_202238664.jpg
    168 KB · Views: 63
  • PXL_20210529_230124687.jpg
    PXL_20210529_230124687.jpg
    184.7 KB · Views: 47
  • PXL_20210523_204118753.jpg
    PXL_20210523_204118753.jpg
    104.5 KB · Views: 47
  • PXL_20210523_204122013.jpg
    PXL_20210523_204122013.jpg
    92.2 KB · Views: 47
  • PXL_20210523_204124379.jpg
    PXL_20210523_204124379.jpg
    101 KB · Views: 48
  • PXL_20210523_220117780.jpg
    PXL_20210523_220117780.jpg
    147 KB · Views: 48
  • PXL_20210523_220122539.jpg
    PXL_20210523_220122539.jpg
    137.1 KB · Views: 59
  • PXL_20210530_153930442.jpg
    PXL_20210530_153930442.jpg
    156.5 KB · Views: 61
I made a small sanding block for the lid to use with the steel wool to help get into the corner of the lip on the back, and also took the emblem off and repainted that. The few chips in the lid I treated with some red brake caliper paint.

I also stripped down all the Z-bars and repainted them although I have no pictures of that.
 

Attachments

  • PXL_20210529_212600958.jpg
    PXL_20210529_212600958.jpg
    120 KB · Views: 37
  • PXL_20210529_212604826.jpg
    PXL_20210529_212604826.jpg
    137.2 KB · Views: 36
  • PXL_20210531_160930788.jpg
    PXL_20210531_160930788.jpg
    107.9 KB · Views: 35
  • PXL_20210531_160940121.jpg
    PXL_20210531_160940121.jpg
    93.9 KB · Views: 35
  • PXL_20210531_160953379.jpg
    PXL_20210531_160953379.jpg
    67.7 KB · Views: 37
For the endcaps, I ended up suiting up to use a siphon style sandblaster with some walnut shell! Tarp and box did a good job at making it so I could reclaim the blasting material. After sandblasting I hit it with some wet-dry sandpaper up to 400, and then painted with flat black rustoleum. The paint flashed a little on one of the end caps but after spraying a couple more coats that toned down.

The firebox didn't need the sandblasting as much, I just took some sandpaper to it.

Getting the screws out of the firebox was a bit of a nightmare, but with patience and persistence (and my dad's help) we were able to get them out.
 

Attachments

  • IMG-3761.JPG
    IMG-3761.JPG
    195.9 KB · Views: 75
  • PXL_20210605_210250198.jpg
    PXL_20210605_210250198.jpg
    161.4 KB · Views: 74
  • PXL_20210606_133554642.jpg
    PXL_20210606_133554642.jpg
    116.4 KB · Views: 68
  • PXL_20210606_214129218.jpg
    PXL_20210606_214129218.jpg
    168.2 KB · Views: 66
  • PXL_20210605_214419965.jpg
    PXL_20210605_214419965.jpg
    163 KB · Views: 66
  • PXL_20210606_171347959.jpg
    PXL_20210606_171347959.jpg
    164.7 KB · Views: 68
  • PXL_20210608_203102388.jpg
    PXL_20210608_203102388.jpg
    143.5 KB · Views: 69
  • PXL_20210606_214108071.jpg
    PXL_20210606_214108071.jpg
    119.8 KB · Views: 70
  • PXL_20210606_214114168.jpg
    PXL_20210606_214114168.jpg
    112.9 KB · Views: 75
My plan is to replace all the hardware with stainless. Most of which has been ordered from McMaster-Carr.

Now that I had the endcaps painted and the lid cleaned, it was time to assemble... but the flat cap hex screws didn't sit flush with the end caps. The issue is two-fold. The diameter of the screw is slightly too large, and the cone shaped bit also doesn't give enough clearance for the screw to sit in its spot.

So I set out to learn how to use my Grandpa's metal lathe so I could make some adjustments! After that, I painted them all flat black to match.

All of the work on this to date has been over the past four weekends... Next up will be the handle, and the frame... Starting to feel like the end is in sight!
 

Attachments

  • PXL_20210606_215116026.jpg
    PXL_20210606_215116026.jpg
    106.1 KB · Views: 66
  • PXL_20210612_012908568.jpg
    PXL_20210612_012908568.jpg
    61.7 KB · Views: 62
  • PXL_20210612_170800296.jpg
    PXL_20210612_170800296.jpg
    126.5 KB · Views: 60
  • PXL_20210613_163910791.jpg
    PXL_20210613_163910791.jpg
    74.5 KB · Views: 60
  • PXL_20210613_163929129.jpg
    PXL_20210613_163929129.jpg
    134.9 KB · Views: 57
  • PXL_20210612_012823727.jpg
    PXL_20210612_012823727.jpg
    85.5 KB · Views: 61
  • PXL_20210612_174346274.jpg
    PXL_20210612_174346274.jpg
    164.5 KB · Views: 63
  • PXL_20210612_194830853.jpg
    PXL_20210612_194830853.jpg
    163.1 KB · Views: 69
  • PXL_20210613_170130628.jpg
    PXL_20210613_170130628.jpg
    117.7 KB · Views: 72
  • PXL_20210613_170143114.jpg
    PXL_20210613_170143114.jpg
    92.8 KB · Views: 70
Last edited:
Oh also I tried finding some replacement clips for the emblem but saw the suggestion to that red gasket stuff. That was way easier and I think will be longer lasting too.
 
I've cut a piece of teak to size for the handle but I'm not sure if I should route the holes into it or not. I like the grain pattern but it does look a bit plain as is. I think at minimum I need to add a round-over but am not sure what other details would be best.

What do you all think I should do with it?
 

Attachments

  • PXL_20210613_185108674.jpg
    PXL_20210613_185108674.jpg
    96.8 KB · Views: 33
A big 'way to go!' on turning those screws down. I went on an endless search for replacement lid hardware and never really found anything that worked right so I've settled with the flax hex screws.
 
A big 'way to go!' on turning those screws down. I went on an endless search for replacement lid hardware and never really found anything that worked right so I've settled with the flax hex screws.
Yeah I looked for a while but couldn't find anything. Now I'm wondering if I could turn some down that are an even closer match to stock (with the serrated underside and the flush top with no hex slot).

I would have simply countersunk the lid. LOL. Way easier. Definitely would have left them shiny stainless as well. Like the contrast. Anyway very nice work
I considered doing this, but I'd already painted the endcaps and this was a good excuse to learn how to use the lathe my grandpa left us. It added a bit more sentimentality to the restore. :)
 
Your profile picture looks like my workbench has many times, and will again at some point this summer! You're going to really enjoy that grill, great work keep posting we love it!
 
Updates...

I decided to get a Rockwell Jawhorse to make my life easier, and with its help went to town with an angle grinder on all the frame parts to remove as much rust as possible. The paint on there is really thick and I didn't have the patience to bring it all back down to bare metal although I know that would have given me the best finish. I've been without a functional grill for long enough!

A few of the legs had enough rust corrosion that it looked like a woodpecker got to it after I removed the rust. Those ones got filled with some epoxy and sanded back again.

I also tried repainting the wheels but they ended up too glossy so I sanded it back dull. The hubs that fit the axle were also white, not black, so I need to paint those...
 

Attachments

  • PXL_20210619_204412603.jpg
    PXL_20210619_204412603.jpg
    206.5 KB · Views: 32
  • PXL_20210626_165030147.jpg
    PXL_20210626_165030147.jpg
    166.8 KB · Views: 32
  • PXL_20210626_183909653.jpg
    PXL_20210626_183909653.jpg
    109.8 KB · Views: 33
  • PXL_20210627_153109932.jpg
    PXL_20210627_153109932.jpg
    93.5 KB · Views: 32
  • PXL_20210703_182602553.jpg
    PXL_20210703_182602553.jpg
    144 KB · Views: 32
I machined down two stainless full thread hex bolts to replace the two original bolts that hold the handle. Painted them black as well so it looks stock.

Painted all the frame pieces...

And finally it was time to put together all the wood slats!

For the upper ones I used 1/4" hex nuts turned on their side. For the bottom one I had 5/16" hex nuts which I had seen recommended. I felt like I needed them spaced slightly more than that though, so I ripped a piece of wood and cut it into little spacer boxes using the bandsaw.

The manifold bars that connect to the grill needed a bit of repair, this grill was missing its bracket, so over the years all the force of pushing down on those knobs had taken its toll I think. I had to bend them back up slightly (by only a couple of degrees) to lift up the valves a little higher so the knobs could turn freely. I then fashioned a bracket to help it stay where it needs to be in the future. I'll need to grab a picture of that.
 

Attachments

  • PXL_20210703_232154146.jpg
    PXL_20210703_232154146.jpg
    123.6 KB · Views: 63
  • PXL_20210704_155758212.jpg
    PXL_20210704_155758212.jpg
    183.6 KB · Views: 58
  • PXL_20210704_161237112.jpg
    PXL_20210704_161237112.jpg
    193.4 KB · Views: 54
  • PXL_20210704_173210056.jpg
    PXL_20210704_173210056.jpg
    173 KB · Views: 62
  • PXL_20210705_235353703.jpg
    PXL_20210705_235353703.jpg
    143 KB · Views: 64
I've done a test fire of it as well. Everything was working. The back burner valve when put in low goes so low that the flame dies off. The middle burner didn't seem to go low enough. So I swapped those valves around.

Grill is back home now, outside... ready for some cooking. So we'll see how it all works.

I've only got a few things remaining to do: Handle, Propane holder, and touch up paint on the hubs for the wheels.

I'll be ordering a new set of flavorizer bars from rcplanebuyer, and I've already ordered a rotisserie from OneGrill. I am pretty excited to try it out!!
 

Attachments

  • PXL_20210711_205220379.jpg
    PXL_20210711_205220379.jpg
    252.7 KB · Views: 53
Thanks.

Also, if anyone needs 6 durawood slats let me know. I'd be happy to ship them to a grill in need.


Back
Top