Hi Jeff,
Clever DIY build there, and I think it came out looking nice and clean! Also, that's a good idea about bolting a pizza pan to act as a ceiling to reduce the head-space.
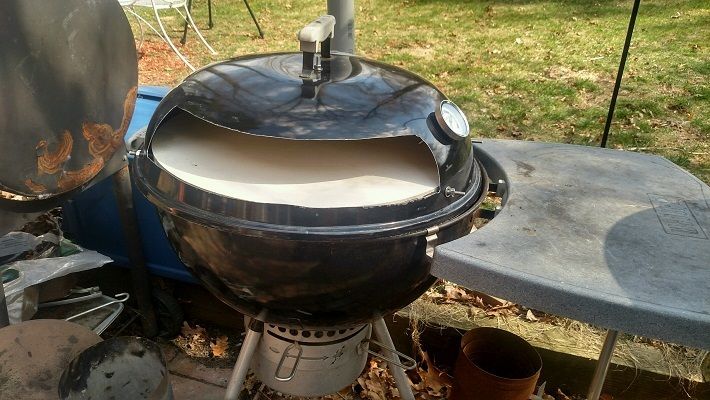
I embarked on a similar journey this weekend, although I was using an official Kettle Pizza. I wasn't able to get the kind of heat I was looking for, at least not for a sustained amount of time. From reading your post, it sounds like you were happy with the way the top of the pie came out, but not the bottom. Opposite for me, the bottoms came out looking great, but the tops just weren't getting there. I used an IR thermometer to measure my pizza stone, and it was generally above 600 degrees.
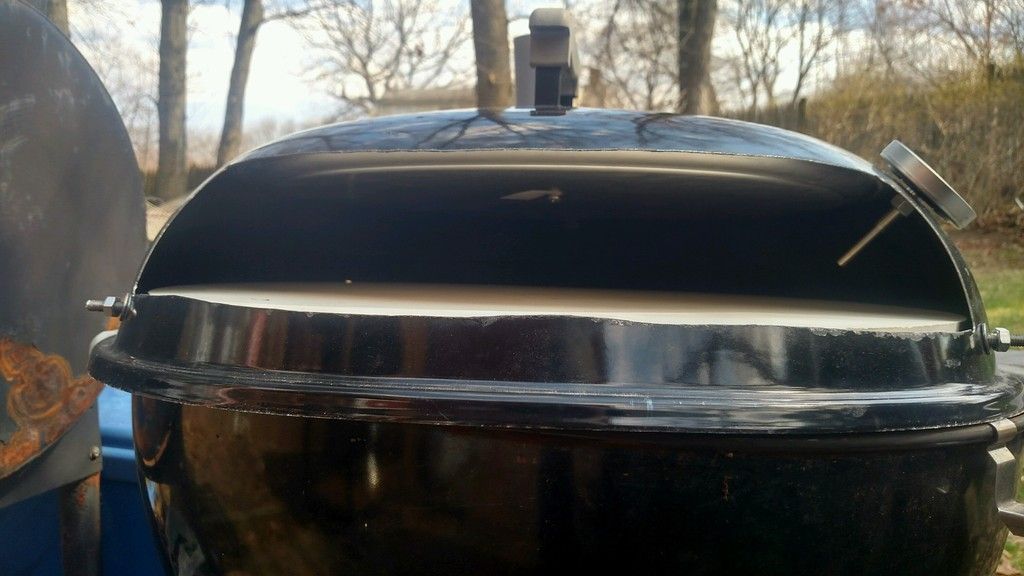
This was my first attempt with the KettlePizza, and my results were tasty, but did not meet the standard I was hoping for. I didn't get it hot enough. I was using lump charcoal, and I actually used hand-sorted pieces of lump, choosing only the largest pieces I had. (You'll find some interesting stuff if you make a habit of searching through bags of lump). My thought was that the largest pieces would burn hotter and longer than small pieces, but in retrospect, they might only burn longer - not hotter - than the small pieces I sorted out. I used 1 full chimney of large lump pieces, and arranged them in the C-shape you described. I then sprinkled on a few extra pieces of unlit lump on top of the lit coals. The KettlePizza also accommodates a Weber Char Basket at the rear of the oven, at the same height as the stone, so I put a few chunks of hardwood in the basket.
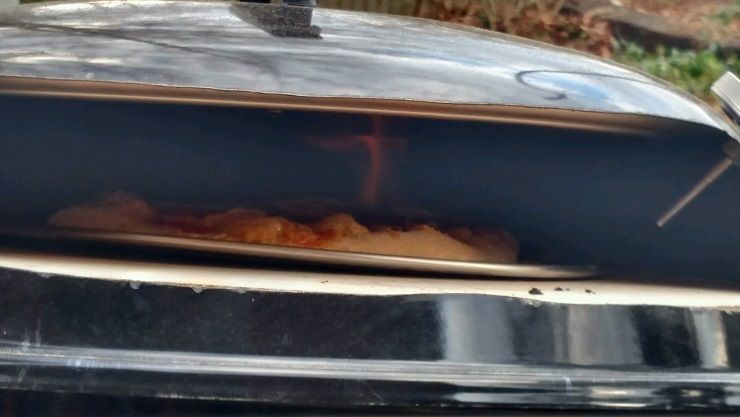
After assembling the KP and giving it some time to heat up, I noticed the included thermometer was pushing past 700 degrees, so I thought things were looking promising. We took the opportunity to take some cool photos of the flames from the wood chunks, and I was again impressed by the way the flames from the char basket were licking forward and across the heat deflector, right above where the pizza would be. With that amount of heat and convection flow, I was eager to see how the pies would turn out!
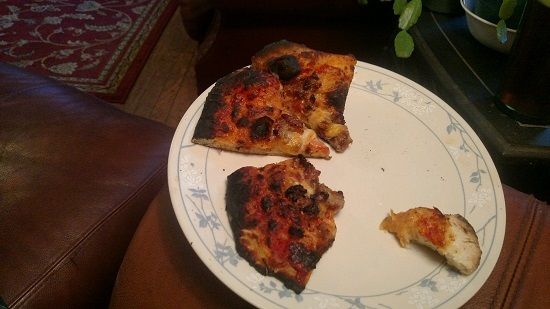
The dough and pizza ingredients were all laid out at this point, but no pizzas were built yet. By the time the first one was ready on the peel, a trip back to the KettlePizza revealed that the temp had dropped by about 150 - 200 degrees already (5-10 minutes?). I added more coals, and figured the first pizza might not be great, but that I'd get it hot again for the next one. Well, I was always chasing the dragon and never got the temps back up into the 700 degree range. Also, that convection action I was impressed with in the beginning was largely gone by the time the pies hit the stone. None of the pizzas came out as I was hoping, but they were all pretty much on-par with what I've made in the oven. Everyone enjoyed the pizza, but I sat there stewing about how I can get more heat outta this thing!
The first obvious change will be to use more charcoal next time. I think I will experiment with using unsorted lump, or perhaps combining lump with Comp K. I plan on using 2 lit chimneys, and arranging basically in the way you said you'd be trying next - a thin layer throughout, with extra coals arranged in a C-shape. I also thought about using more unlit coals to keep the heat going longer, although as a start, I'll be happy if I can just get 2 pizzas in at 700+ degrees before I start losing heat. I suppose putting lit coals on top of the unlit coals would be better than putting unlit on top of lit. I also think I should experiment with using some aluminum foil to "seal" some of the extra openings and crevices between the KP and the kettle itself, so that as much of the convection flow as possible is going in through the vents at the bottom of the kettle and out through the mouth of the oven. For now, I'm hedging my bet on the combination of MORE FUEL and sealing some of those crevices, to avoid losses of heat and convection. Ever since that first attempt, I've been mildly obsessed with finding ways to get that heat up into the range I'm looking for.