$15 Genesis Silver C to Frankengrill.


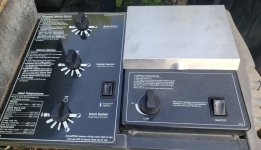
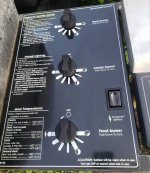
If you have already tried simple green with some #0000 steel wool, that is about the best you will get them. That is a case of the Weber Fade. Not sure what causes it, but it is essentially permanent.

The black knobs look great. I did a Grill Parts Dyeing Demo at the Grill meet last Saturday. I believe Mike Lang will be providing some footage of that at some point. I am using some of those dyed parts on my current rehab. It sets the grill off and makes it a little bit unique with all the gray handles and knobs on the old Genesis grills.
 
Question:

I removed the side burner valve assembly to get to the rocker switch and I noticed the orifice to fuel line from the valve was clogged. I cleaned it out with toothpick and q-tip but I also noticed the metal fuel line that connected to the valve had a opening. Shouldn't there be a screen there to keep debris out to prevent what I just cleaned out from happening.

Found this part no.
5294786971Spider guard for the Side burner.
 
Last edited:
Those black knobs and buttons sure do look slick. I might have to do that. I did see Bruce's Cirque de Soleil Fire Dance in his kitchen, and would consider my dye job a failure unless I had a similar display. That was impressive!

Seriously though, you guys with dyed plastic especially knobs and pushbuttons, does the black color look good after a few months? I have some broken knobs I might dye then cut to see how far in the dye penetrates.

I just don't know how I'm going to beat that flameball for the video. Bruce set the bar pretty high!
 
We actually took a knife to an obscure part of one of the handles that I dyed and it took a couple shavings to get down to the gray. The dye won't scratch or rub off. It would need to be a deep gouge to get down to the gray.
 
We actually took a knife to an obscure part of one of the handles that I dyed and it took a couple shavings to get down to the gray. The dye won't scratch or rub off. It would need to be a deep gouge to get down to the gray.
Mum's the word on the pyrotechnics then lol
 
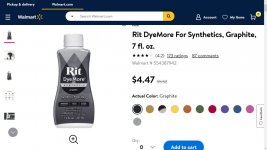
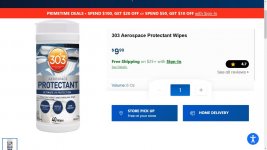
Bruce's flame video is because he added acetone after he had already turned the burner on. I have been dying my parts without the use of acetone. I just boil water to 209 degrees and leave at that temp during the process. Once I reach that temp I add the synthetic rit dye. Then I add the parts and leave them in place for around 20 to 30 minutes. Then I remove and place them in cold water to cool down and then I remove and let dry on a plate with a paper towel. Once completely dry I coat with 303 Aerospace Protectant Wipes. All this I learned from Bruce and other members on this forum.

I honestly do not know of the durability though. For I just started this process a month ago. But that is how I accomplish my task.
OK thanks, I did not know how important the acetone was. Chemically, most of the acetone boiled off when it got added to the boiling water, that is what almost burned Bruce's house down. Basically then you can just simmer them in water. I'll have to look into what the acetone is doing. Might just be part of the directions for the dye, I am only thinking about doing this, I don't have any of the dye yet.
 
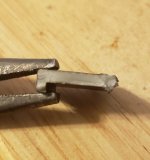
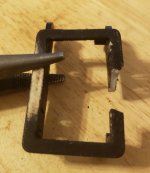
This what happens when I scratch it with these rough pliers. It does come off.
It would be interesting if the results are different with acetone.
Maybe I need to rethink the process I am using.
To use acetone
To dye for a longer period of time.
What do you think @Bruce?

Dyed Scratched with Pliers.jpg
 
Last edited:
Yes the acetone might soften the plastic up a little. Like many things it would be interesting to compare!
 
Theoretically the acetone helps the dye penetrate the plastic. But I have seen where both ways get good results. I have also seen where they say to wipe apart down with acetone before dying it helps too
 
Theoretically the acetone helps the dye penetrate the plastic. But I have seen where both ways get good results. I have also seen where they say to wipe apart down with acetone before dying it helps too
Yes, that makes sense. Acetone is a really good solvent, it is soluble with water and with oils. So it is softening up the plastic (which is technically an "oily" compound) and letting the dye penetrate better. I bet when you're using acetone, it would work to just soak the knobs in the acetone and water / dye solution overnight or for a few days, this way the acetone doesn't evaporate and the dye has time to penetrate.
 
Picking up a Free Silver C to strip parts from tomorrow.
It has the right side flip out table, and black end handles. Going to see if it has a better side burner and hopefully it has the spider guard for the side burner I need.
Guy said he was going to leave it by his garage and that he was not going to be there for I was not coming until later in the evening.
I just hope someone does not pick it up before I get there.

Screenshot_2021-06-26_224131.jpg

Edit:
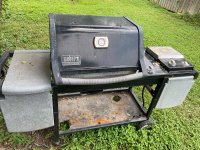
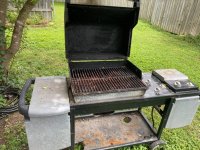
I got it. It was in pretty rough shape. I will have to evaluate parts once I have cleaned them. The owner said he
never used the side burner. I did not ask if he had the grill since new though. I think I may keep the thermoset tables, side burner, control panel, end handles, knobs, rocker switches, manifold and lid. Maybe even keep the firebox. Going to scrap the rest.

Any thing else you guys think I should keep?

Free Silver C pic_1.jpg
Free Silver C pic_2.jpg
 
Last edited:
Any way to get rid of the Hugh around the rocker switches without scratching the Control Panels?
I did not realize how badly the panels were faded.
i have good look using turtle wax hybrid solutions and a buffer it will look brand new you will need to remove the cover and rocker switch


Back
Top