Jason Griffis
New member
Let me begin by thanking the author (PaulD) of the forum from Drab to Fab! And the many restorations compiled there as well as this website in general. What an excellent resource for a complete restoration, grillparts.com for their excellent website and easy to use online parts catalog by model. The story began with an inherited barbecue, my Grandpa's 1993(?) weber to be exact. 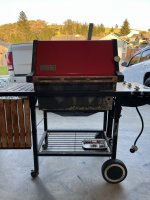
I got the barbecue upon his passing 2013 and have held onto it ever since, he preferred this one to the others he had as it always "cooked the best". I had previously replaced burners and grates to get it usable once before (life originally on the Oregon coast from new to 2013 - well taken care of however had some unavoidable Coastal rust issues). I ran natural gas for a while and this barbecue sat idle from 2015 to 2018 or so. My new place I moved to no longer had natural gas so I went back to the classic LP. Over the winter 2021 I started to notice poor performance and decided it was time to rebuild again, this time however I decided to go all out in a way that only the people (like me) perusing this website will appreciate. I started with lots of research, mainly this forum and different websites for replacement parts to see where prices were the best. I decided to go with grillparts.com and am happy I did. Great customer service and simple return procedure as I naturally made a few minor ordering mistakes along the way not knowing the exact model number until part way through the process.
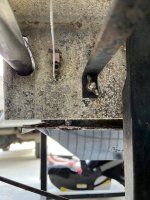
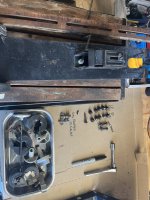
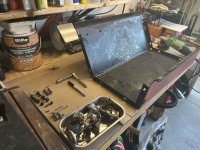
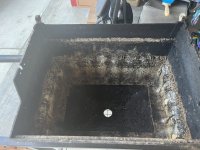
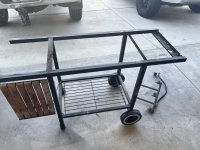
Disassembly was pretty straight forward and made me appreciate well AMERICAN made products of yester year. Once disassembled I took the fire box and sides to the sandblaster for a cleaning.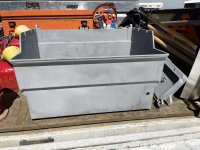
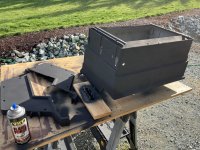
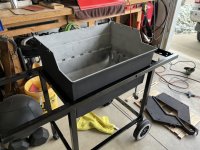
Then came paint with high heat flat black header paint from any NAPA/Auto parts store (was advised NOT TO PAINT INSIDE in my reading - which makes sense, don't want paint flakes near your food no matter the heat rating) a little surprised to learn that the black inside I was seeing was simply 30 years of grease on an enamel coated metal! While parts were getting sandblasted I went after the hood and the grease trap. The tool that worked the best I found was a razor blade scraper as shown, some degreaser, 0000 steel wool and elbow grease.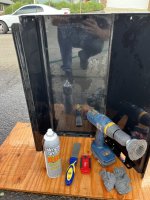
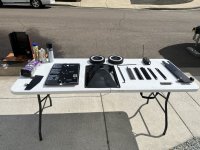
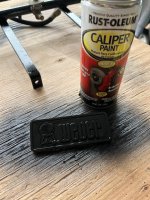
Emblem was to be repainted and sanded back down to get a like new finish so I proceeded with gloss black high heat caliper paint as shown. I also used this to paint frame/gas manifold etc that needed paint after some grinder work removing rust/paint flakes.
Fortunately all the parts held up well and I was able to disassemble fairly painlessly. I would recommend as stated somewhere along the way do not try to remove the burner tube screws/washers. I simply cut the old burner tubes and pulled them out then slid the new right back in place under the washers. Wood parts were easy to sand down and refinish. Then the most satisfying part of the process once parts showed up was the rebuilding to like new condition.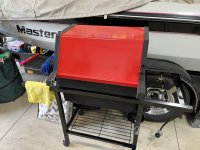
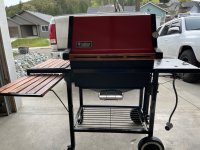
Also something I found interesting and had no idea was that the thermometer for this particular model doubles as a meat probe and can be removed and inserted into your meat!
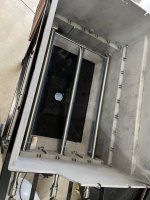
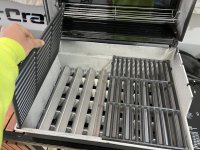
RC Plane Buyer on Ebay for the broken stainless flavorizer grates was a great call from the Drab to Fab forum
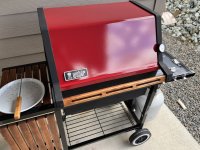
Cleaned up the knobs as you can see and actually taped, sanded tape off, painted black the indicator (someone did red somewhere, I liked the idea).
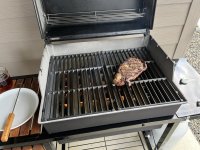
One funny note for the observant folks out there - I went ahead and had the new grates installed upside down! for the first cook until I promptly realized my mistake and flipped over. If you're a casual observer or thinking about a renovation hopefully this can inspire you and give you some pointers for your project! Happy Grilling

I got the barbecue upon his passing 2013 and have held onto it ever since, he preferred this one to the others he had as it always "cooked the best". I had previously replaced burners and grates to get it usable once before (life originally on the Oregon coast from new to 2013 - well taken care of however had some unavoidable Coastal rust issues). I ran natural gas for a while and this barbecue sat idle from 2015 to 2018 or so. My new place I moved to no longer had natural gas so I went back to the classic LP. Over the winter 2021 I started to notice poor performance and decided it was time to rebuild again, this time however I decided to go all out in a way that only the people (like me) perusing this website will appreciate. I started with lots of research, mainly this forum and different websites for replacement parts to see where prices were the best. I decided to go with grillparts.com and am happy I did. Great customer service and simple return procedure as I naturally made a few minor ordering mistakes along the way not knowing the exact model number until part way through the process.


Disassembly was pretty straight forward and made me appreciate well AMERICAN made products of yester year. Once disassembled I took the fire box and sides to the sandblaster for a cleaning.


Then came paint with high heat flat black header paint from any NAPA/Auto parts store (was advised NOT TO PAINT INSIDE in my reading - which makes sense, don't want paint flakes near your food no matter the heat rating) a little surprised to learn that the black inside I was seeing was simply 30 years of grease on an enamel coated metal! While parts were getting sandblasted I went after the hood and the grease trap. The tool that worked the best I found was a razor blade scraper as shown, some degreaser, 0000 steel wool and elbow grease.


Emblem was to be repainted and sanded back down to get a like new finish so I proceeded with gloss black high heat caliper paint as shown. I also used this to paint frame/gas manifold etc that needed paint after some grinder work removing rust/paint flakes.

Fortunately all the parts held up well and I was able to disassemble fairly painlessly. I would recommend as stated somewhere along the way do not try to remove the burner tube screws/washers. I simply cut the old burner tubes and pulled them out then slid the new right back in place under the washers. Wood parts were easy to sand down and refinish. Then the most satisfying part of the process once parts showed up was the rebuilding to like new condition.


Also something I found interesting and had no idea was that the thermometer for this particular model doubles as a meat probe and can be removed and inserted into your meat!


RC Plane Buyer on Ebay for the broken stainless flavorizer grates was a great call from the Drab to Fab forum

Cleaned up the knobs as you can see and actually taped, sanded tape off, painted black the indicator (someone did red somewhere, I liked the idea).

One funny note for the observant folks out there - I went ahead and had the new grates installed upside down! for the first cook until I promptly realized my mistake and flipped over. If you're a casual observer or thinking about a renovation hopefully this can inspire you and give you some pointers for your project! Happy Grilling

