S J. Gold Mini WSM Smoker


Status
Not open for further replies.
One last tweek before using. Expanded metal on top of the charcoal grate to keep small pieces from falling through too soon.
IMG_00016.jpg
 
I added Gold vents to a Silver with covers made from the excess material when I cut the pot bottom out.

I also found that cutting out the bottom was needed to pile in as much coals as possible. I use a basket made out of expanded metal to keep the coals from choking the air space inside.

My purpose was to reach and maintain temps above 300 for chicken and high 200s for ribs.

If I had to do it all over again, I would add 2-3 18in WSM vents on a Silver to manage air/temp control for either low and slow or high heat cooking.
 
Well, I've been running it for 4 hours so far. The first 2 with nothing in it. In the last 2 I put in 9 drumsticks and a 3 lb chunk of bologna that I quartered. So far so good! It is dialed in at about 237 and holding steady. I did have to open the bottom vent a little less than 1/2 way in addition to my 3/4" hole so the can mod will be needed. Still have lots of charcoal left but it stopped smoking so I had to add a chunk of hickory. I started with 3 small pieces.
 
Well, here we go. Haven't used my mini in a few months, so I decided to use it for my Boston Butt today. I tried to pack the Stubbs briquettes in the bowl as neatly as I could to get it as full as possible. I lit 9 coals, and placed them over the unlit (along with 2 chunks of pecan and 1 chunk of maple) around 02:45 in the morning, and by 03:15 I was up to 225*. Man I love this little smoker"!
 
4 for 3 deal deal on Amazon right now. The thermometer and the Vasconia tamale pot are both on the list. Went with the Amazon Prime trial and the tamale pot was waiting on the porch this afternoon. WooHoo!
 
Update:

I have spent nearly a year with this mod and thought an update was in order.

1. I find I prefer using this smoker to smoke food because its easier to start and I don't have to mind it.

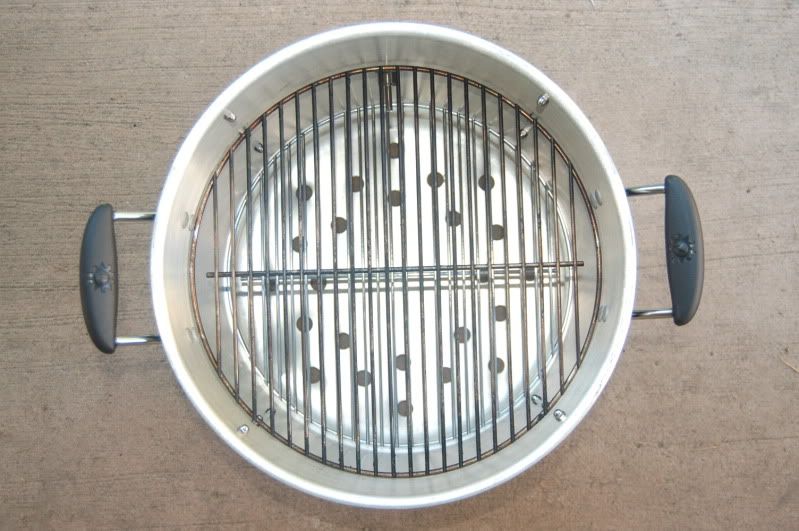
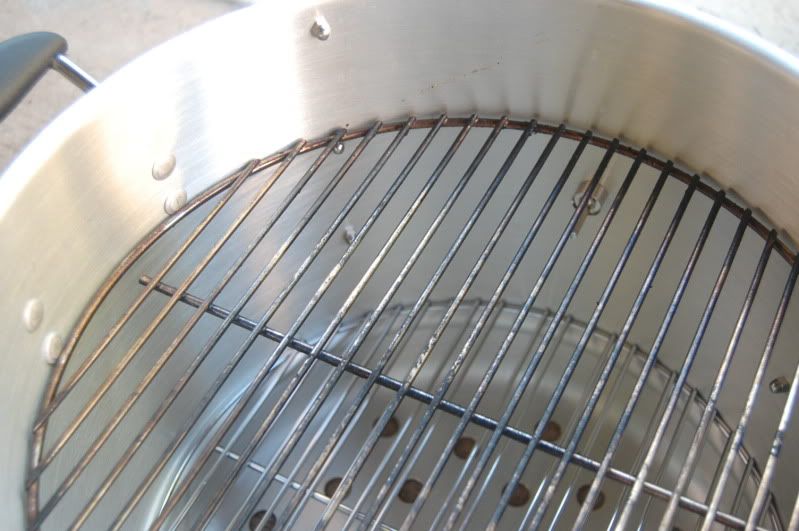
2. I think two racks are all you need. With the third rack sitting on the very top, it acts as a very nice warming spot, but cooking up there is slowwww....

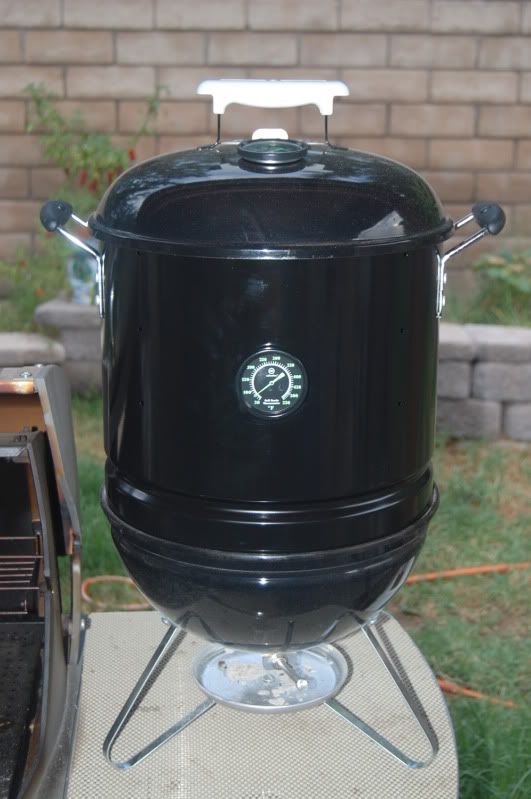
3. Durability: This thing sits out in the rain and just takes it. No rust, no wear nothing. It seems as if it really is made by weber.

4. Thermometer location: Put it in the center of the pot. At the top the air doesn't get that warm and is not a true reflection of what's going on inside your smoker.

5. To cut the bottom out or not? I am at the stage of thinking that if you want to do an 8 hour cook or longer you will need to cut the bottom out. If you only need to do on average 6 hour cooks (ribs, small butts) then some smoke holes on the bottom should be plenty.

6. Heat diffuser: I am using the clay pot, and to be honest I think it is robbing a lot of heat from my food. I think if you cut the bottom open a metal pie plate (10" - 12") is ideal. If you leave the bottom in tact, then all you will need is a drip pan and a disposable pie tin should be good enough for that.

7. To paint or not to paint: I painted mine with rustoleum high temperature paint. Took an extra 10 minutes, and it looks stock.

8. Don't overload it with food. I have said repeatedly that I can cook 3 racks of ribs, two buts, two chickens and 36 wings, and I can. But use that as the upper limit of what you cook on it.

9. SJS or SJG: If you are buying this get the SJG. You get set it and forget it simplicity. Clean up is simple. And I find I can adjust the fire better for long cooks with the sjg.

10. Outside storage: Either put a cover over you completely assembled mini smoker, OR disassemble the smoker and put the Weber lid on the base. The reason for this is that moisture will find its way into the charcoal area, and render your left over charcoal less useful.

11. Briquettes or Lump? I use Briquettes for consistency. The wood adds the flavor, so all I need is for the briquettes to add the heat.

12. Wood chips or wood chunks? I use wood chunks because its easier. I don't smoke with harsh woods like mesquite, and only use hickory when I am smoking beef. Otherwise I use mild sweet woods like Oak, Apple, and Cherry.

Really need to think Mr. Dean for this mod. It has made my cooking much easier.

Jay
 
Say Hello to the newest member of the family:

Well, I spent my day off being as productive as feasable. I decided to be as flexible as possible by making grill supports every 3" since hardware is cheap (hardware's still at my shop, black stainless) and you never know how what you're gonna be smokin'...

DSC_0098.jpg


Pics of the interior and variable grill height mounting supports:

DSC_0100.jpg


DSC_0101.jpg
 
I decided to be as flexible as possible by making grill supports every 3" since hardware is cheap (hardware's still at my shop, black stainless) and you never know how what you're gonna be smokin'...

Can you post some pics of the interior? Did you cut the bottom out?
 
SteveF what did you use for paint and the handles?


Jay, nice summary and agree with all your comments. Although I have other cookers.. unless I need the larger capacity, I use the mini most of the time.

re. 9 ... I added vents on the side of a Silver. would recommend buying 18 WSM vents for anyone using a Silver for the reasons stated by Jay.
 
So I've used my smoker several times now and have decided to use a can for extra ventilation due to ash build up. I'm also wondering if I need to allow the cooker to heat up a little before adding the meat. Any opinions on this? I'm just wondering if allowing the cooker to heat up and then adding the meat will allow the cooker to establish an updraft more easily.
 
Mike, I assume you have the SJS for your mini smoker. Have you thought about the mod posted by Kevin C on the bottom of page 39?
As far as waiting to load the smoker, I have never waited to place the meat on my smoker. I have always placed my meat on the grate as soon as I place the lit coals over the unlit. It has always worked well for me, on both my WSM and on my mini.
 
Hi Tim. I saw that mod and was about to do it but was hesitant to cut into the bottom. Thought I would try the can first. I think my biggest drill bit is 1/2 inch so maybe two holes instead of one.
 
Originally posted by J Reyes:
SteveF what did you use for paint and the handles?

The paint is Ace hardware heat resistant gloss black and the handles came with the tamale pot.

I don't know if it'll make a difference, but after the paint dried for a day, I burned a load of charcoal with the talmale pot upside down to (hopefully) more evenly and thoroughly cure the paint prior to use.
 
Steve, I have said all along that I love the thermometer you used, but I just noticed the 2nd thermometer mounted in the lid! Just curious if there is a temp between the center (side mounted) thermometer and the lid mounted thermometer? Again, just curious.
Thanks,
Tim
mini-
wsmsmile8gm.gif
 
Status
Not open for further replies.


Back
Top