Dominick A
TVWBB Fan
I did verify the BS170's last night. They are in the right place. I also gave the board another alcohol scrub. I'll be bridge hunting tonight, thanks.
Post some high res pic's (in focus, after the cleaning) so we can help you trouble shoot.
Ralph, please don't shout, ouch my ears........")
")
OK, if the regulator label was different from the BS170 then I guess that kinda verifies things (unless somehow you got an altogether wrong part).
So you are now looking for a solder bridge somewhere on a 5V lead. whatever it is shorting that out and making you measure 0 Ohms from 5V to ground.
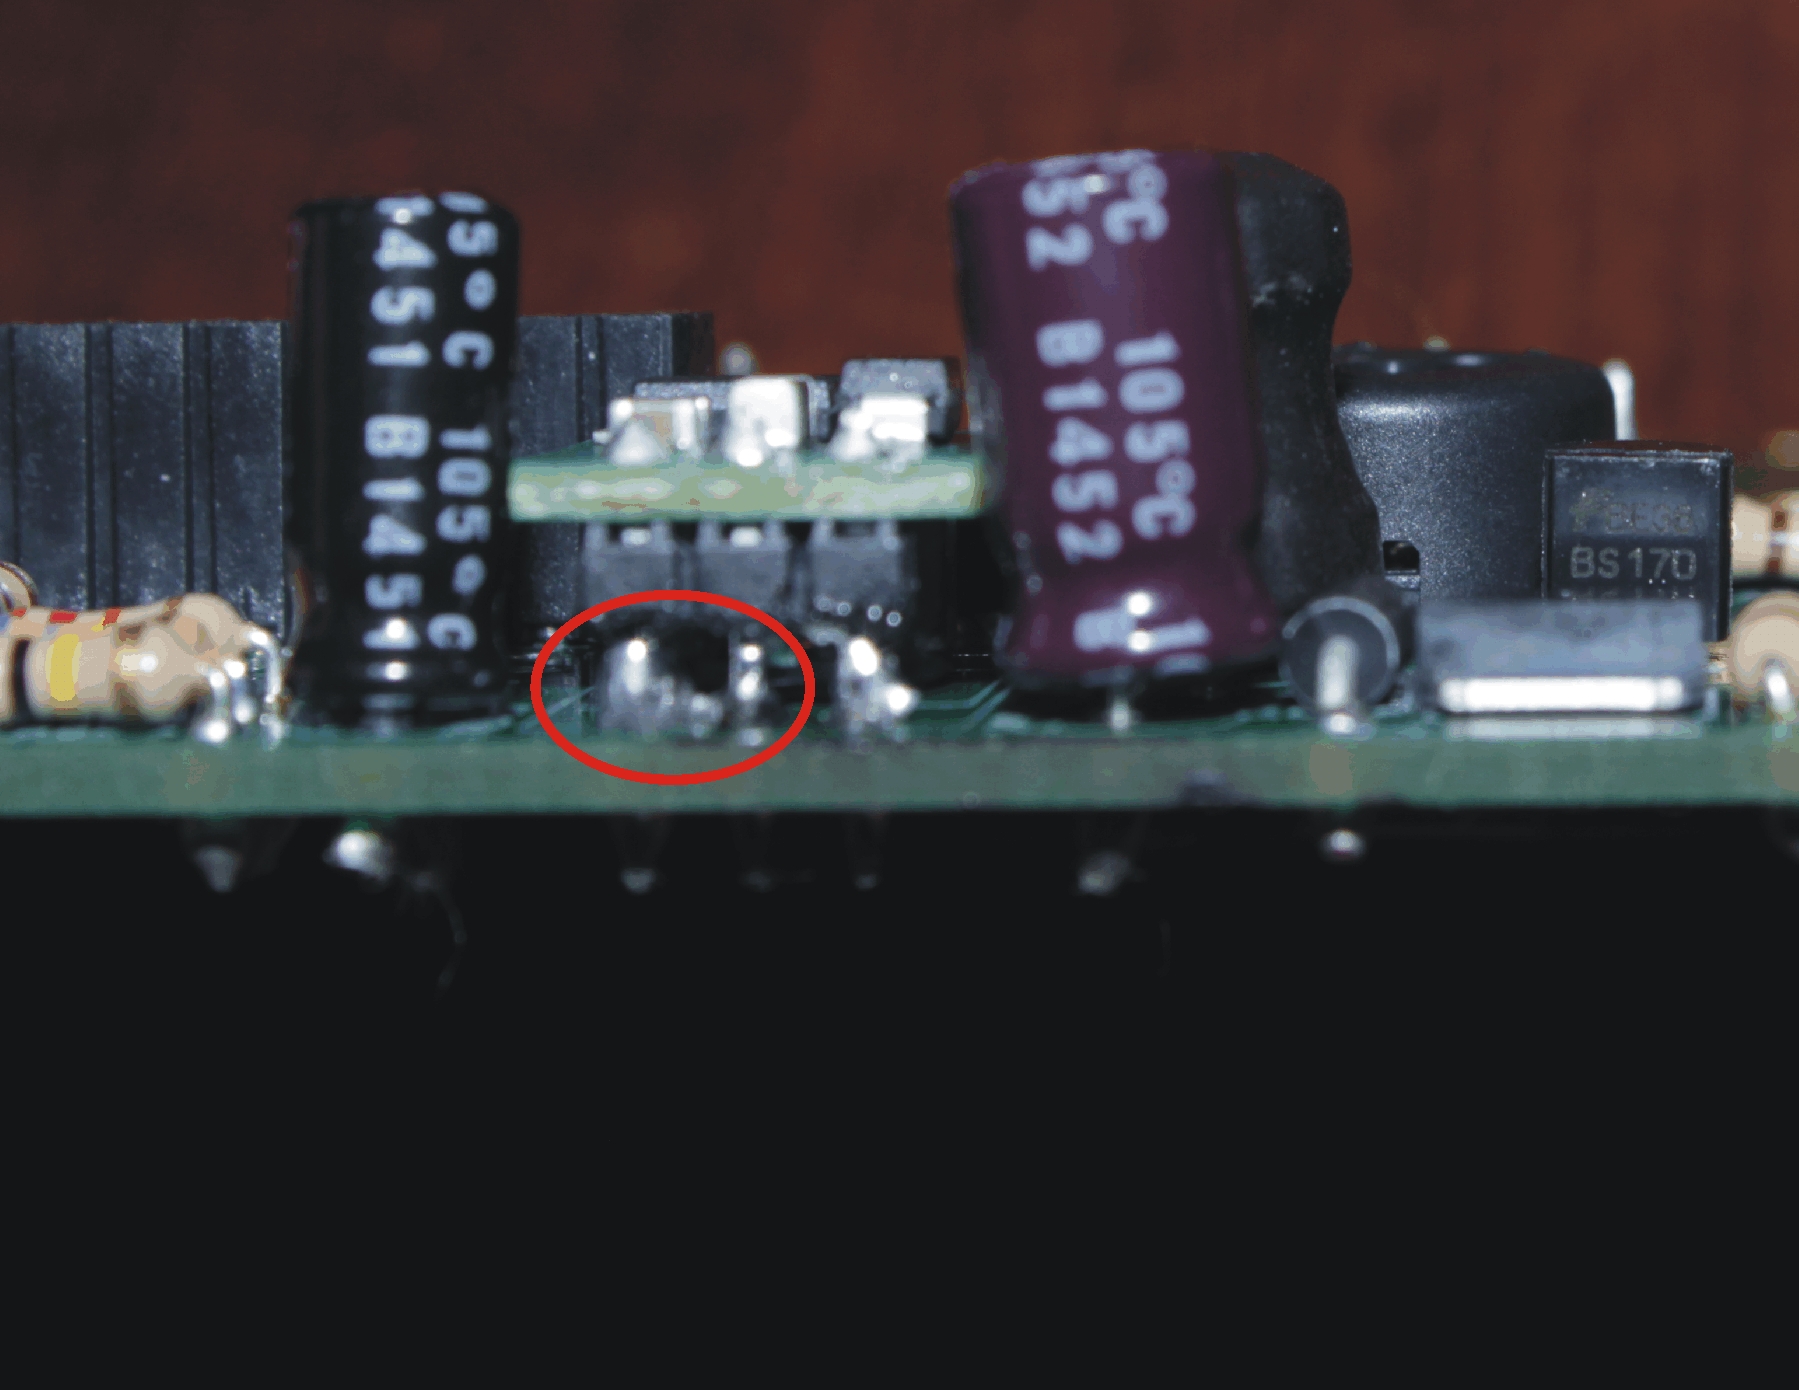
Is there anything other than alcohol and a toothbrush I can use to clean my board? I have scrubbed on 2 occasions, and while it did take care of the residue on the board itself, the joints I soldered are still discolored a bit. Maybe I'm not scrubbing long/hard enough? I will take a series of close up hi res pics tonight and post.
The color of the solder joints depends on the quality of soldering. A good joint should be shiny, when the joint is dull it means that the temp was too high or too low or that the heating time was either too long or too short. You can brush a dull joint all you want but it will never shine.
They do make flux removal products/sprays for cleaning boards but you should be able to get it done with alcohol and a brush. I would be interested to see what your board looks like now after some cleaning, because the pics you posted had a lot of charred areas and it was hard to see what is really going on there. Perhaps cleaned up it would be easier to spot the solder bridge.
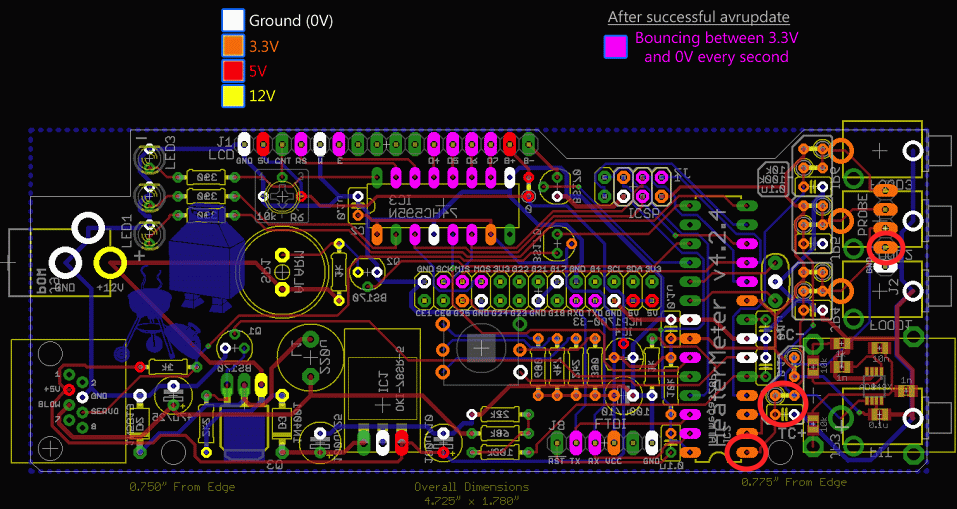
Here is a diagram that shows where various voltages are present on the board, pay particular attention to the RED +5V spots:
My guess....
The LCD contrast pot (that blue box thing) has 5V on it, that part is soldered in on the other side of the board so the pins are completely surrounded by the ground plane there. The soldering looks sloppy so there's a good chance to short that 5V pin to ground right there. Clean up that solder joint by removing a bunch of that solder. Also, the LCD Backlight jumper has 5V on it, clean that up and verify it is isolated from the ground plane also. The diagram should give you a hint on where to look for the short. (ignore the 2 red circles, I guess they were left over from helping someone else)
As for cleaning things up... Do you have a solder sucker or a role of solder wick? You kinda need one or the other to do the cleanup work properly. The cheapest/easiest way to go would be solder wick...
I agree with Ralph, the OKI regulator would be the first thing to check.
Just a question, what kind of solder are you using? Almost none of the joints have properly flowed. I would remove most of the solder of all the joints and re-solder them with a good quality solder or use some additional flux.