My Genesis 1000 project


Good morning! I’ve been trying to find this with the search bar, and going through the “sticky” thread for restoration...

Could you all please tell me what black paint is best to use on the wheels?
I saw somewhere that white satin Rustoleum works for the inserts.
Thank you in advance!

Also, I’m going to ask Mr Tofte for his help in getting a replacement tank level sticker and the warning sticker for the tank scale.
I really appreciate all of the help and advice! I removed the side sticker with the serial number etc on the side of the control panel and reaffixed it to the underside of the panel as it was getting pretty faded.
Just a reminder when you install the sticker to have an empty tank hanging on it! I almost failed to do that.
 
Hood hardware is soaking in a bag of Easy Off until tomorrow.
Refurbished the original wheels, and frankly I think they look better than the NOS one I have. I’ll just keep that one for an emergency…

The steel axle came out well with the vise, sandpaper, and 0000 steel wool to finish. Then used some Flitz polish I had in the toolbox to finish it off. I did not clear it. I figure I can take it off again in another 25 years if I still have it.

The wheels came together perfectly and did not have to Krazy Glue the white walls to the wheels.
Some vigorous persuasion with a rubber mallet got the new end cap back on the axle.

Oh, I refurbished the old rusty grill cleaning tool that was included in my purchase of the grill😆.

Hoping tomorrow night to get to reassemble the hood, handle, and the table slats.
 

Attachments

  • IMG_6210.jpeg
    IMG_6210.jpeg
    179.1 KB · Views: 11
  • IMG_6215.jpeg
    IMG_6215.jpeg
    467 KB · Views: 10
  • IMG_6216.jpeg
    IMG_6216.jpeg
    273.1 KB · Views: 10
  • IMG_6209.jpeg
    IMG_6209.jpeg
    172.9 KB · Views: 8
  • IMG_6208.jpeg
    IMG_6208.jpeg
    99.4 KB · Views: 10
  • IMG_6213.jpeg
    IMG_6213.jpeg
    110.9 KB · Views: 9
  • IMG_6214.jpeg
    IMG_6214.jpeg
    73 KB · Views: 11
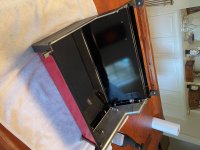
So, ended up getting started early this morning, and hoping to get back to work on it tonight.
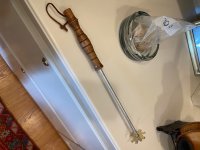
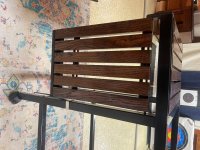
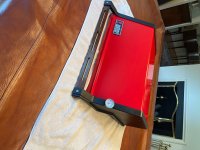
I refreshed the hood hardware on the bench grinder wire wheel this morning, and picked up my new handles and slats from a local woodworker near my son’s school after dropping him off.
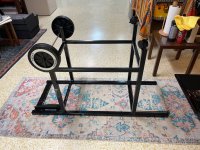
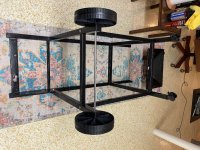
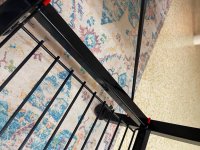
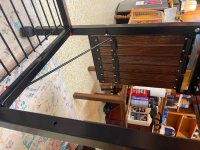
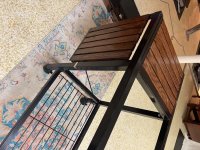
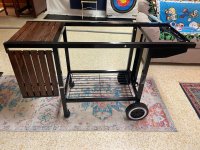
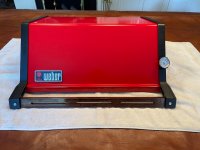
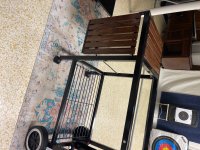
The hood/ lid is now back together and the slats and shelf are back on the frame.
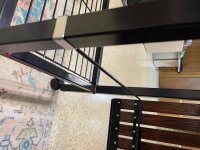
Sorry for the sideways pictures…

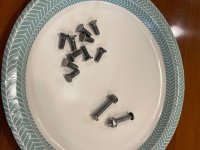
The hardware for the shelf is in the exact locations of the originals, and used 2 5/16” drill bits as spacers.
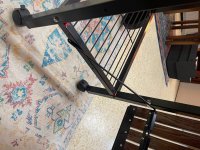
That said, I don’t think the original was put together exactly correctly. In order to enable the shelf to rest horizontal without an upward tilt, I reversed the left front leg mount. In order for the shelf to rest properly vertical when not in use, I let the arm’s friction against the frame keep it still and steady. You can see in one picture, if you look closely, I put a rectangular black vinyl decal on the lower frame rail to protect the paint from friction. Then I decided to put the rubber pieces on the bottom frame shelf ends for the same reason. There’s also one on the swinging shelf arm end.

Hope that was clear. I could take off the hardware and redrill holes and may do that in the future. Honestly, I’m hesitant to do that just now, and I like how this turned out.

Going to watch the video on servicing the manifold tonight, and figure out my next steps.
 

Attachments

  • IMG_6235.jpeg
    IMG_6235.jpeg
    168.3 KB · Views: 8
  • IMG_6241.jpeg
    IMG_6241.jpeg
    191.2 KB · Views: 8
  • IMG_6240.jpeg
    IMG_6240.jpeg
    238.6 KB · Views: 6
  • IMG_6239.jpeg
    IMG_6239.jpeg
    199.7 KB · Views: 6
  • IMG_6237.jpeg
    IMG_6237.jpeg
    258.6 KB · Views: 7
  • IMG_6238.jpeg
    IMG_6238.jpeg
    461.5 KB · Views: 8
  • IMG_6226.jpeg
    IMG_6226.jpeg
    187.1 KB · Views: 9
  • IMG_6231.jpeg
    IMG_6231.jpeg
    181 KB · Views: 8
  • IMG_6233.jpeg
    IMG_6233.jpeg
    179.4 KB · Views: 7
  • IMG_6234.jpeg
    IMG_6234.jpeg
    281.3 KB · Views: 7
  • IMG_6221.jpeg
    IMG_6221.jpeg
    127.8 KB · Views: 8
Looking great!
Here's the measurements if you need them to double check for your flip table hardware. Also that metal clip that you have on the front leg goes on the back leg for the hook to go into from the table. Here's a picture of that also. When installed correctly your table should hang straight down.
Screenshot_20250818_114536_Photos.jpgScreenshot_20250818_114827_Photos.jpg
I realize this picture is of the opposite side of the grill but it's the same concept.
 
Looking great!
Here's the measurements if you need them to double check for your flip table hardware. Also that metal clip that you have on the front leg goes on the back leg for the hook to go into from the table. Here's a picture of that also. When installed correctly your table should hang straight down.
View attachment 118472View attachment 118471
I realize this picture is of the opposite side of the grill but it's the same concept.
Wellllll that makes a lot more sense!! Thanks! 😆Not where it was when I bought it .
Managed to scratch the paint a little taking that bracket off again. Now I’m glad I didn’t repaint the frame because I would have been furious!
 

Attachments

  • image.jpg
    image.jpg
    150.8 KB · Views: 1
Wellllll that makes a lot more sense!! Thanks! 😆Not where it was when I bought it .
Managed to scratch the paint a little taking that bracket off again. Now I’m glad I didn’t repaint the frame because I would have been furious!
You're supposed to move that bracket back and forth every time you want to raise and lower the table, which seems like kind of a pain to me. The sliding mechanism is so much easier to use in my opinion.


Back
Top