My Genesis 1000 project


Steve Garretson

TVWBB Member
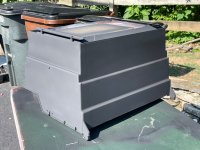
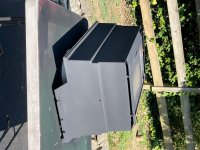
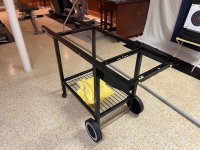
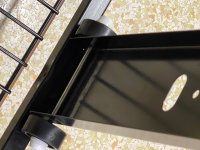
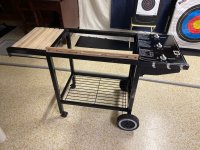
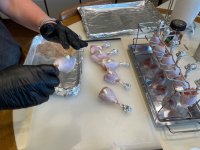
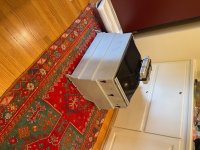
Found this grill on Marketplace for $50 while looking for a Performer. So, this is a father and son project.
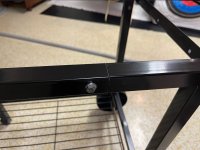
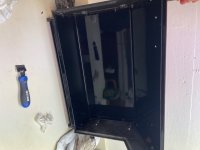
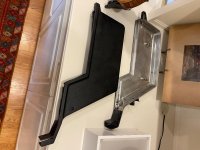
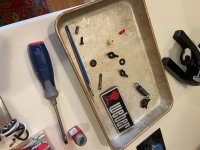
Pictures and some progress so far.
New slats and handle to be determined…
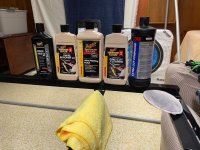
Thanks for the great information in this forum.
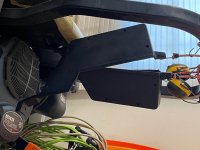
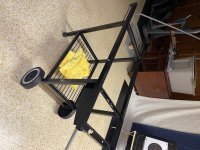
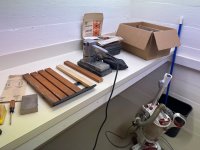
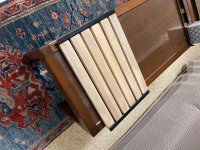
IMG_5997.jpegIMG_5999.jpeg
 

Attachments

  • IMG_6039.jpeg
    IMG_6039.jpeg
    236.6 KB · Views: 21
  • IMG_6038.jpeg
    IMG_6038.jpeg
    217.3 KB · Views: 21
  • IMG_6065.jpeg
    IMG_6065.jpeg
    410.2 KB · Views: 27
  • IMG_6092.jpeg
    IMG_6092.jpeg
    251.8 KB · Views: 26
  • IMG_6132.jpeg
    IMG_6132.jpeg
    213.6 KB · Views: 26
  • IMG_6134.jpeg
    IMG_6134.jpeg
    105.8 KB · Views: 23
  • IMG_6164.jpeg
    IMG_6164.jpeg
    138.7 KB · Views: 23
  • IMG_6165.jpeg
    IMG_6165.jpeg
    162.2 KB · Views: 23
Painted the cookbox and end caps, so they’re drying currently. The cookbox was painted with the Rustoleum high heat bbq flat black. I did not see a “matte” black, so this will have to do. Should have new white oak slats and a handle next week. Now I have to decide on a stain finish and polyurethane to use. Any thoughts?
Thanks as always.
 

Attachments

  • IMG_6171.jpeg
    IMG_6171.jpeg
    273.7 KB · Views: 7
  • IMG_6172.jpeg
    IMG_6172.jpeg
    134 KB · Views: 7
  • IMG_6170.jpeg
    IMG_6170.jpeg
    178.6 KB · Views: 7
Painted the cookbox and end caps, so they’re drying currently. The cookbox was painted with the Rustoleum high heat bbq flat black. I did not see a “matte” black, so this will have to do. Should have new white oak slats and a handle next week. Now I have to decide on a stain finish and polyurethane to use. Any thoughts?
Thanks as always.
Welcome to TVWBB Steve!

"Matte" and "flat" are pretty much interchangeable terms as far as I know. So, did you do the end caps in a semi-gloss black?
 
Welcome to TVWBB Steve!

"Matte" and "flat" are pretty much interchangeable terms as far as I know. So, did you do the end caps in a semi-gloss black?
Yes, though with the humidity here, they (the end caps) seem maybe a little blotchy. We’ll look at it again after it has more of a chance to dry. The paint may just need to cure a bit.
 
The cookbox turned out well. The next mission tonight will be to use these elixirs I’ve had (except the “sealant) for over a decade since I restored an old car. The frame is in really good shape except for a few spot of surface rust, not visible with the cookbox in.
So I don’t want to break the paint if I don’t have to.
I’ll sand down the surface rust spots with a wire dremel and touch those up.
I also like that it’s cool in the basement, so I’ll be doing it by hand rather than using the orbital buffer.
 

Attachments

  • IMG_6175.jpeg
    IMG_6175.jpeg
    341 KB · Views: 10
The cookbox turned out well. The next mission tonight will be to use these elixirs I’ve had (except the “sealant) for over a decade since I restored an old car. The frame is in really good shape except for a few spot of surface rust, not visible with the cookbox in.
So I don’t want to break the paint if I don’t have to.
I’ll sand down the surface rust spots with a wire dremel and touch those up.
I also like that it’s cool in the basement, so I’ll be doing it by hand rather than using the orbital buffer.
It will interesting to see how that turns out. I got away with just waxing the frame of a slightly newer Genesis frame than yours. It was in like new condition to begin with, zero rust or defects in the paint. I just used turtle wax and I was surprised by how much oxidation I ended up with on the microfiber towel I used to buff the wax off. It did look fantastic when I was done though.
 
Starting to come together, but I think I’m going to run out this weekend to get a more aggressive rubbing compound, and then work back through the progression. I think it will turn out very well, really.
 

Attachments

  • IMG_6181.jpeg
    IMG_6181.jpeg
    435.6 KB · Views: 16
  • IMG_6180.jpeg
    IMG_6180.jpeg
    244.3 KB · Views: 16
  • IMG_6179.jpeg
    IMG_6179.jpeg
    205.7 KB · Views: 16
Final note. Looked at the axle for the LP gas hanger contraption bracket. Did not want to pull the wheels to clean up the axle, so I used some painter’s tape, a couple of 3x5 cards, and went after the axle with the nylon brush attachment for the drill.
 

Attachments

  • IMG_6182.jpeg
    IMG_6182.jpeg
    185.2 KB · Views: 12
  • IMG_6187.jpeg
    IMG_6187.jpeg
    143.8 KB · Views: 12


Back
Top