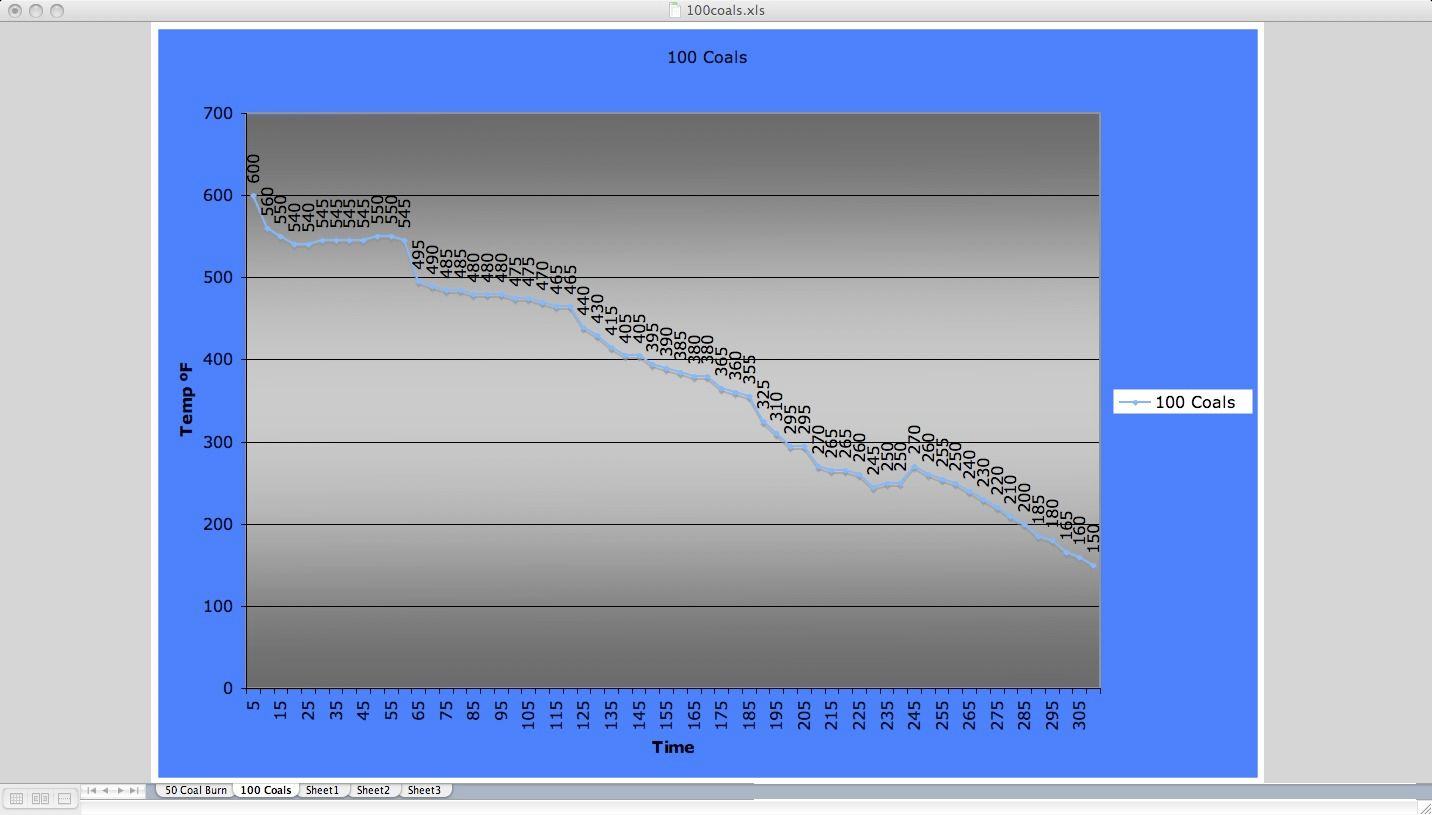
The 100.
well I was able to burn a full chimney today.
there is no photo because that is what it is a full chimney is 100 coals.
I am happy to report it did not take 8 hours but only an extra hour from the 50 coals burn for a total of 5 hours 20mins from light to 150f.
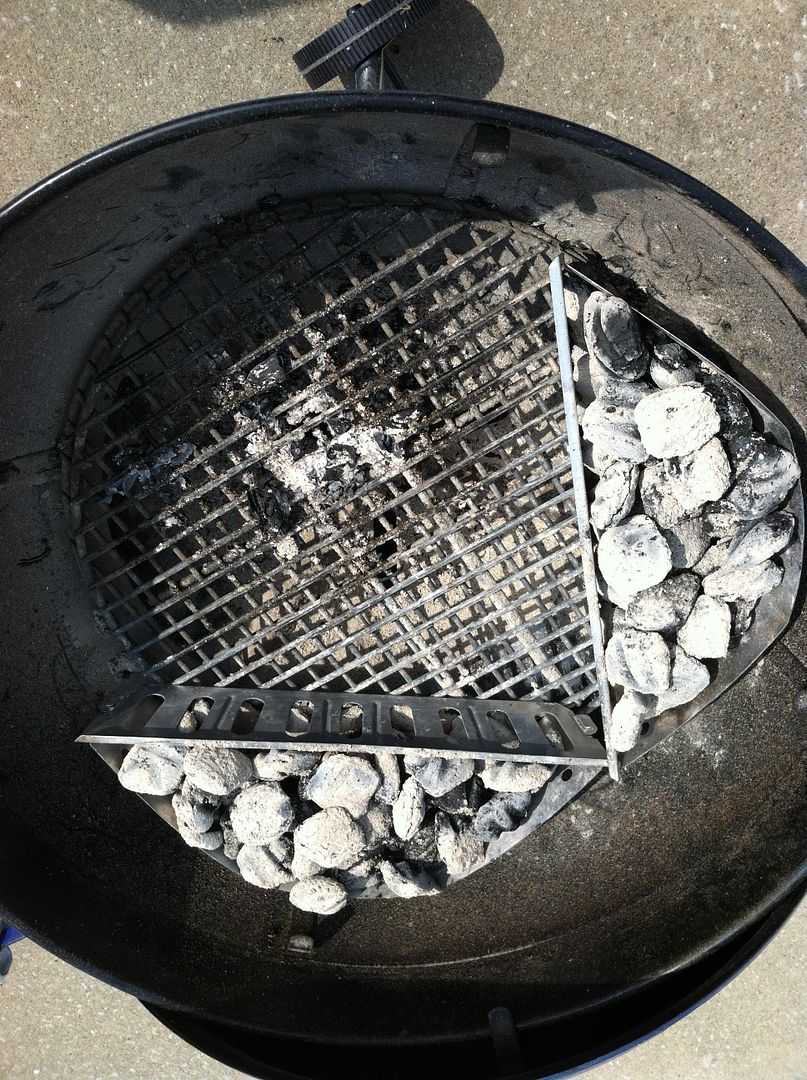
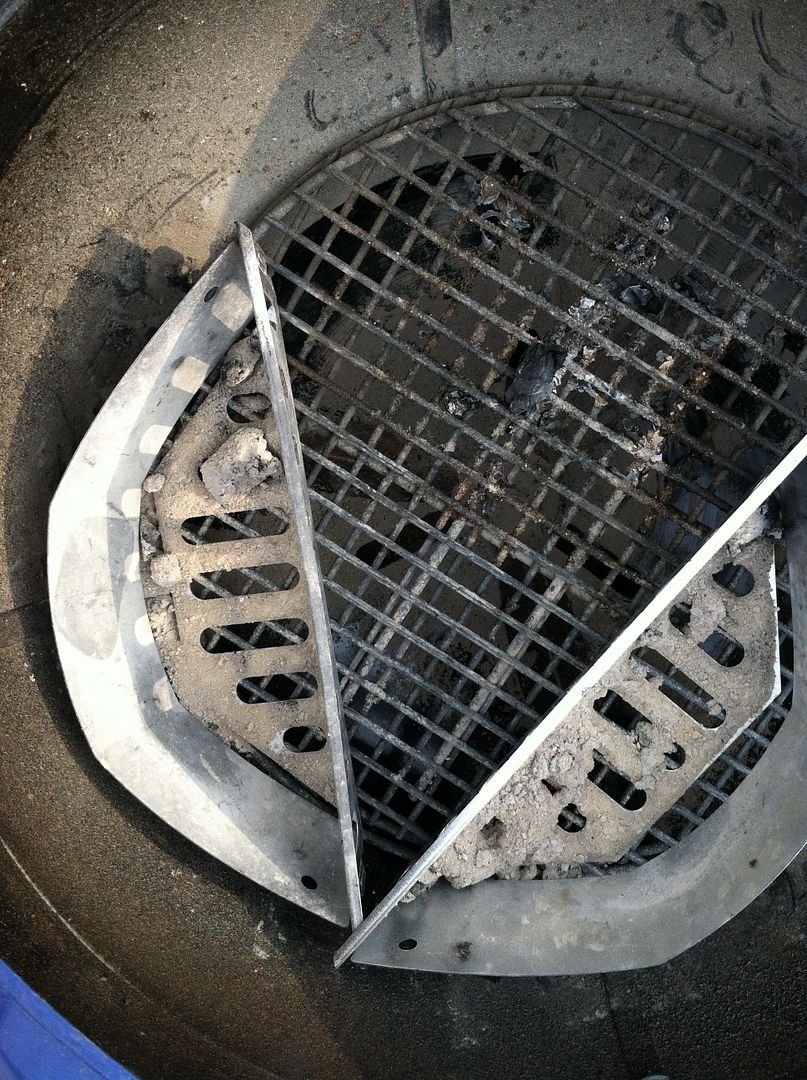
here is how i arranged the fire.
I chose to arrange the fire in this way to keep consistent with air flow around the basket with the 25 and 50 burns.
I thought about placing the flat face of the baskets together like we may do when cooking but i felt that would change the dynamics to much from the other burns.
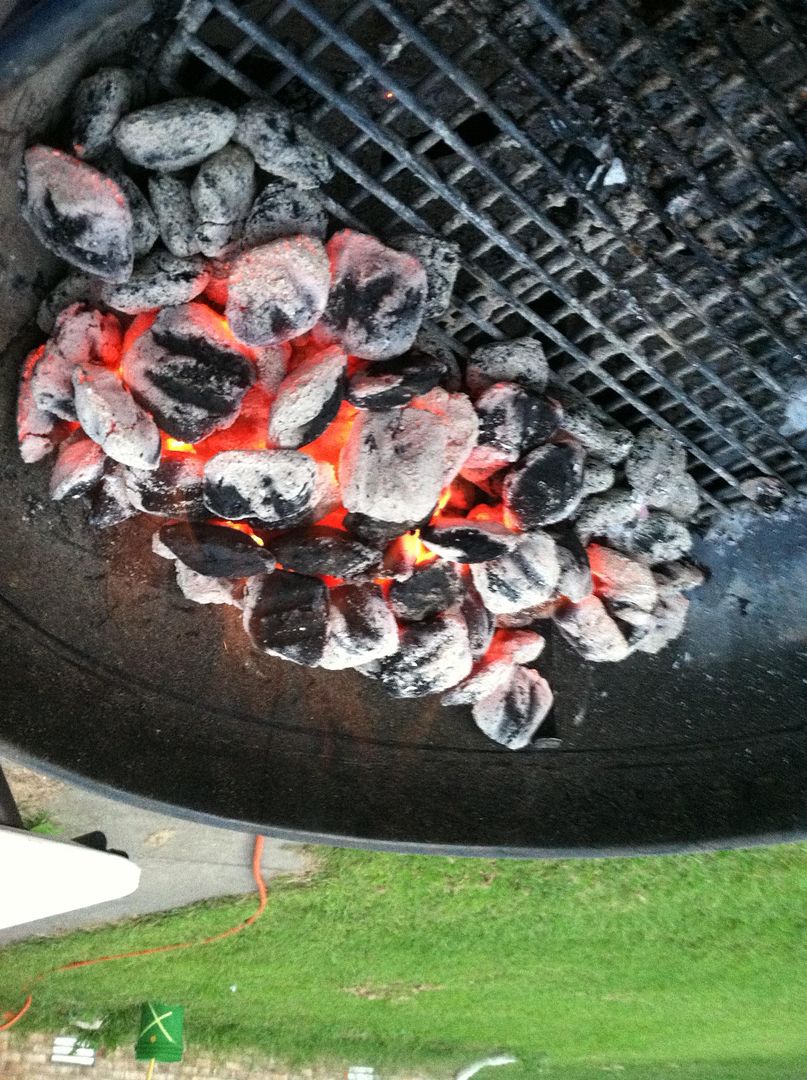
the time in the chimney was 21mins until i had flames spouting out the top and the very top coals had some corners turning to ash.
i will say that there was a coal or 3 on the very top that only had red glow on the underside. I made the choice that this was ok because i had the first lit coals on the bottom falling out of the chimney. as you can see in the above photo that is the dump and you can see how some of the coals are complete ash and smaller than others, i accepted that reality as there isnt much i could do in this test. I wanted to stay consistent.
In a cooking situation i found it is much easier to light a half a chimney then pour it over the unlit coals in the kettle or basket.
there is something interesting to report with this burn, i had a air temp drop and a drizzle for 90 mins. I was worried this would completely ruin my experiment however the kettle was not really affected by this. it shows the resiliency of the kettle and the fire inside.
Now i am very sure there was a cooling effect but it is not as big as i thought it would be and i see no real reason to have to sit again for 5 hours.
thats really about it. lets look at the data charts and discuss.
i am happy to see that the characteristics of the curves are true from each burn.
the line generally only declines.
when the fire is strong and the ashes are knocked off there is a slide in the temp rather than a spike.
there are valleys.
at the end of the fire, knocking the ashes off creates a spike in temp.
you can see the rain effect at minutes 190 to 240. There is a clear effect on the grill as the decline gets a bit wonky versus the rest of the chart. Still though the kettle powered through the lower air temp and the falling water.
the water began right after a ash knock at 180 mins so there was a slide from that, then the air cooled and the water began. interesting to learn from that experience.
so other than not taking 8 hours to burn everything, this test went much like the others.
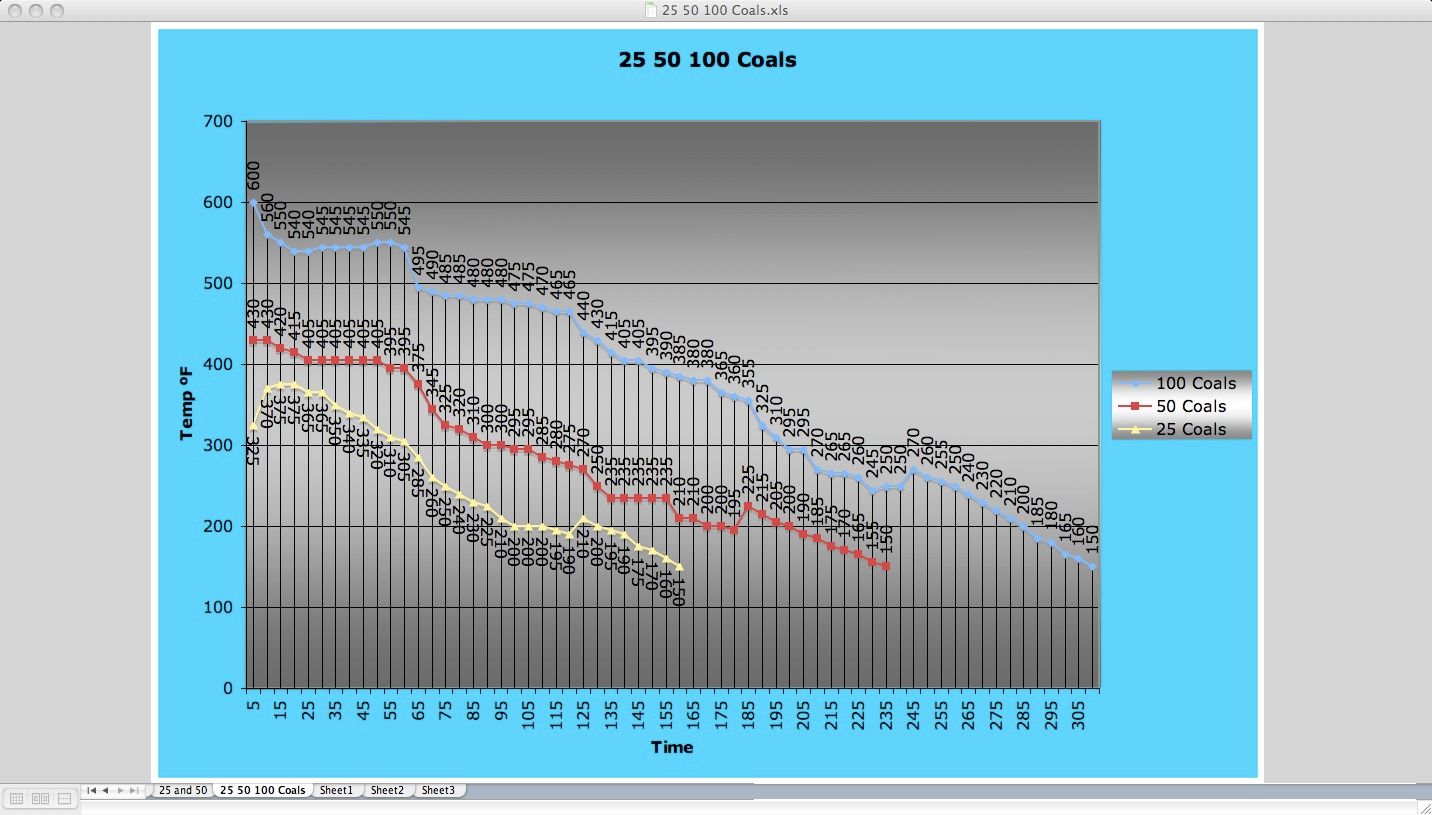
lets compare!
ahh lots of things to discuss here. lets work our way from left to right.
the very first thing i learned is how the kettle size affects the fire.
we can see clearly that 25 coals takes a moment to catch up and heat the interior of the kettle.
while 50 coals is juuuuusssst about right as it begins to burn and slip into a nice long valley of stable temps.
while 100 coals is a beast, right off the bat it pinned my needle so i can only estimate it was 600+ but as you can see this fire is larger than the kettle itself and the restrictions on air flow brought the fire down right away.
we can see in the bigger fires there are more and longer valleys. 100 compared to 50 shows more stable temps. as with 25 it is a steady decline.
i suspect that the water and cooler air messed up a valley in the 295f range. we can see after the temp dip from the ash bump, the kettle settles in for 10 mins but then it gets wonky.
we can look at 50 coals and see this behavior toward the end of the fires life to so that is why i conclude the light rain and cooler air had only a small effect. I further back this up as you can see the kettle recovers at 250f and that is when the rain let up.
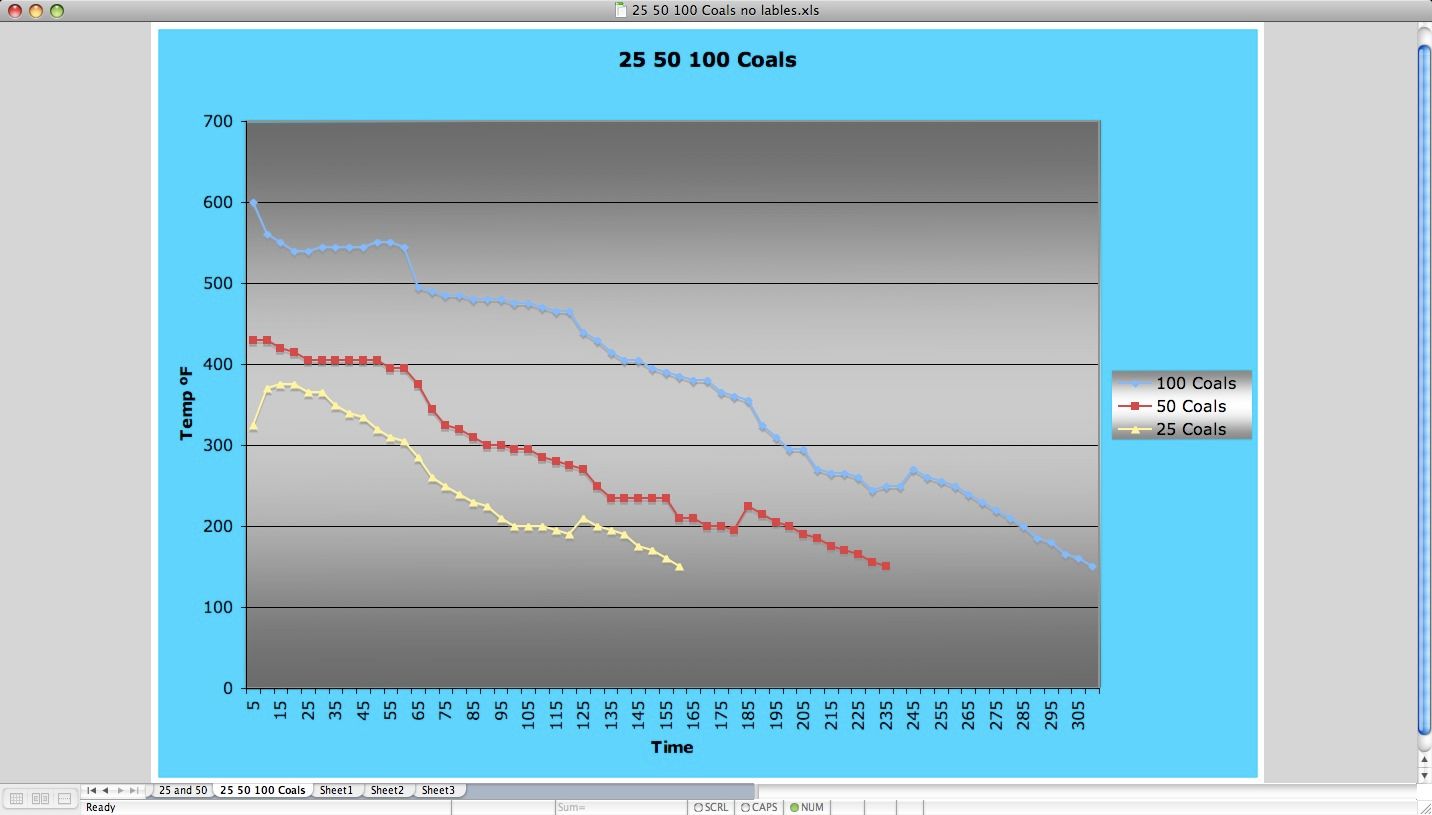
I have prepared some other charts for you to look at.
here is all three lines just with out all the clutter.
it was a really fascinating experiment and the amount of knowledge i learned from this is exponential.
i let you take it as your own. I hope I helped you if you had questions.
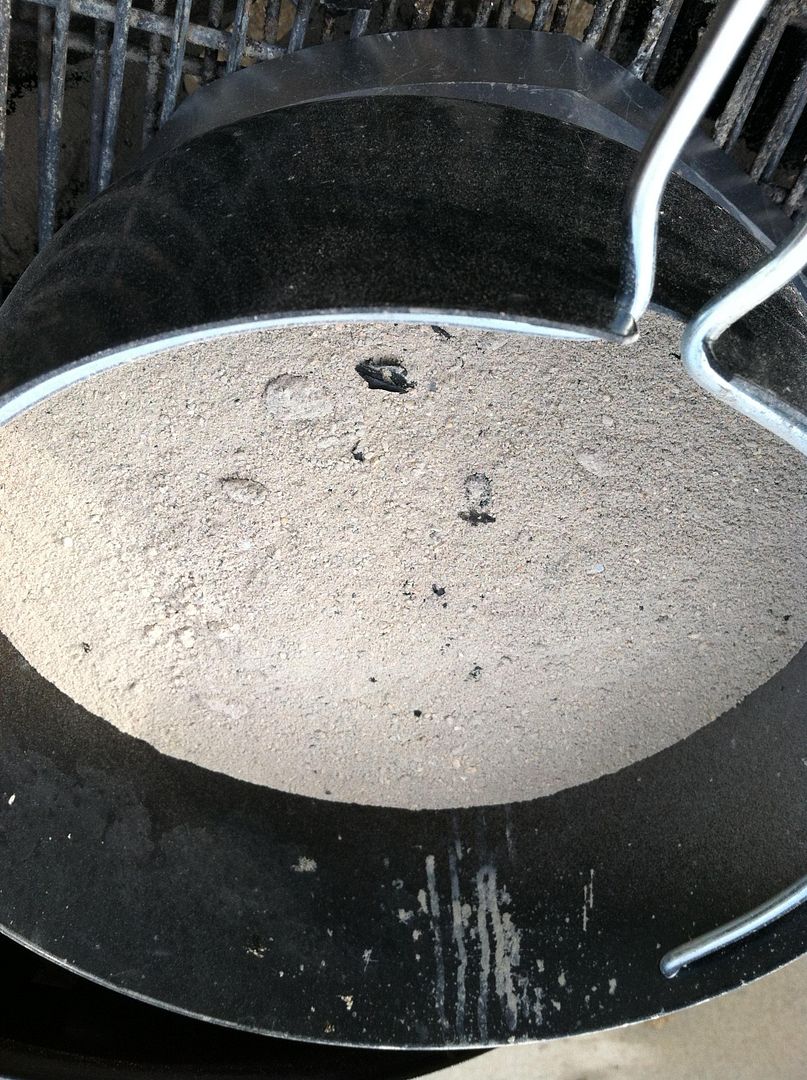
oh here is the ash can after the 100 coals.
just under a half a bowl, i dont think thats too bad, but then again i havent burned any natural briquettes so that might be a ton of ash.
again the weber proves its worth in a efficient burning machine
this was all that remained after this burn.
i have noticed, at least for this test, the more coals i burn the less there is at the end of the experiment.
i thought the 50 burn was efficient, this one was practically nothing but dust and the 25 had quiet a few glowing coals left.
Thank you all for reading this and asking questions

Ill come up with something else i want to learn more about, i am thinking about how to maintain a fire temp, so i would like to make a time table and a general idea of how many briquettes to add at a time and what time to add them.
Lets talk about it all!
")
I am always looking to better my skills.
esr
")