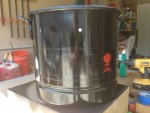
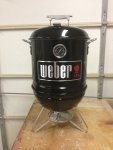
*Kudos* Weber Mini Build


JakeJD

New member
Hello everyone! All the great Weber Mini builds on this forum have inspired me to dig out my old Smokey Joe and put it to good use...as a mini smoker. Kudos to all the great builds & information on this forum..seriously awesome builds & info.

I have everything planned & lined up for my *Kudos* build except for the paint. I have a few questions:

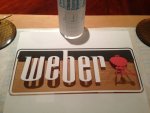
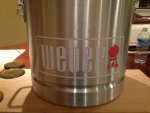
1. I would like to add a simple Weber logo similar to this: https://tvwbb.com/threads/my-weber-mini-build.39966/. However, I am not following how Chad Bman applied the logo cutout to the pot? Somewhere in there he used a 2nd layer of shelf liner, but I cannot follow. I also have been unable to locate a suitable "car window" type sticker.

2. Tips on painting? Looks like glossy, high temp engine paint should suffice, but high temp grill paint should also work. Also, looks like I need aluminmum etch primer. Any other tips

Cheers, Jake
 
Welcome to the forum Jake. I have used these guys quit a few times, Stick This Graphics , not sure if they do any Custom stuff but you could contact them.
You'll love the Mini, they are great little smokers. MIne goes Camping with us. Good luck
 
Jake,

I went to Photobucket and got clearer versions of some of Chad's photos so you can see more details of his process. I don't understand it completely, but I think I get a lot of it.

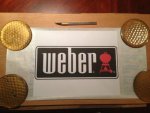
He starts by printing the Weber logo on an 8.5" x 11" sheet of "Avery paper", something like Avery 6465, an adhesive label material.

C58B182A-BE4E-4482-BD43-F606EE57472F.jpeg

He sticks it to "vinyl shelf paper". This is a piece of Matte Clear Adhesive Shelf and Drawer Liner by Magic Cover, available at Hobby Lobby, Home Depot, and other stores that sell shelf liner. He sticks the logo to the clear vinyl side of the shelf liner, leaving the liner backing intact.

Here he's used an Exacto knife to begin to remove the black portions of the logo:

2546BD32-7ECD-4042-8F00-DCD76CEAFA98.jpeg

He starts at the top left and top right corners of the logo and cuts toward the bottom. He's cutting through both the Avery sticker and the vinyl shelf liner. When he gets to the bottom of the logo, he applies small pieces of Scotch tape to hold that thin edge in place--one piece at each corner and two pieces between the two corners. I'm not sure why he takes the time to cut the outer edge of the black outline that frames the logo; he only needs to free the white outline with the "b" attached.

Back at the top, he makes a horizontal cut to free most of the black field, leaving the letters and kettle still attached to the top part of the label. Here he says, "I used more shelf liner over the top to hold everything together." He removes the backing from a second sheet of shelf liner and applies it over the entire logo sticker to hold the letters and kettle in place. I guess he ends up cutting through this material to finish removing the black portion at the top of the logo.

Here he's stuck the logo to the pot:

6B986B47-08F4-4306-83A5-B1D20CC848E4.jpeg

Several assumptions:
  1. He removes the backing from the initial layer of shelf liner so he can stick the logo to the pot.
  2. He's able to separate the second piece of shelf liner from the printed side of the Avery label.
  3. He shows the kettle on the pot in this photo, but he removes it before applying the primer. Might be better to separate the kettle from the logo at this point before sticking the logo on the pot.
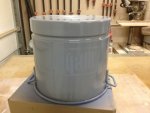
Here he's sprayed the pot with primer:

66DBAC6F-07E9-4835-88E1-0E16BB366CEE.jpeg

Now he says he "shot the 'grill' area with red paint', meaning that he sprays some red paint over the gray primer in the area where the kettle will be, slightly larger than the kettle. After the primer and red paint cure for 1 week, he applies the kettle sticker to the pot, aligning it and spacing it correctly with the letters, so that it masks the red paint underneath. He sprays the whole pot with a couple of coats of black paint and lets it cure.

Here he's removed just the kettle sticker, revealing the red paint underneath:

2CC38B8D-FB07-4622-8B4D-902F98C16572.jpeg

Here's the result after the remaining stickers are removed:

964ECBB4-F4AA-4D99-97B9-98FA2D7439E3.jpeg

Is this at all helpful? :D
 
Last edited:


Back
Top