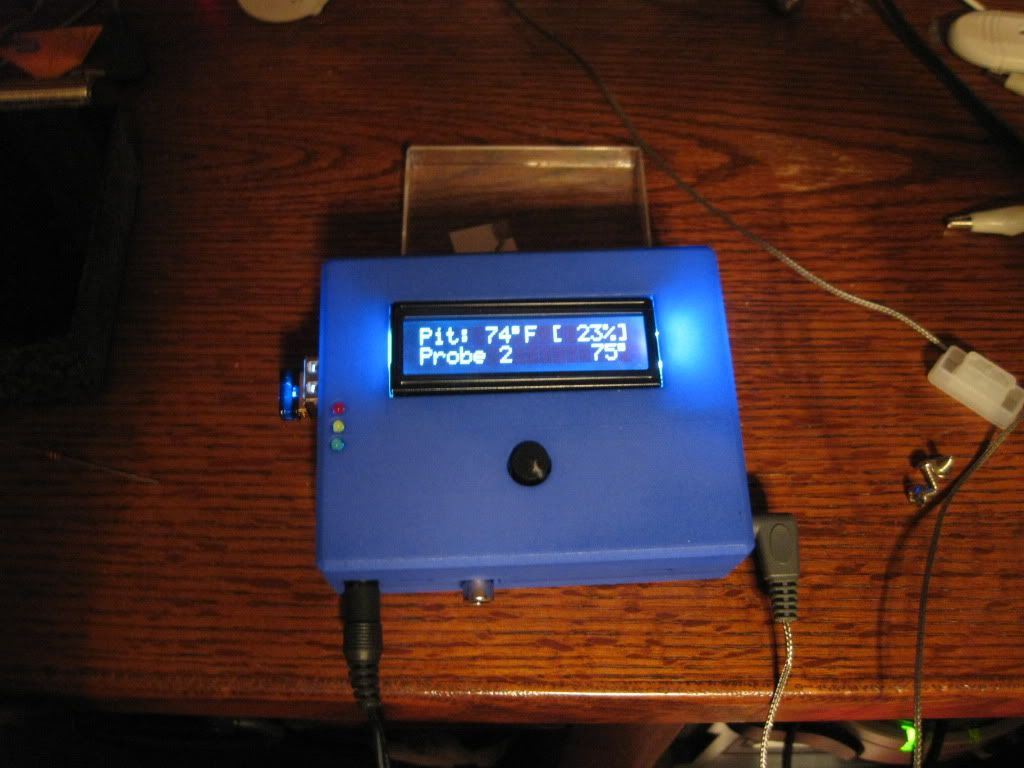
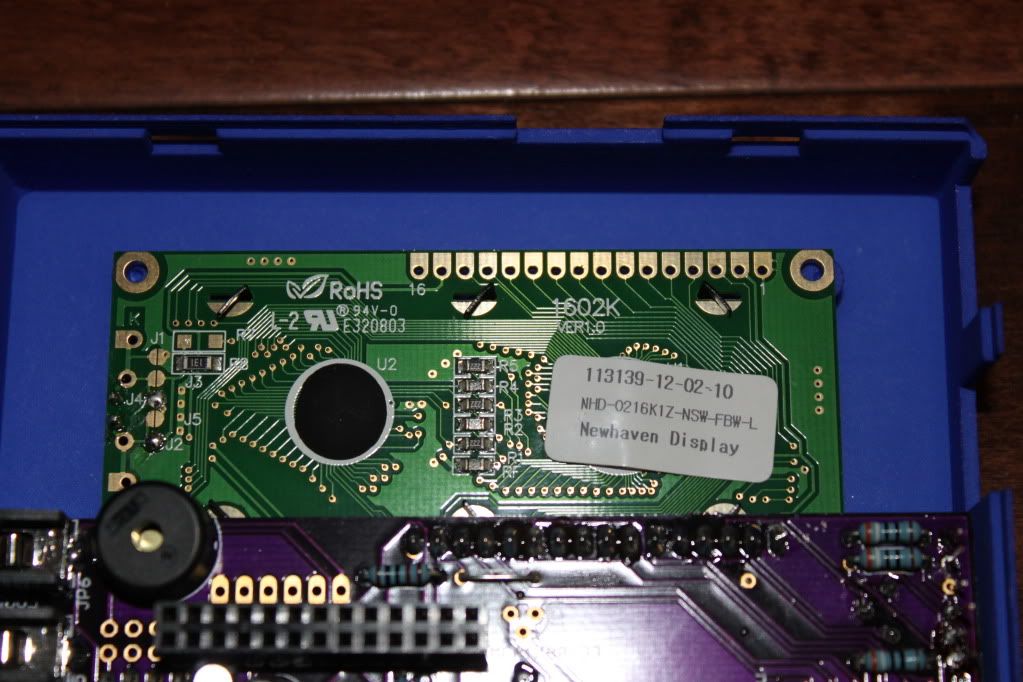
HM version 4 Rpi 3d print case


Around $350

That's reasonable. I got the manual for the 3d printer. Lots to read. The cartridges are 250 dollars each. ouch. Not sure how much we can get out of it.

There are two software programs that work with the printer:
1. CatalystEX, installed on your workstation, processes the STL files for printing and communicates
with the printer from your workstation.
2. System software, the operating software installed on the printer, controls printer functions.
 
Just got my blue case from Shapeways. It looks really good.

I did a quick test fit and everything fits well except the support post for the LCD that is close to the ethernet jack is not in the correct location. It needs to move towards the ethernet jack. I'll measure it later when I get a chance. The post on the side by the probe jacks is dead on, so I will be able to secure the LCD using that post.

Everything else fits really well.

IMG_5504.jpg


dave
 
Last edited:
Wow that blue really looks nice. Guess it is about time for me to order one so I'll have it in time for the HMPi I'm going to make my Dad for christmas.
 
I do like the color a lot.

A couple things I've noticed. The clips don't seem to "clip" very well. The bottom will just fall off if I don't hold it together. Maybe we could add a small line of material on the top half to act as a ridge for the clips to hold on to.

Shapeway broke a piece of the corner off. It is only cosmetic, but I figured I paid $35 for the piece it shouldn't have cosmetic damage. I'll contact them today and let ya'll know how they respond.

Oh, I really like the case :)

dave
 
Last edited:
Check the clips to make sure there are no plastic burrs that may be impeding the clip seating. Use a small nail file to remove any burrs. If the clips are properly seated, the bottom should not fall off.
 
Tom,

I got my calipers out and measured the distance between the centers of the two posts. It measures ~76.784mm, looking at the spec on mouser for the LCD it shows a distance of 75.0+-0.2mm. From the looks of it I would guess that is right, it does look to be off about the diameter of the hole.

Here is a picture:
IMG_3743.jpg


Right side: offset
http://i191.photobucket.com/albums/z84/lovingHDTV/IMG_3751.jpg

Left side: this side looks good
http://i191.photobucket.com/albums/z84/lovingHDTV/IMG_3752.jpg

If you look at the album that these are in, you can see more pictures. I wonder if it is caused by the opening for the LCD being slightly larger that the actual size, to allow for movement, then the posts being placed with similar offset from the opening. This would cause one post to be too far out. Just a thought.

thanks for your design,
dave
 
I'm kind of thinking some mylar tape on the inside of the case would stop the lcd from shining through ?? How much if the $35 was shipping/handling/etc ?? IE what would the 10 piece price be each ??

Do you/can you have your order setup like the mouser "project" so others can easily order one up ?? $35 sounds a lot better than some of the more expensive earlier options. I'm still thinking about whittling one from some kind of billet plastic on the Bridgeport :-).

Bill
 
Yes I was going to put some of the aluminum tape to reduce the LCD glow.

For me the costs were:
Top $34.51
Bottom: 32.37
Shipping 6.50

I'm kind of thinking some mylar tape on the inside of the case would stop the lcd from shining through ?? How much if the $35 was shipping/handling/etc ?? IE what would the 10 piece price be each ??

Do you/can you have your order setup like the mouser "project" so others can easily order one up ?? $35 sounds a lot better than some of the more expensive earlier options. I'm still thinking about whittling one from some kind of billet plastic on the Bridgeport :-).

Bill
 
is the LCD and button pretty much seated as far as they can go? I am waiting on all my parts to build the RPi Hm4, and want to make sure I can get it working before spending the money on the case. I also don't want to end up butchering my work trying to fix the heights of the LCD and button if I can avoid it.
 
Yes I slide the LCD down on the header pins as far as it would go. For the button, don't snap it into place. I just set in in the holes, then soldered it in. This allowed the button to sit slightly proud of the surface. What I did was not solder the button in place until I had the case in hand and I could try out what height I wanted. I just snapped the button in place and used it like that until the case came.


is the LCD and button pretty much seated as far as they can go? I am waiting on all my parts to build the RPi Hm4, and want to make sure I can get it working before spending the money on the case. I also don't want to end up butchering my work trying to fix the heights of the LCD and button if I can avoid it.
 
For the button, don't snap it into place. I just set in in the holes, then soldered it in. This allowed the button to sit slightly proud of the surface.
That's a pretty good and easy idea. I straightened out the pins on mine then set a piece of 3mm material under it and soldered it in place. Your method seems quicker and doesn't require any extra parts.
 
Yes I slide the LCD down on the header pins as far as it would go. For the button, don't snap it into place. I just set in in the holes, then soldered it in. This allowed the button to sit slightly proud of the surface. What I did was not solder the button in place until I had the case in hand and I could try out what height I wanted. I just snapped the button in place and used it like that until the case came.

Great! Thanks for the tips!
 
That's a pretty good and easy idea. I straightened out the pins on mine then set a piece of 3mm material under it and soldered it in place. Your method seems quicker and doesn't require any extra parts.

I like that method too. I'm updating the stl for the top of the case right now to reflect the corrected lcd post placement and will put your method for mounting the button on the first page of this thread too.
 
Dave, I opened up my file for the top and measured the center to center length of the posts and it comes up as 75.2 mm. I'm not sure why yours measures 76.something mm. It must be a printing issue although I think shapeways quotes an error tolerance of 0.3 mm. I'm going to hold off on adjusting anything for now until I hear back from others and get a better sense of what sort of variance there is from case to case.
 
Actually, after thinking about it, what if I change the posts to something like this:

ixy538.jpg


This way, you can just drill a small hole depending on how your particular print ends up.
 
New to the board. Wife bought me a smoker for an anniversary gift.

I spoke to a protype shop here in st.loius who has a high end fdm machine and said if we get 10 to 15 together we can get case for about half the cost of shape ways. He only has the white abs, but said most folks use krylon to paint to the desire color.

If anyone is interested, let me know. I was waiting to see if Tom had any other updates before commiting. All my parts are ordered and I'm waiting for them to arrive.
 
Tom,
I printed the hpi top (repaired) stl file from the first post. I also downloaded the 123d file from the first post this AM, and measured that post distance there and it matched my print. Did the updated files not get posted?

dave

Dave, I opened up my file for the top and measured the center to center length of the posts and it comes up as 75.2 mm. I'm not sure why yours measures 76.something mm. It must be a printing issue although I think shapeways quotes an error tolerance of 0.3 mm. I'm going to hold off on adjusting anything for now until I hear back from others and get a better sense of what sort of variance there is from case to case.
 
I think this looks good. Any chance to get a similar looking post for the mounting hole that is to the left of the 4-way button and maybe one for the hole through the NFET by the DC power connector?

dave

Actually, after thinking about it, what if I change the posts to something like this:


This way, you can just drill a small hole depending on how your particular print ends up.


Back
Top