You are using an out of date browser. It may not display this or other websites correctly.
You should upgrade or use an alternative browser.
You should upgrade or use an alternative browser.
Genesis Platinum 1000 Restoration
- Thread starter AlexPicchietti
- Start date
Samuel
TVWBB Emerald Member
He, @Josh Dekubber, would have to provide the details and explanation though.
Last edited:
Steve Hoch
TVWBB Olympian
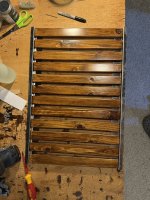
The wood looks fantastic! You did a great job staining it.First round of seal on the slats and second round of stain on the handle.
Steve Hoch
TVWBB Olympian
AlexPicchietti
TVWBB Fan
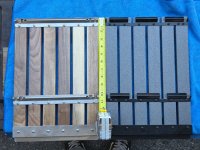
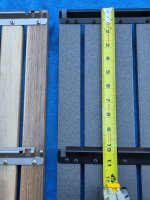
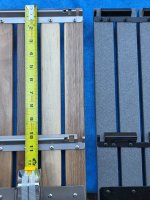
@Josh Dekubber looks straightforward, front end of the third bracket is 10” from the end of the slats? Anything else you’d note?
Josh Dekubber
TVWBB Hall of Fame
I think the picture pretty much says it all.@Josh Dekubber looks straightforward, front end of the third bracket is 10” from the end of the slats? Anything else you’d note?
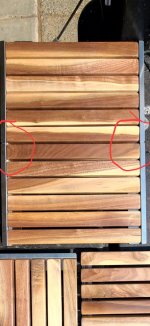
Oh the tables that go on the bottom. Whatever you're using for spacing do half of that to the end of the z-metal so that when you put your bottom tables together you have the same spacing between slats as the rest of the table. When the bottom two tables are installed together side by side.
Josh Dekubber
TVWBB Hall of Fame
Josh Dekubber
TVWBB Hall of Fame
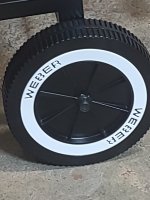
Steve have you had a chance to start working on the older style wide white walls? No rush just curiousI've been painting the wheels as well as putting new 3D printed inserts in them and they come out looking pretty much new.View attachment 116702
Cody Bratton
TVWBB Platinum Member
That wood is looking great!
Do you think it’s going to be hard to give this away?
Do you think it’s going to be hard to give this away?
AlexPicchietti
TVWBB Fan
Thanks brother! Appreciate you.I think the picture pretty much says it all.
Oh the tables that go on the bottom. Whatever you're using for spacing do half of that to the end of the z-metal so that when you put your bottom tables together you have the same spacing between slats as the rest of the table. When the bottom two tables are installed together side by side.
Yes it’s gonna be hard to give away. But I’m looking forward to my bro’s reaction, my kids still haven’t spoiled the surprise when he’s around
Josh Dekubber
TVWBB Hall of Fame
Very cool!!Thanks brother! Appreciate you.
Yes it’s gonna be hard to give away. But I’m looking forward to my bro’s reaction, my kids still haven’t spoiled the surprise when he’s around
Steve Hoch
TVWBB Olympian
Yes, almost ready to start test printing.Steve have you had a chance to start working on the older style wide white walls? No rush just curious
Josh Dekubber
TVWBB Hall of Fame
Very cool!Yes, almost ready to start test printing.
AlexPicchietti
TVWBB Fan
Josh Dekubber
TVWBB Hall of Fame
Looks beautiful!! No reason to rush.
Steve Hoch
TVWBB Olympian
I somehow missed the part where you said you were restoring this for your brother, very nice.Thanks brother! Appreciate you.
Yes it’s gonna be hard to give away. But I’m looking forward to my bro’s reaction, my kids still haven’t spoiled the surprise when he’s around
AlexPicchietti
TVWBB Fan
Steve Hoch
TVWBB Olympian
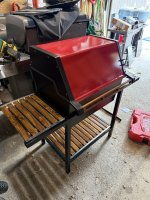
You're definitely going to want to put the wheels and casters on without anything else on the frame.Dry fitting some parts now; waiting on a few pieces and then I’ll be ready for final assembly
View attachment 116801
AlexPicchietti
TVWBB Fan

