You are using an out of date browser. It may not display this or other websites correctly.
You should upgrade or use an alternative browser.
You should upgrade or use an alternative browser.
Best approach to removing the firebox bolt?
- Thread starter AlexDeDios
- Start date
If you want the stainless frame then look for an 05-06 Genesis Platinum. Hard to come by but they pop up here and there.
As far as cleaning the firebox, if you want it shiny clean then nothing will beat an angle grinder and cup brush. I've been there and done that though and now resort to using Sam's Club oven and grill cleaner and a pressure washer because it's easier and less time consuming. It won't get it nice and shiny though, just clean enough for me at least.
Yes, I'm not looking to get it shiny clean, not at all. I'd just like to get the previous owners cooking residues off it, that's all. I can smell their burgers as I scrape. I'm going to see if I can find a polyethylene container large enough to soak the firebox in. Any ideas? Maybe a 55 gallon barrel?
THyde
TVWBB Guru
Here is another idea, although some may disagree with me due to the potential to "warp" the fire box:
Heat that sucker up as hot as you can get it for a good 30 minutes. Put some tin foil over the grates to keep the heat down below. The heat will char any grease residue and you should be able to scrape it off much more easily. It will be more like ash than grease. However, don't overdo it and warp the fire box.
"These friggin things are WARPED! Why do I always get a warped one?"
"Right as usual, sir."
Tomorrow's the big day for me. Going to try and fix the remaining problems and get it back together. I'm not shooting for a restoration, just clean-ish and functional with minimal dollars spent.
1. Frame connectors are fixed (today) with the McMaster-Carr square push-in (hammer-in) nuts.
2. Going to try welding a nut to the stub of the firebox bolt. That always works on YouTube.") Plan B is to drill it out.
Plan B is to drill it out.
3. Going to try welding the tabs back on to the right frame. These will be my first welds ever and I've received no instruction so a guaranteed disaster, I expect. Plan B is to grind the remnants of the tabs off and use 1-1/4" McMaster-Carr square push-in (hammer-in) nuts in the top of the wheel frame tubes with a vertical bolt through the right frame.
4. Spray-on oven cleaner and more pressure washing of the firebox.
5. Wire wheel and paint the manifold.
6. Reassemble and grill!
1. Frame connectors are fixed (today) with the McMaster-Carr square push-in (hammer-in) nuts.
2. Going to try welding a nut to the stub of the firebox bolt. That always works on YouTube.
Plan B is to drill it out.3. Going to try welding the tabs back on to the right frame. These will be my first welds ever and I've received no instruction so a guaranteed disaster, I expect. Plan B is to grind the remnants of the tabs off and use 1-1/4" McMaster-Carr square push-in (hammer-in) nuts in the top of the wheel frame tubes with a vertical bolt through the right frame.
4. Spray-on oven cleaner and more pressure washing of the firebox.
5. Wire wheel and paint the manifold.
6. Reassemble and grill!
Last edited:
Tony-Chicago
TVWBB Wizard
No the hole pnly gets bigger. If you take a piece of material and heat it it all gets bigger all domensuons. If there is a hole it gets bigger. If you think of the sheet getting heated it enlarges. Including the very spot where there woild be a hole. Iow what do yoi think happens with the piece of metal where there is a circle drawn? That part of the metal would expand too.Yes, that is correct, try not to heat the bolt. However, I believe aluminum expands at a faster rate than steel (correct me if I'm wrong), so heating the bolt as well as the surrounding aluminum should still help as long as you aren't concentrating the heat on the bolt.
Now, here is the question for the engineering types:
If you heat the area around the bolt, and not the whole side of the firebox, are we sure that the expanding aluminum is not expanding into the bolt, making it tighter? It's not like a nut where the whole nut will expand.
There is another school of thought that says heat the bolt and it will expand in the hole and stretch the aluminum and maybe crush some rust (constrained expansion?) and when it cools it will be looser.
Gerry
Tldr
The hole gets bigger
I think you are right. The area you are heating will expand and warp the sheet of metal if you don't heat the whole sheet.No the hole pnly gets bigger. If you take a piece of material and heat it it all gets bigger all domensuons. If there is a hole it gets bigger. If you think of the sheet getting heated it enlarges. Including the very spot where there woild be a hole. Iow what do yoi think happens with the piece of metal where there is a circle drawn? That part of the metal would expand too.
Tldr
The hole gets bigger
Thanks! I had to think about that for a bit!
Cheers
Tony-Chicago
TVWBB Wizard
It will put pressure on it the same as if you had stretched or compressed it an equal amount. That is one way to reset buildings with a heated rod stretching or growing then tighten the plates and as the rod cools it pulls the building back together.I think you are right. The area you are heating will expand and warp the sheet of metal if you don't heat the whole sheet.
Thanks! I had to think about that for a bit!
Cheers
Iamgine two sheets, same but one with a hole cut out. Heat both, same thing happens. Hole gets bigger. If you heat the section you cut out, same.
In your example, heating only a portikn can render a warp or such, however in metal it is usually fast enough to spread, or well then yes buckle.
I've seen evidence of the rod and plate thing to stabilize old brick buildings. Keeps the walls from spreading and dropping the floor joists. Is that what you mean by "reset buildings"?It will put pressure on it the same as if you had stretched or compressed it an equal amount. That is one way to reset buildings with a heated rod stretching or growing then tighten the plates and as the rod cools it pulls the building back together.
Iamgine two sheets, same but one with a hole cut out. Heat both, same thing happens. Hole gets bigger. If you heat the section you cut out, same.
In your example, heating only a portikn can render a warp or such, however in metal it is usually fast enough to spread, or well then yes buckle.
Tony-Chicago
TVWBB Wizard
Exactly!I've seen evidence of the rod and plate thing to stabilize old brick buildings. Keeps the walls from spreading and dropping the floor joists. Is that what you mean by "reset buildings"?
RobM in So Cal
New member
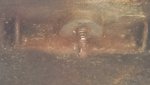
I admire your ambition to tackle this "Achilles Heel" of the Weber Genesis. I am not sure why Weber didn't use a high grade stainless steel bolt and some type of insert for this? Cost to assemble and total life expectancy of the product are probably the main reasons. I had the same problem but didn't do as good of job drilling as you did. Only broke 3 of my very good titanium nitride drill bits, so I have to add that into the total cost of my buying a used Weber and fixing it up!
Attachments
RobM in So Cal
New member
My last question to this topic. Is it better to have the nut on the inside of the firebox? I saw one build that had it on the outside and it was finished with a nice acorn nut. I think I will do this but the hardware locations only sell acorn nuts in packs of 5x or more. Yes, this might be overboard but I like my new (used) grill. It works great!
Ed P
TVWBB Honor Circle
It could be that the acorn nut has a second purpose, to keep the table from shifting too close to the crossmember next to the firebox. Some durawood versions have a spacer plate for this (Bruce said it doesn't work all that well, and I didn't ask him how he knew).
EDIT: A non-issue with the thermoset tables. My '05 Silver C has the table right next to the crossmember.
EDIT: A non-issue with the thermoset tables. My '05 Silver C has the table right next to the crossmember.
Last edited:
Bruce
TVWBB 2-Star Olympian
Ed, if you look at that table, you will notice that there are two nubs along the grill box side of that Thermoset table that hold it about 1/8 to 3/16" off the cross member. If you don't see the nubs, then you have the side table on up side down.It could be that the acorn nut has a second purpose, to keep the table from shifting too close to the crossmember next to the firebox. Some durawood versions have a spacer plate for this (Bruce said it doesn't work all that well, and I didn't ask him how he knew).
EDIT: A non-issue with the thermoset tables. My '05 Silver C has the table right next to the crossmember.