Cody Bratton
TVWBB Platinum Member
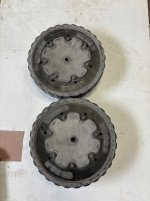
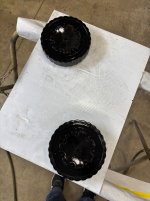
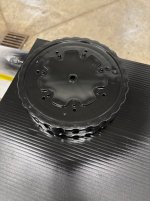
This afternoon I did a little experiment on painting wheels. It was an experiment so I wanted to use a less desirable wheel for it, so Daisy wheels it is. Figured if I messed them up, no angst from throwing them away.
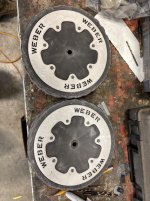
I started by giving them a good cleaning, with Zep Fast505, a non abrasive scotch-brite and a hose.
I used a dual action (DA) sander with 220grit paper on the treaded area to knock down some of the high spots and help to even it out a little bit (in the future I may try 80 or 180 on the tread only, especially on the white walls). Then into the face of the wheel.
I then hand sanded the faces with with 400 grit to remove the scratches and grooves that the 220 put in. In the future I will not use 220 on the faces of the wheel, and with the style of the white walls, machine sanding isn’t really an option in the center. Then used a red scotch-brite to get the shine off the remaining low spots.
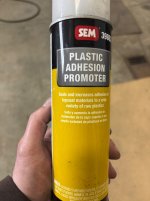
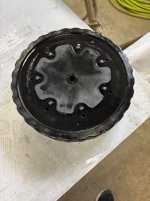
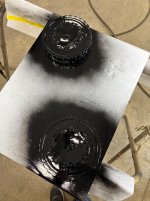
Blew them off and wiped them off with wax and grease remover. And tacked them off with a tack rag. I then applied SEM plastic adhesion promoter following the directions on the can. A very light coat, almost a misting, waited 5 minutes for flash and laid down a wet coat.
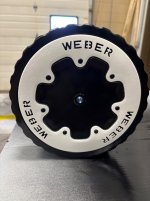
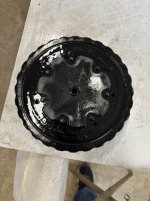
After 15 minutes I was ready to top-coat. I used Rustoleum 2X in semi-gloss. A first light coat, 3-5 minutes to recoat. And recoated 2 more times.
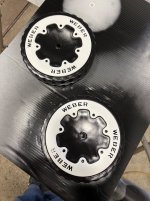
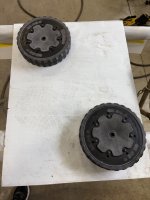
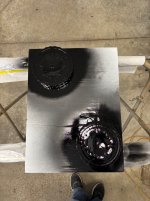
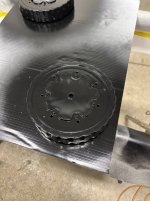
In all (not waiting for drying) it was probably 20-25 minutes of active work. I’m hoping some of the shine dies off overnight but overall pretty happy with how they turned out.
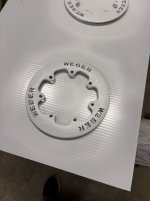
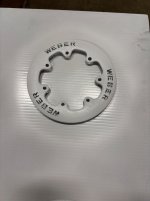
I also did the same with the white walls, only I just used the red scotch brite to prep dud to their fragile nature. Also Rustoleum 2X in semi-gloss. I’ll pop them together in the morning and post a pic. Pics are chronological with write up.
I started by giving them a good cleaning, with Zep Fast505, a non abrasive scotch-brite and a hose.
I used a dual action (DA) sander with 220grit paper on the treaded area to knock down some of the high spots and help to even it out a little bit (in the future I may try 80 or 180 on the tread only, especially on the white walls). Then into the face of the wheel.
I then hand sanded the faces with with 400 grit to remove the scratches and grooves that the 220 put in. In the future I will not use 220 on the faces of the wheel, and with the style of the white walls, machine sanding isn’t really an option in the center. Then used a red scotch-brite to get the shine off the remaining low spots.
Blew them off and wiped them off with wax and grease remover. And tacked them off with a tack rag. I then applied SEM plastic adhesion promoter following the directions on the can. A very light coat, almost a misting, waited 5 minutes for flash and laid down a wet coat.
After 15 minutes I was ready to top-coat. I used Rustoleum 2X in semi-gloss. A first light coat, 3-5 minutes to recoat. And recoated 2 more times.
In all (not waiting for drying) it was probably 20-25 minutes of active work. I’m hoping some of the shine dies off overnight but overall pretty happy with how they turned out.
I also did the same with the white walls, only I just used the red scotch brite to prep dud to their fragile nature. Also Rustoleum 2X in semi-gloss. I’ll pop them together in the morning and post a pic. Pics are chronological with write up.
Attachments
-
 IMG_8678.jpeg343.9 KB · Views: 9
 -
 IMG_8681.jpeg170.7 KB · Views: 9
 -
 IMG_8680.jpeg252.4 KB · Views: 8
 -
 IMG_8683.jpeg265.4 KB · Views: 8
 -
 IMG_8684.jpeg244.1 KB · Views: 8
 -
 IMG_8685.jpeg223.2 KB · Views: 7
 -
 IMG_8686.jpeg250.6 KB · Views: 7
 -
 IMG_8687.jpeg316 KB · Views: 8
 -
 IMG_8691.jpeg311.4 KB · Views: 8
 -
 IMG_8694.jpeg265.9 KB · Views: 10
 -
 IMG_8695.jpeg293.3 KB · Views: 10
 -
 IMG_8696.jpeg179.4 KB · Views: 11
 -
 IMG_8697.jpeg182.4 KB · Views: 10
Last edited: