I live in North Texas fella, I can't afford to bring this grill to you.Bummer, another one bites the dust. I didn't realize you already had another that was restored. Being up here in the rust belt, that one looked like a fantastic grill to rehab
You are using an out of date browser. It may not display this or other websites correctly.
You should upgrade or use an alternative browser.
You should upgrade or use an alternative browser.
Weber Genesis Silver restoration project
- Thread starter CParman
- Start date
Whatda mean, fella?Sometimes a "man had GOT to know his limitations"
Steve Hoch
TVWBB Olympian
Don't worry, Cody has plenty of old grills. You might want to strip it of any good parts before you put it to the curb though. You mentioned you already have a silver b so there could be something useful down the road.I live in North Texas fella, I can't afford to bring this grill to you.
Per that last pictures I posted. If I can get the two burners fasteners out without destroying the threads in the casting and remove the broken bolt thread out of the main lower cook base I might consider keeping this grill. I am debating wether to just pressure wash the lid and bottom cook chamber or media blast them in order to prepare for paint, kinda like I did for my 2001 Silver B grill a few years back.Don't worry, Cody has plenty of old grills. You might want to strip it of any good parts before you put it to the curb though. You mentioned you already have a silver b so there could be something useful down the road.
Anthony Spitzer
TVWBB Pro
Do you have to take the two burner fasteners out or will the burner end just slip in under the head and hold it in place? I've never worked on one of these but it looks like you got the old burners out without taking the fasteners out. I'm sure that the experts on this grill will have the answer.
That is true. You can install new burners by removing the manifold and leaving the 2 screws in question in place. Just clean up the area and slide the new burners under the screws and reinstall the manifoldDo you have to take the two burner fasteners out or will the burner end just slip in under the head and hold it in place? I've never worked on one of these but it looks like you got the old burners out without taking the fasteners out. I'm sure that the experts on this grill will have the answer.
That's an idea. Per my restoration of my (bought new in 2001) Silver B I was able to remove the two burner fasteners will little difficulty. Thus I thought it was the norm to remove those two fasteners.That is true. You can install new burners by removing the manifold and leaving the 2 screws in question in place. Just clean up the area and slide the new burners under the screws and reinstall the manifold
FYI, most who restore here leave those two bolts alone, As they are just placeholders without the need for tightening, there is no need to remove/replace, while the risk of stripping/breaking those bolts is fairly high. As long as a burner can slide under and be removed, they are good.
LMichaels
TVWBB 2-Star Olympian
The screws in the firebox are not supposed to be removed. Weber makes it so easy to slide the manifold back, slide the burners out, and simply reverse the process IDK why so many folks want to attempt to do it in such a convoluted and difficult manner and also one which more often than not results in damage
Since we are on the subject of fasteners. What about the Hex nuts that attach the side of the top. These fasteners look a lot like Auto TRIM PAL course nuts. Do you guys just buy the usual hardware from Weber (mine would part number 80158) or do you source the hardware pieces from somewhere else? I am trying to find as much stainless fasteners as possible because they will last longer.The screws in the firebox are not supposed to be removed. Weber makes it so easy to slide the manifold back, slide the burners out, and simply reverse the process IDK why so many folks want to attempt to do it in such a convoluted and difficult manner and also one which more often than not results in damage
Steve Hoch
TVWBB Olympian
I've always just reused the ones that are on there from the factory.Since we are on the subject of fasteners. What about the Hex nuts that attach the side of the top. These fasteners look a lot like Auto TRIM PAL course nuts. Do you guys just buy the usual hardware from Weber (mine would part number 80158) or do you source the hardware pieces from somewhere else? I am trying to find as much stainless fasteners as possible because they will last longer.
Val Deale
TVWBB Super Fan
I agree with Steve. I have not done as many grills as the experts above but I always just reuse the lid-to-endcap nuts. One thing I understand though is that you want to be careful not to over-tighten them. As soon as they get a little snug it's best to just stop tightening. Per the burner screws - don't do anything to them but brush clean the undersides so the new or cleaned burner ends can simply slide under the nut head.I've always just reused the ones that are on there from the factory.
John-NY
TVWBB Pro
I know everyone already said it, but just to be clear and on the same page, never remove these. Simply slide the burner tubes tabs horizontally underneath them to install the burners (or slide the tubes out from other them to remove them). Photo below.

Separately, I’m confused about which bolt you mentioned that snapped off. Do you have a picture? If you’re talking about the bolt on the side of the cookbox that secures the cookbox to the frame, this thread is helpful:
Thread 'HOW TO: Cook Box Frozen Bolt Removal'
https://tvwbb.com/threads/how-to-cook-box-frozen-bolt-removal.86506/
If the broken bolt is stuck inside its hole, I recommend this bit to drill it out:
BOSCH GT300 1/4inch Carbide... https://www.amazon.com/dp/B00292AAUM?tag=tvwb-20
Cody Bratton
TVWBB Platinum Member
I sure wouldn't mind one of them to come from Texas rust freeDon't worry, Cody has plenty of old grills. You might want to strip it of any good parts before you put it to the curb though. You mentioned you already have a silver b so there could be something useful down the road.


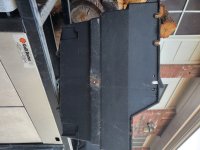
Hello John: Here is a picture of the bolt thread that broke off in the lower cook chamber.I know everyone already said it, but just to be clear and on the same page, never remove these. Simply slide the burner tubes tabs horizontally underneath them to install the burners (or slide the tubes out from other them to remove them). Photo below.
View attachment 121875
Separately, I’m confused about which bolt you mentioned that snapped off. Do you have a picture? If you’re talking about the bolt on the side of the cookbox that secures the cookbox to the frame, this thread is helpful:
Thread 'HOW TO: Cook Box Frozen Bolt Removal'
https://tvwbb.com/threads/how-to-cook-box-frozen-bolt-removal.86506/
If the broken bolt is stuck inside its hole, I recommend this bit to drill it out:
BOSCH GT300 1/4inch Carbide... https://www.amazon.com/dp/B00292AAUM?tag=tvwb-20
Attachments
Steve Hoch
TVWBB Olympian
There's still plenty of rust free ones around here too, they just usually cost more than free.I sure wouldn't mind one of them to come from Texas rust free
LMichaels
TVWBB 2-Star Olympian
Just get some of these. Start right in the center of the bolt. No need to even center punch. These bits are so cool I can start a hole in a round piece of steel without a punch with a handheld drill with no trouble at all. So no worries it will not walk out on you. Then follow up with appropriate twist high speed steel bit or if you want one of those spade looking bits.Hello John: Here is a picture of the bolt thread that broke off in the lower cook chamber.
Cody Bratton
TVWBB Platinum Member
I haven't seen many of late under the $40-50 mark. And I have a nice little herd to go over this winter. Once the kids basketball seasons end in January, I will be all systems go on prepping for the spring flip season.There's still plenty of rust free ones around here too, they just usually cost more than free.