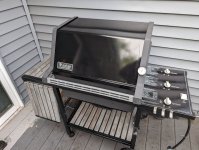
Weber Genesis 1000 LX Rehab (progress & questions)


D Grilli

New member
Hey All! It's been 7ish years since I acquired my barely touched Genesis 1000 LX. Unfortunately, no, I was not able to keep it in pristine condition. But such is life for grills that are heavily loved...or rather heavily used.

Anyway, the time has come to take this thing apart and do some rust mitigation and replace some parts. Pretty much all the stuff in the fire box as you might imagine.

I'll get around to posting some before/during/after pics soon. Mostly during/after because I have a bad habit of forgetting to take before photos. In the meantime, questions.
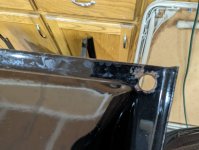
  • Anyone know the size/thread of the bolt and accompanying but that is on the left side, top center of the firebox? It's the one that fastens the left side of the frame to the firebox. Unfortunately I had to Dremel it off (probably because aluminum on steel is bad joojoo). I'll see if I can't dig up a parts manual to answer my own question and then hit up Fastenal or McMaster Carr.
 
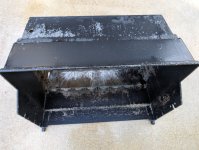
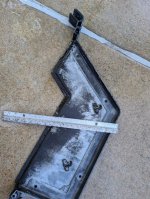
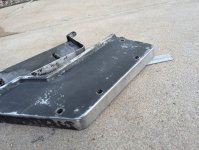
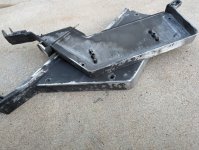
Oh! And third question for now. The porcelain coated lid and ...grease funnel drawer(?) under the firebox cleaned up real nice. Both have some chips in the coating in small areas. Any guidance on treating these? Rust-Oleum high heat paint? Hate to spot treat with different paint like this but, want to prevent rust.

1000007422.jpg
 
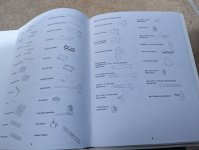
2" x 1/4-20 stainless steel hex bolt on the left side of cook box.

Yep, clean up the drip pan and use some rustoleum high heat ultra paint. I treat mine with some rustoleum rust reformer first though.
 
2" x 1/4-20 stainless steel hex bolt on the left side of cook box.

Yep, clean up the drip pan and use some rustoleum high heat ultra paint. I treat mine with some rustoleum rust reformer first though.
Thanks! I suppose the drip drawer is underneath the fire box isn't going to get too hot for the rust reformer. I'll hit it with that first and then some of the gloss high heat ultra I got.

For painting, I already hit the frame in a few areas with the rust reformer. The coverage and finish on that stuff is pretty. I almost hate the idea of painting over the matte finish with the gloss black I got. Also had to spend a ton of time scraping, wire wheeling, and sanding loose paint and loose rust off all the durawood frame pieces. They've also been generously rust reformed, but at this point they're just going to have to look like Edward James Olmos' face when all is said and done.
 
The Rust reformer seems to hold up quite well under the High heat paint. Also, if you want a high heat black paint, try regular High Heat Rustoleum. It is Matte/flat.
 
The Rust reformer seems to hold up quite well under the High heat paint. Also, if you want a high heat black paint, try regular High Heat Rustoleum. It is Matte/flat.
I picked up the matte high heat and the semi-gloss high heat ultra.

Good to hear it holds up, because I went ahead and hit the "high heat" contact parts of the frame with it anyway. My plan for the frame is (was):
  1. Rust reformer spot treatment (also hitting all the welds, gaps, and insides of the frame tubes best I could).
  2. High heat ultra semi-gloss the parts of the frame that contact the firebox.
  3. Rust-Oleum gloss protective enamel the rest of the frame.
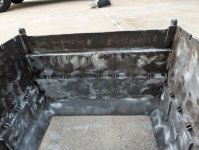
For the outside of fire box and cast aluminum sides of the lid (removed from the lid), I'm hitting all that with Xylene and then pressure washing it all with a whirlybird (0-deg tip). After that dries, hit it with the high heat matte black. If the pressure washer doesn't do a good enough job, I might break out an angle grinder with a wire cup but I hope I don't need to take it that far to prep the surface for a decent looking finish looking decent. And the inside is...whatever, as long as the gross levels of crud are removed. It gets re-seasoned and will be caked up again anyway.
 
That is basically exactly how I paint all of my rehabs. But, I use Rustoleum 2X Semi-gloss as it matches the Hight Heat Ultra very well.
 
That is basically exactly how I paint all of my rehabs. But, I use Rustoleum 2X Semi-gloss as it matches the Hight Heat Ultra very well.
Yeah, after I got home with it the other day I kind of face palmed that I got gloss instead of semi-gloss. I've been waffling about going back and picking up the semi-gloss instead. Wonder if Menards will take a return on spray paint.

BTW @Bruce , I ran across a few of your how to's while doing research before executing on this. Thanks for putting videos together and whatnot!

Thanks all around, actually. Seeing familiar names from other posts here. I appreciate the help!

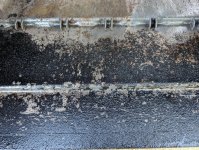
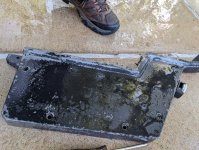
As for the cast aluminum pieces. I'm not super impressed with my whirlybird's work. Debating if I want to crack open the wire cup and go to town or just paint. The guidance I've seen in some of the compiled sticky of how to's and advice was that the big thing was to remove loose paint. I'm on the fence, feel like the finish will look better if I just strip the old coating off as much as possible. Not sure if anyone has any strong arguments one way or the other but my Achilles tendons and elbows are out of grease for today either way.

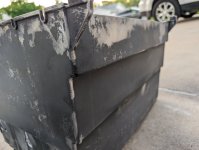
PXL_20240526_231637493.RAW-01.COVER.jpgPXL_20240526_231640813.RAW-01.COVER.jpg
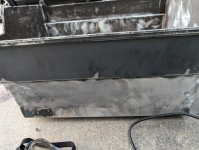
PXL_20240526_231654538.RAW-01.COVER.jpgPXL_20240526_231657746.RAW-01.COVER.jpg
 
Yep, only removing part of the paint will likely show on the finished product. But, really only the top part of the cook box shows once the cook box is installed. And, if it is a keeper grill, just clean up the inside with a putty knife or maybe pressure wash it. It will be gunked up after a few cooks anyway. End caps are a different story though.
 
I found some elbow grease and went to town with the wire cup. After spending damn near 30 minutes stripping all the paint off the front lower part of the box, I made the decision that if the paint isn't coming off with a few passes of the wheel, it ain't worth the effort (this time at least). Plus it was getting difficult to avoid gouging the aluminum with swirls.

PXL_20240527_013304635.RAW-01.COVER.jpgPXL_20240527_013310056.RAW-01.COVER.jpgPXL_20240527_013243986.RAW-01.COVER.jpgPXL_20240527_013255721.RAW-01.COVER.jpgPXL_20240527_013246344.RAW-01.COVER.jpg

I'm going to do a pass on the end caps with a sander to smooth out the transitions with the bare metal and remaining paint that didn't come off. Otherwise I mainly focused on the areas where the paint was prone to coming off (the edges of the caps).

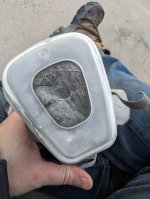
And I'll echo other posts for anyone else that happens along. Wear your PPE, you will not regret it. Gloves, mask, eye goggles (a face shield would also be good), hat, pants, long sleeves. These filters are supposed to be white.
PXL_20240527_013350186.RAW-01.COVER.jpg

That said...The end caps took some special care...clamped between my boots. I'll have to look into getting one of those clampy saw horse things I saw in one of your videos @Bruce lest I decide to shake hands with danger the next time I do a rehab.
 
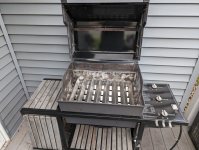
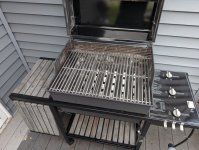
Well, it's done! I'll have to get on actually posting the rest of the photos from disassembly. A special middle finger (to myself from last week) is in order regarding the Dura Wood slats and their spacing. The holes are not all drilled in the same space of course, and I didn't think to catalog which ones came from where. So... That was about an hour and a half of the crappiest puzzle ever. Kind of hilarious how frustrating that was in the context of restoring the entire grill.

I was also today years old when I learned that the thermometer is meant to be removable so you can use it to check meat temps! RTFM I guess. Missed that one.

I can't remember, I thought there was some kind of procedure people were recommending to season the inside of the firebox. I could just be misremembering though after 7 years, and Google isn't being forthcoming with any guidance. For now I just ended up running it for an hour to burn off residue from the new stainless parts and to cure the heat paint.

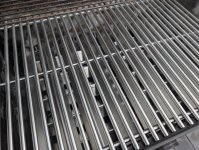
I'll also have to look into adjusting the new burner tubes but at least they're lighting up.

PXL_20240527_234628598.RAW-01.COVER.jpg
PXL_20240527_234748033.RAW-01.COVER.jpg
PXL_20240527_235321377.RAW-01.COVER.jpg
PXL_20240527_234829747.RAW-01.COVER.jpg
 
A special middle finger (to myself from last week) is in order regarding the Dura Wood slats and their spacing. The holes are not all drilled in the same space of course, and I didn't think to catalog which ones came from where.
Yes, that would be a nightmare. What I came up with was to remove one z bracket on each table and scratch l - Vl on the bottom edge of each slat to make reassembly easier. While all the slats are off I give them a bath in hot water, bleach, and dish soap to clean all the grease off of them. I know, this advice comes a little late but it looks like you got them back in the right order.


Back
Top