Prepping for Pizzas on the WSC E6


Brett-EDH

TVWBB Hall of Fame
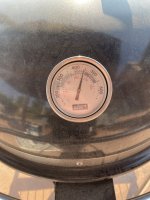
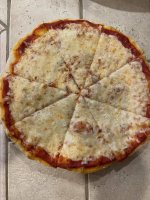
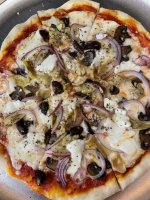
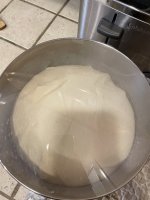
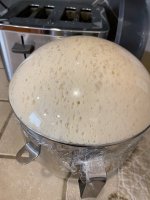
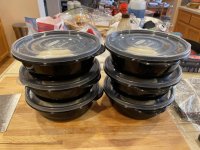
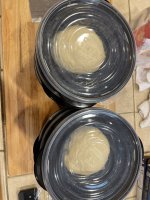
If the smoke ever clears and we get to see the sun tomorrow, it’ll be pizza Sunday.

Working on getting my football party game in shape as pre-season starts next week.

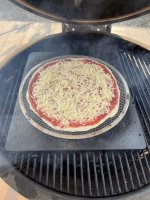
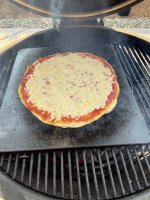
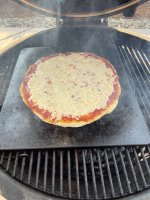
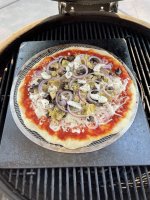
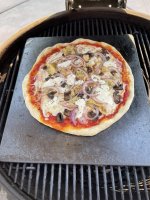
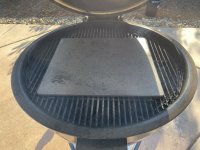
Any other E6’ers making pizzas on a steel? Open to exchanging ideas and experiences.

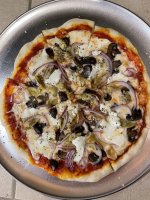
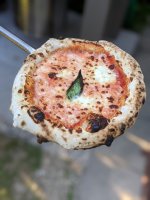
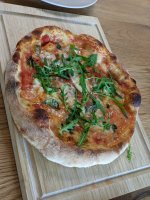
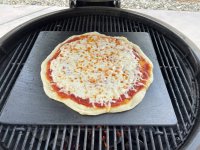
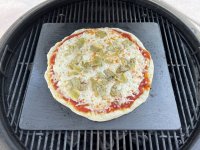
(the cooked pizzas are from my last cook a few weeks back)
 

Attachments

  • 5569E9DC-B289-479F-8A2F-498319E782C0.jpeg
    5569E9DC-B289-479F-8A2F-498319E782C0.jpeg
    102.2 KB · Views: 21
  • 7E2C6E82-6C8C-4911-9CCC-CF1111087F42.jpeg
    7E2C6E82-6C8C-4911-9CCC-CF1111087F42.jpeg
    102 KB · Views: 18
  • B70CF21C-8056-48EB-8C86-F97ED3AC8912.jpeg
    B70CF21C-8056-48EB-8C86-F97ED3AC8912.jpeg
    114.4 KB · Views: 17
  • 129F08AB-FBA4-4ADC-BD38-5315C41B9CB4.jpeg
    129F08AB-FBA4-4ADC-BD38-5315C41B9CB4.jpeg
    163 KB · Views: 16
  • 7650824C-1C69-43F3-8CF8-977ED241879B.jpeg
    7650824C-1C69-43F3-8CF8-977ED241879B.jpeg
    172.3 KB · Views: 16
  • 4465AC29-E0AE-486A-BA1D-2943C5777671.jpeg
    4465AC29-E0AE-486A-BA1D-2943C5777671.jpeg
    138.9 KB · Views: 16
  • C7FAF57A-7142-4457-9473-437BE09610C4.jpeg
    C7FAF57A-7142-4457-9473-437BE09610C4.jpeg
    144.1 KB · Views: 22
  • 3E864F45-1581-4685-A693-F246C799DDA9.jpeg
    3E864F45-1581-4685-A693-F246C799DDA9.jpeg
    195.7 KB · Views: 23
  • 175C7991-FAF2-487F-88F3-CCBA63E3BCE5.jpeg
    175C7991-FAF2-487F-88F3-CCBA63E3BCE5.jpeg
    196.1 KB · Views: 23
I cook on steel fairly regularly. I have a 16" round steel (3/8" thick) and a 16" round stone (3/4" thick). I stack the steel on top of the stone with a small air gap and heat sync it all up to around 600 degrees for 40 minutes or so before I start putting the pizza on. Usually about 5-6 minute cook times with a little break between each one. I usually place the pizza on, then immediately open up the top vent wide open to crank heat to offset opening the lid and putting in the pizza. I find it helps hold the temperature a bit better.
 
I cook on steel fairly regularly. I have a 16" round steel (3/8" thick) and a 16" round stone (3/4" thick). I stack the steel on top of the stone with a small air gap and heat sync it all up to around 600 degrees for 40 minutes or so before I start putting the pizza on. Usually about 5-6 minute cook times with a little break between each one. I usually place the pizza on, then immediately open up the top vent wide open to crank heat to offset opening the lid and putting in the pizza. I find it helps hold the temperature a bit better.
Interesting. What’s your reason for steel atop the stone versus steel on the grate and hot coals directly below the steel?

I’m debating dropping my coals to the way bottom (cooking position) and then running high heat and adding some oak chunks for more wood fired flavor.

This dough batch will be at least 24 hours cold fermented which should help deliver more color to the dough instead of being more blonde. My crisp is spot on so far with a nice crack/bite feel. Not a fan of mushy dough. We prefer some crunch to the dough when biting in.
 
I just find the steel can get too hot from the radiant heat of the coals and burns the crust too much for our liking, so the stack creates some indirect heating.
Makes sense. I start my pizzas on a pizza screen to create that air gap and go 3 mins at 450-500 dial temp. Then I deck the pizza onto the steel for 60-90 seconds till desired doneness.

I did my first pie on my gasser when I seasoned my steel. Dial was over 600°. I cooked the pizza in 60 seconds and burned it in 90 seconds. I need an IR thermometer to learn more about the steel’s actual temp. Thank you for your input. Much appreciated.
 
Brett, I bought this one just to measure pizza stone temps on my gasser.


I double stack the stones to protect pizza from direct heat. using BGE feet as spacers. View attachment 34349
That looks good. I think I have to experiment with putting my coals at the bottom of the E6 and that distance might be enough to provide nice ambient heat to get the color I’m seeking on the dough and lessens the heat on the pizza’s bottom. Very helpful. TY.
 
That looks good. I think I have to experiment with putting my coals at the bottom of the E6 and that distance might be enough to provide nice ambient heat to get the color I’m seeking on the dough and lessens the heat on the pizza’s bottom. Very helpful. TY.
I think a shield is needed. I did pizza on my BGE with the platesetter legs down and a stone on top and burned the crust black before the top was done. That's when I found the suggestion to add a spacer with the feet.

good luck, post pics.
 
I think a shield is needed. I did pizza on my BGE with the platesetter legs down and a stone on top and burned the crust black before the top was done. That's when I found the suggestion to add a spacer with the feet.

good luck, post pics.
The WSC E6 has a metal diffuser plate that sits atop the coals when coals are loaded into the lowest position. Between the diffuser plate and distance between the coals and steel, I might find that happy medium. TY. Valuable input here. 🙏
 
I don't like to use my diffuser for high temperature cooks (though some do) as I think it traps too much heat underneath and the temperature right near the coals has to be 1000 degrees or more I would think. Just does not seem to be a great idea to me. Heat stress etc.

If you have the original WSC first generation, it is also the insulated model, yes? I don't think, with pizza, you want to INSULATE the stones from the heat - you do need some direct radiant heat for pizza as it does require hotter than typical temps.

Anythink - a stainless steel drip tray etc...can act as that bottom layer...but I don't recommend using the diffuser near the coals at high temps.
 
So, I wound up not using the diffuser plate and instead managed temps via the bottom and top vents. My steel was still way too hot insomuch that I kept the pizzas on the screens longer than usual, 5 mins instead of 3.

Next pizza session will be preheat to 400° and then bake pizzas on screen till cheese bubbling, around 4-5 mins and then deck the pie onto the steel for crisping.

Overall, had good success tonight. But there’s still room for improvements.
 

Attachments

  • 4920E2E5-8CB4-4056-85F9-A1E324809F2E.jpeg
    4920E2E5-8CB4-4056-85F9-A1E324809F2E.jpeg
    171.2 KB · Views: 12
  • ADD7965A-A2EA-4FC8-940D-AC796D53ADE9.jpeg
    ADD7965A-A2EA-4FC8-940D-AC796D53ADE9.jpeg
    181.2 KB · Views: 11
  • 5031C732-3D4A-4567-9A2B-F350C4030E45.jpeg
    5031C732-3D4A-4567-9A2B-F350C4030E45.jpeg
    182.1 KB · Views: 11
  • 36E56DE2-BA2E-4075-A625-7DDC6C57043E.jpeg
    36E56DE2-BA2E-4075-A625-7DDC6C57043E.jpeg
    169.6 KB · Views: 11
  • 6386945E-B3C4-459B-9982-4048FCA9FE2E.jpeg
    6386945E-B3C4-459B-9982-4048FCA9FE2E.jpeg
    209.6 KB · Views: 11
  • D4460E2B-B126-4844-8104-42723C9572EE.jpeg
    D4460E2B-B126-4844-8104-42723C9572EE.jpeg
    212.7 KB · Views: 13
  • ABD276B6-72E4-4556-B463-F73FADDD01D9.jpeg
    ABD276B6-72E4-4556-B463-F73FADDD01D9.jpeg
    201.2 KB · Views: 13
  • FD5735AD-B575-4A68-A3B3-05A9719CD53A.jpeg
    FD5735AD-B575-4A68-A3B3-05A9719CD53A.jpeg
    251.6 KB · Views: 14
  • EF61FBD8-72B4-46E0-A28D-E7F3DF451427.jpeg
    EF61FBD8-72B4-46E0-A28D-E7F3DF451427.jpeg
    238 KB · Views: 13
I don't like to use my diffuser for high temperature cooks (though some do) as I think it traps too much heat underneath and the temperature right near the coals has to be 1000 degrees or more I would think. Just does not seem to be a great idea to me. Heat stress etc.

If you have the original WSC first generation, it is also the insulated model, yes? I don't think, with pizza, you want to INSULATE the stones from the heat - you do need some direct radiant heat for pizza as it does require hotter than typical temps.

Anythink - a stainless steel drip tray etc...can act as that bottom layer...but I don't recommend using the diffuser near the coals at high temps.
WSC E6, 2nd gen. The diffuser has no wings, just a metal plate. I agreed with your comments and didn’t use diffuser. The 3/8 in. Steel will do beat at 400-425. Anything above that is too much heat from my experiences so far. I’d say I’m at 80% where I’d like to be on these. We can make pizzas in 5 mins now and the steel doesn’t give up. It keeps on heating and cooking the pies, well.
 
Nice work! Never used steel for pizzas but I have heard good feedbacks. I don't put coals beneath though, I use indirect heat. Do you achieve better results with direct heat? I may give it a try next time.
If I may add a tip for pizzas, which helped me tremendously improve the results: higher water percentages in the dough give the best results for pizzas in the BBQ or in the oven.
All the recipes you can find are generally made for wood-fired ovens or regular pizza ovens, which are much hotter than our kettles (480°C or 900°F). At this range of temperatures the pizza cooks within one minute, it's too quick for this quantity of water to evaporate.
In an - inevitably - colder barbecue kettle, you can cook it within 4 to 5 minutes which means that more water will evaporate during the cook, so it is a good idea to put more water.
Traditional recipes aim for 55 to 60% water in the dough. If you aim for 70%, you will get a much more puffy, smooth and yet crispy pizza (the dough is a bit stickier to work, but it is definitely worth it). For three dough balls it is something like 300 gram water, 500 gram flour for a 60% hydration pizza, and 350 gram water / 500 gram flour for a 70% hydration pizza. You might tinker those percentages and find what works best for your cooker.
My dough are fermenting for tonight as I'm writing this, I love pizzas!
 

Attachments

  • PXL_20210616_174005440.PORTRAIT.jpg
    PXL_20210616_174005440.PORTRAIT.jpg
    124.6 KB · Views: 8
  • PXL_20210403_170526645.PORTRAIT.jpg
    PXL_20210403_170526645.PORTRAIT.jpg
    219.3 KB · Views: 8
Nice work! Never used steel for pizzas but I have heard good feedbacks. I don't put coals beneath though, I use indirect heat. Do you achieve better results with direct heat? I may give it a try next time.
If I may add a tip for pizzas, which helped me tremendously improve the results: higher water percentages in the dough give the best results for pizzas in the BBQ or in the oven.
All the recipes you can find are generally made for wood-fired ovens or regular pizza ovens, which are much hotter than our kettles (480°C or 900°F). At this range of temperatures the pizza cooks within one minute, it's too quick for this quantity of water to evaporate.
In an - inevitably - colder barbecue kettle, you can cook it within 4 to 5 minutes which means that more water will evaporate during the cook, so it is a good idea to put more water.
Traditional recipes aim for 55 to 60% water in the dough. If you aim for 70%, you will get a much more puffy, smooth and yet crispy pizza (the dough is a bit stickier to work, but it is definitely worth it). For three dough balls it is something like 300 gram water, 500 gram flour for a 60% hydration pizza, and 350 gram water / 500 gram flour for a 70% hydration pizza. You might tinker those percentages and find what works best for your cooker.
My dough are fermenting for tonight as I'm writing this, I love pizzas!
Fabien, this is great info. Thank you. My current recipe hydration is 60% and the sought after style is NY Neapolitan. My dough balls weight around 235-250g. I’m using 00 flour with semolina mixed in as well for the specific crunch we like.

Cooking on the Weber Kamado, my temps are very consistent as the unit is insulated.

In your recipe, what’s your dough ball weight in grams? And what size pizza do you prefer to make? We usually are running 12-14 inch pies when we shape the pie.

And my cook times run 3-5 mins using this steel. Curious to glean more info and techniques if you’re willing to share. Thank you.

I’ll definitely try a 70% hydration next. Sticky dough doesn’t scare me.
 
Each ball weighs between 230 to 280ish grams, which is on par with Napolitan pizzas specifications, but American style pizzas are diferent so it depends on what you wish. Depending on how flat and how big you want your crust, it's around 30 centimeters or 12 inches but can be extended (the size of my pizza stone is the limit here)

If you want some info to make great pizzas at home, I would recommend "The Elements of Pizza" book which is everythng you will ever need to master great pizza at home (believe me, I have tried many books!)
very much inline with what I thought. thank you. if you haven't already, check out Vito and his pizzas. the guy's a machine and makes many different recipes as he cranks out a bunch of pizza styles. i've consumed countless videos he's produced.


i'll be making that 70% hydration this week. i bought fresh arugula for my next pizzas. if we get some some (clearing out the smoke skies we are under), I will make my own sundried tomatoes too for toppings. and i'll wilt some red onions for sweetness too.
 
Another tip: If you prepare too much dough balls, just cook them (without stretching them, just throw the ball on your stone) with no ingredients at all. They will puff and make delicious bread you can freeze for making awesome sandwiches later.
And yes I know Vitto, he makes great videos!


Back
Top