Help! Remove stripped screws gas control valve.


Try pushing it up from the bottom with something small while trying to unscrew it at the same time. I'm pretty sure on most of the older valves you can see the end of the screw on the bottom.
 
I'm having this problem right now with the central control valve of my E-310. I've tried soaking both the front & the (exposed) rear of the screw with PBlaster with no improvement. I really don't want to have to drill this out :cry:
 
The output is too broad from a heat gun. You need something with a pinpoint little flame something like this https://www.menards.com/main/tools/...ch/mt780/p-1571380066404-c-8533.htm?exp=false
Oh, I also have a butane micro-torch! Just didn't think I'd want to use something that got that hot.

Just to be clear, I am putting the flame on the "screw seat" ... what is that? Is that the "top" of the screw (where the philips head is cut) or the "bottom" of the screw (which pokes out the back of the control valve body), or am I putting the flame on the side of the metal body itself (to try and expand it off the threads of the screw)?

Also, I notice that on each of the control valves, the left screw is shiny, while the right screw has a green tint. At first I thought it was just corrosion. But all three control valves have the green tint ... only on one side ... and always on the right side. That can't be coincidence, right? In Chris's Video one of the screws is shiny and the other has a yellow tint. Is this some kind of threadlock??
 
Don't leave the flame on there. Just get it on slightly to warm it. Then more PBlaster. Let that soak, wipe it off and hit the base again slightly with the flame pinpointing it as best you can then get it off, repeat the PBlaster soak.
Basically the screw has to screw "into" something. That is where you need to direct the flame. Again we're not looking to make anything really hot or you could ruin the valve.
Basically you just want the metal surrounding the screw to expand slightly and get a little room in there for the more penetrant. Not a guarantee but this is about all I can think of to get those loosened up
 
Whoooooo! I got it out!

I'm still not sure what you meant by the "screw seat" ... but I just touched the inner blue cone of my micro-torch to the "top" of the screw (where the philips head is cut) for maybe 5 seconds. Let it cool down, and then tried again with my screwdriver and just when I was about to give up I heard that delightful "ping" as it broke loose :giggle:
 
There is a multi-page HOW-TO about cleaning and lubricating valves in the link below, and post #128 discusses that if the screws have hash marks on the screw head, they are actually Pozidrive screws, which are similar in appearance to Phillips head. If the head isn't completely cammed out, or for future use, a link for the correct bit is given. It's a good read.

 
There is a multi-page HOW-TO about cleaning and lubricating valves in the link below, and post #128 discusses that if the screws have hash marks on the screw head, they are actually Pozidrive screws, which are similar in appearance to Phillips head. If the head isn't completely cammed out, or for future use, a link for the correct bit is given. It's a good read.

I don't see hash marks. But I do see a little circle stamped in one of the "quadrants" of the screw head. I'll bust out my macro lens tomorrow and try to get a photo of it.
 
The area under the head of the screw is the screw seat. That's where the metal-to-metal friction is.

I don't see hash marks. But I do see a little circle stamped in one of the "quadrants" of the screw head. I'll bust out my macro lens tomorrow and try to get a photo of it.
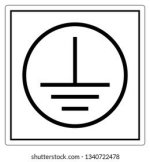
Is that on the green screw? Electrically, that generally indicates a grounding screw. There may be a ground symbol inside the circle if so.
 

Attachments

  • protective-earth-ground-symbol-sign-260nw-1340722478.jpg
    protective-earth-ground-symbol-sign-260nw-1340722478.jpg
    11.7 KB · Views: 1
There is a "head" on a screw and it screws "into" something. Best to heat what it screws into. If you heat the head the screw itself will expand and can possibly make it a bit tighter. But, it worked and I'm glad no matter how that the micro torch worked for you
 
HI All,
I just went through this with all 3 valves on my old Genesis Platinum. They had REALLY tiny Phillips head screws with one screw on each valve covered in red thread locker. I only got 2 of the non-thread locked screws out without the screw head stripping and NONE of the thread locked ones came out. I had soaked them in brake cleaner and gotten most of the thread lock off, but the screws are so tiny on mine that they still stripped.

I had phenomenal success using a small, left-hand drill bit to back them out. They centered really easily in what was left of the Phillips slots and as soon as they started to bite the screws would break loose and unscrew.

On my grill, the screws were M3 x 12mm. I got stainless cap head screws off Amazon and they also worked great, with a much meatier head so I won't have this issue again. I replaced all of the screws with these.

Hope this helps!
Garrison


1748612292274.png


1748612385012.png
 
Last edited:


Back
Top