Jonas Klint
New member
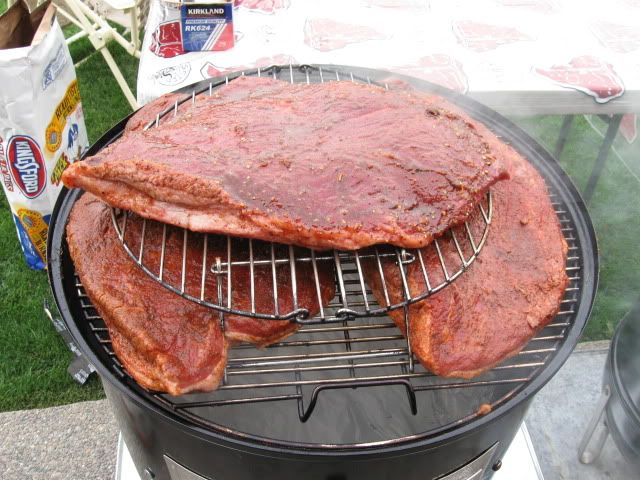
I’m new to this forum, but I have found it to be a gold mine when it comes to finding information about the WSM and other grills and this inspired me to come up with a way of adding a third cooking grate in my recently purchased WSM. I have so far made both ribs and beer can chicken on the WSM and this modification will not allow you to have high meats on the lower and middle grate but it will give you some extra space for lower meats such as wings, fish or ribs laid flat and still allow for high meats such as whole chickens or briskets on the upper grate.
The modification will cost you less than $20 (including a new grate) and it takes about an hour to do. It will give you a distance of ~100 mm between the lower and middle grate and ~90 mm between the middle and upper grate. Sorry for the metrics but I’m originally from Europe and it’s hard to change to Imperial ;o)
Hardware bought at Home Depot
• Shelf Support (1 x 8) $1.82
• Hex Nut 5mm (2 x 2) $0.82
• Machine Screw 5x12mm (2 x 3) $1.80
• Weber Cooking Grate 18.5” (#7432) $13.99
• Total cost $18.43 + tax
Instruction
• Remove the 4 water bowl/grate brackets from the WSM
• Mark the halfway point between the lower and upper support (~100 mm) Please note that the bolt to fasten the shelf support will be exactly halfway between the lower and upper support wile the actual support rest will be 10 mm above this mark. Something I first noticed after I have drilled the holes so you may want to compensate for that when marking where to drill.
• Drill the holes in the brackets. I used a 1.5 mm drill to make a pilot hole and then a 5 mm for the bolt and finally on the back side of the bracket I used a 10 mm drill to be able to sink the bolt head.
• Grab the pin on the shelf support with a locking pliers and the shelf support with another pair of pliers and gently rotate the pin until it’s loose, you don’t need much force. This is the hole that the bolt will go through.
• Put the bolt through from the back of the bracket and add the shelf support on the inside (toward the grate) and fasten with a nut. I cut off the excess part of the bolt with a hack saw, you don’t have to do that but I wanted everything to be flush. I could have used a shorter bolt but that would have resulted in another trip to the store.
• Make sure to turn the shelf support so that the bolt and nut are below the support, if you turn it the other way the grate will not fit.
• In order to fit the new grate you may have to cut off the upper bolts for the brackets, again I used a hack saw and cut off the bolts evenly to the nut. I tried to put the grate in without cutting off the bolts but it was too tight for the grate. However if you use the lower grate then you don’t have a problem but I couldn’t find that grate in the store.
Done! Just to fire up the WSM and start cooking ;o)
Here are some pictures of the mod.