Val Deale
TVWBB Fan
I'm on vacation for this week and have some extra time. We are on Ocracoke Island on the Outer Banks and I thought I'd share some photos I have of the first two grills I fixed up.
They won't be as exciting as some of the incredible craftsmanship and ingenuity I've seen on this forum but I have been really enjoying my grill projects and the forum is about sharing so here it goes -
My first grill was actually a Silver A in pretty good shape I bought for $40. It had a clogged burner and some grime on the control panel and lid that cleaned up well and I was amazed at how well it cooked compared to my last grill. The Silver A still needs a full restoration but it really got me interested in the whole Weber vintage line from the late '90's to the early Silvers. Here's a photo of the Silver A that got me started:
Soon after I was running the Silver A, I looked into B's and C's. I thought the 3rd burner would be a big step up.
I was looking at two Silver B's on FB Marketplace. One was $35 and far away and the other was close by me but the seller wanted $125. I ending up buying the $35 grill but having a long conversation with the owner.
As it turned out, he was really attached to his Weber Silver B but did not have time to clean it and/or getting back to spec. He asked whether I would fix it up for a fee and I said sure. And so I started my first Weber renovation.
Jim's grill was in pretty good shape compared to the one I bought for $35 but needed a lot of elbow grease for the lid and firebox. I was very lucky to have Jim as my first customer - he just said "Val, I'm going to let you take the lead on this project" and he agreed to pay for whatever I needed to renovate his Silver B.
Here are some before shots and the beginning shots of the project:


.jpg")

As you can see from the "DU" it was built in 2002.

And now the cookbox cleaning...
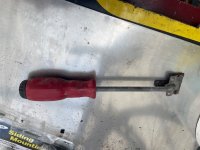
Scraping was next to impossible on the cookbox so I switched to a drill and wire cup.


Scrubbing and de-greasing the outside.

This is what I used for the outside. I put on three coats.

I'm taking a break from the thread and will come back to the lid and other parts soon.
They won't be as exciting as some of the incredible craftsmanship and ingenuity I've seen on this forum but I have been really enjoying my grill projects and the forum is about sharing so here it goes -
My first grill was actually a Silver A in pretty good shape I bought for $40. It had a clogged burner and some grime on the control panel and lid that cleaned up well and I was amazed at how well it cooked compared to my last grill. The Silver A still needs a full restoration but it really got me interested in the whole Weber vintage line from the late '90's to the early Silvers. Here's a photo of the Silver A that got me started:
Soon after I was running the Silver A, I looked into B's and C's. I thought the 3rd burner would be a big step up.
I was looking at two Silver B's on FB Marketplace. One was $35 and far away and the other was close by me but the seller wanted $125. I ending up buying the $35 grill but having a long conversation with the owner.
As it turned out, he was really attached to his Weber Silver B but did not have time to clean it and/or getting back to spec. He asked whether I would fix it up for a fee and I said sure. And so I started my first Weber renovation.
Jim's grill was in pretty good shape compared to the one I bought for $35 but needed a lot of elbow grease for the lid and firebox. I was very lucky to have Jim as my first customer - he just said "Val, I'm going to let you take the lead on this project" and he agreed to pay for whatever I needed to renovate his Silver B.
Here are some before shots and the beginning shots of the project:
As you can see from the "DU" it was built in 2002.
And now the cookbox cleaning...
Scraping was next to impossible on the cookbox so I switched to a drill and wire cup.
Scrubbing and de-greasing the outside.
This is what I used for the outside. I put on three coats.
I'm taking a break from the thread and will come back to the lid and other parts soon.