Below is a summary of my decisions and experiences installing a lava lock door. Hope my 2¢ helps the next person considering stock door replacement.
After I lost a good sized pork but to a flame out I went through all the possible ways it could have failed. The cook started hot, which I mistakenly attributed to a long dry cherry split I used for smoke wood, but temps were stable for 2 hours before bed. I've set it up for overnight smokes similar to this before without issue so I wasn't afraid. Woke up to a cold smoker and meat below safe serving temp. My last logged probe reading was just before safe but there's no way to be sure it actually reached it or how long it remained below so into the trash it went.
After scavenging the forum It looked like my culprit was air leaks. All body seals were fairly tight and had fresh felt installed the previous year. Which just left the janky door, the door who had been bent into shape countless times, who's handle had disintegrated and been replaced with spare bolts and scrap wood I had lying about. It was less than ideal so I considered the options.
1). New stock door
Matches the look & function, cheap. BUT:
; ultimately same handle that failed and same bendy problems down the line.
2). Cajun bandit door
Matches the look & most function, steel is REAL, costs a bit more than stock, better latch and sealing. BUT; handle is still smallish and door is now heavy, some complain they still have to bend it like the stock door.
3) Lavalock Door
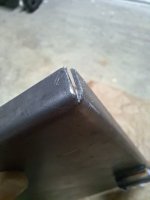
Hinges!, strong latch, steel, seals tight, easy access, you don't have to put door down on the ground. BUT; most expensive, requires corrosion protection, requires modification that can't be undone, utilitarian.
The hinges and strong seal of that latch ultimately won me over. It just eliminates a whole mess of variables and really is set it and forget it after install. The bandit almost stole the show due to to ease of install and price, but I didn't want to troubleshoot bending to fit if need be.
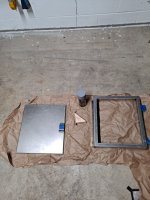
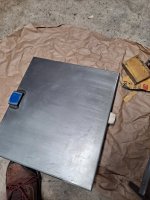
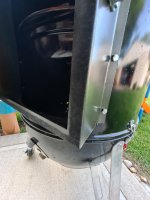
Install & a few pictures to come later. It's dinner time here.
After I lost a good sized pork but to a flame out I went through all the possible ways it could have failed. The cook started hot, which I mistakenly attributed to a long dry cherry split I used for smoke wood, but temps were stable for 2 hours before bed. I've set it up for overnight smokes similar to this before without issue so I wasn't afraid. Woke up to a cold smoker and meat below safe serving temp. My last logged probe reading was just before safe but there's no way to be sure it actually reached it or how long it remained below so into the trash it went.
After scavenging the forum It looked like my culprit was air leaks. All body seals were fairly tight and had fresh felt installed the previous year. Which just left the janky door, the door who had been bent into shape countless times, who's handle had disintegrated and been replaced with spare bolts and scrap wood I had lying about. It was less than ideal so I considered the options.
1). New stock door
Matches the look & function, cheap. BUT:
; ultimately same handle that failed and same bendy problems down the line.
2). Cajun bandit door
Matches the look & most function, steel is REAL, costs a bit more than stock, better latch and sealing. BUT; handle is still smallish and door is now heavy, some complain they still have to bend it like the stock door.
3) Lavalock Door
Hinges!, strong latch, steel, seals tight, easy access, you don't have to put door down on the ground. BUT; most expensive, requires corrosion protection, requires modification that can't be undone, utilitarian.
The hinges and strong seal of that latch ultimately won me over. It just eliminates a whole mess of variables and really is set it and forget it after install. The bandit almost stole the show due to to ease of install and price, but I didn't want to troubleshoot bending to fit if need be.
Install & a few pictures to come later. It's dinner time here.