Mark Combs
TVWBB Member
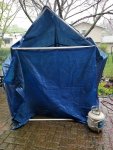
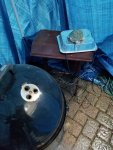
With the forecast of steady rain starting Saturday evening and continuing all day Sunday, needed to find a way to protect the smoker and electronics.
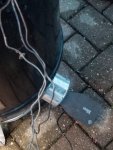
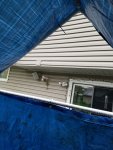
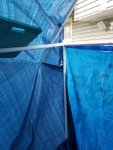
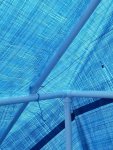
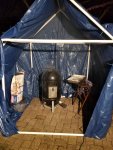
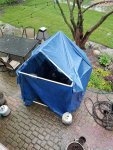
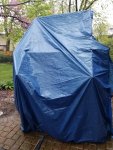
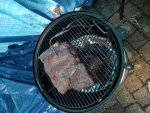
Constructed this in about 2 hours, using pvc and tarps that I had and 1" PVC side outlet elbows from Menards. The PVC was cut to 5' sections for all except the cross bar in the roof which is only about 4' (ran out and was not going to the store to get more). Whatever you use, the top support should be slightly smaller than 5' to make it easier to join to the upper square. While everything could be glued together, I only dry fitted and used zip ties to hold the roof frame to the "box". The tarp isn't perfect, but it works. It was 12' x 24'. Plenty long on the sides, but comes up a bit short on the front and back. I had another small tarp that I used to fashion a doorway. The opening on the front faces the back of the house, and slightly southeast facing- which minimized water coming in.
The nice thing about it is it will break down and be fairly easy to store.
Here is the part list:
10- 1" PVC side outlet elbows (4 for the bottom square, 4 for the top square, and two for the roof support) @ $2.48 each
16- 5' 1" PVC pipes (4 bottom square, 4 top square, 4 side posts, 4 roof eaves) (side note, if using 10' and cutting; measure the whole pipe and divide by 2, as pipe length can vary)
1- 4' roof cross member
1- 12' x 24' tarp (it is a bit long, but I tuck it under and then placed weight on it in case of winds. I think a 16' x 24' would have been better, as it may have provided more coverage over the front eave.
1 - 5' x 8' tarp for the doorway
zip ties
Tape can come in handy to hold the connections also.
Wasn't perfect, but it worked. This was a steady rain, not a thunderstorm, so was not overly concerned about wind. The 1" certainly worked, and it helped that I had 1' pipe already. You can certainly go larger on the pipe and connectors and give it a bit more strength.
Welcome any additional ideas, thoughts or what you may have done.
Attachments
-
 20200516_233550.jpg163.2 KB · Views: 27
 -
 20200516_233604.jpg99.5 KB · Views: 28
 -
 20200517_092720.jpg278.9 KB · Views: 24
 -
 20200517_092729.jpg109 KB · Views: 23
 -
 20200517_121311.jpg210.9 KB · Views: 21
 -
 20200517_121329.jpg207.2 KB · Views: 21
 -
 20200517_121343.jpg162.8 KB · Views: 20
 -
 20200517_121347.jpg178.7 KB · Views: 20
 -
 20200517_121354.jpg188.1 KB · Views: 19
 -
 20200517_121404.jpg174.8 KB · Views: 17