Ed P
TVWBB Platinum Member
First off, let me thank @nebhead, @WeberBox, @chason, and all the other contributors to this project. It's been a lot of fun and I think this project has a lot of potential. The people contributing to this project are very responsive if any questions come up along the way...we are all just a bunch of tinkerers.
The PiFire is a DIY pellet grill controller based on the Raspberry Pi Zero W. There is excellent documentation available online and the project has a GitHub page:
 nebhead.github.io

 github.com
There is also a Discord channel available for online discussion.
The PiFire was originally designed to replace the controller in a Traeger pellet grill. During the design phase, a prototype version was built that could be switched between the OEM controller and the PiFire for debugging purposes. A standalone version can be readily built as well. I have recently built the prototype version and have it mounted in an inexpensive Sam's Club Member's Mark pellet grill.
For those not familiar with the Raspberry Pi (Pi), a Pi is an inexpensive single board computer typically running a version of Debian Linux (Raspbian), although it is capable of running other OSes as well. The Pi was introduced in early 2012 and has had several improvements and revisions since then. I have several of them in use in different applications...as a 3D printer and MPCNC front-end, and of course, a HeaterMeter. This project is based around a Pi Zero W, a stripped down version of the Pi, although any Pi can be used with allowances made for the physical differences between the various Pi versions.
There are some STLs available on Thingiverse for the control cabinet, hopper sensor, and display housing. My main control box is a remix derived from @WeberBox's Traeger design. @nebhead (the creator of PiFire) also has an excellent display design for the Traeger. These items and the source files for the STLs are linked in the PiFire documentation as referenced earlier. The files for the Pi HAT (a printed circuit board that simplifies connection to the Pi) (printed circuit board) and the files for a button board PCB that simplifies switch connections can both be made to order inexpensively. Instructions on how to order PCBs is included in the online documentation referenced earlier. Also, a section of the PiFire Discord channel has been set aside for members to exchange extra boards.
Some pictures:

The main control box. There are 3 boxes in my controller...the main control box, the display box, and the temperature probe box with an OFF-ON switch and power LED.

What's under the hood? Left to right: the 4-relay output board, the Pi HAT, and a 120VAC powered 5VDC 5A power supply. The Raspberry Pi Model B+ v1.2 (not seen) is below the HAT.

A closer look at the 3.2" TFT display. The buttons to the right cycle through various options and the center button makes the selection. Current display: Combustion Fan ON, Auger ON, hopper level FULL, temperature set point 165, current temp 179, probe 1 temp 118, probe 2 temp 0. HOLD indicates which mode the controller is in. The igniter is OFF at this time and the icon is not displayed. Each individual temperature probe can have its own set point (I did not have that set for P1 or P2 here). The colored rings around the temperature display indicate the current status relative to the set point. Note that the current temperature is higher than the set point on the Grill probe...the indicator ring has turned red and the blue bar denotes the set point. Very nice!

The temperature probes plug into a small box that I attached to the bottom of the OEM controller with mounting tape for easy removal as needed. The OFF-ON button can be seen and the LED shows the unit is ON, easily seen from within the house. The display housing is mounted with magnetic strips to the hopper. Note that the cables are short enough that if I knock the display off it won't hit the ground...same with the probe box. The laser sensor is uber cool and exceedingly accurate! No, it won't damage your eyes if you look directly at it...

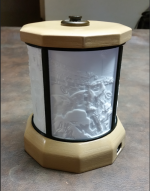
A side view of the optional pellet sensor, an inexpensive laser measuring device that very accurately monitors pellet level.

The main control mounts up under the hopper where it is protected from the elements and can barely be seen. I've tried to get an upshot picture but had problems with reflections.

There are so many features with this project I can't possibly show them all, but here is a graph from a recent cook. I have been tweaking the PIDs for my grill, which is somewhat different from the Traegers.
I have not had the opportunity to explore all of the slick PiFire features fully as of yet, having only recently completed my installation, but among the PiFire's unique features to date: editable cookfiles created and stored for each cook, a pellet database stored for pellet rating, pellet usage along with current hopper level, and recipe storage. A recipe mode is being thought out for development that will change grill temps based on time, and a lid open routine for what happens when the lid is opened.

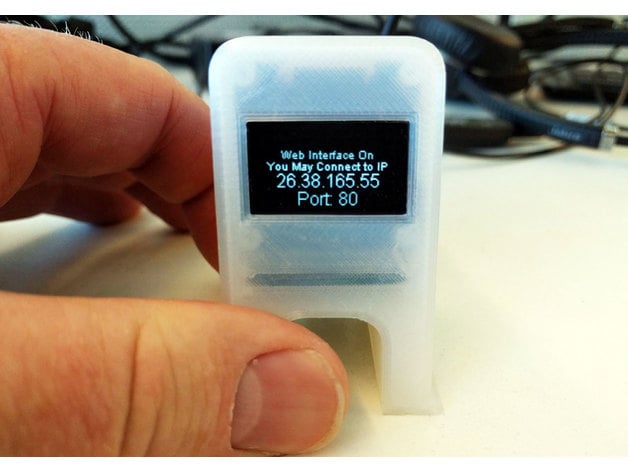
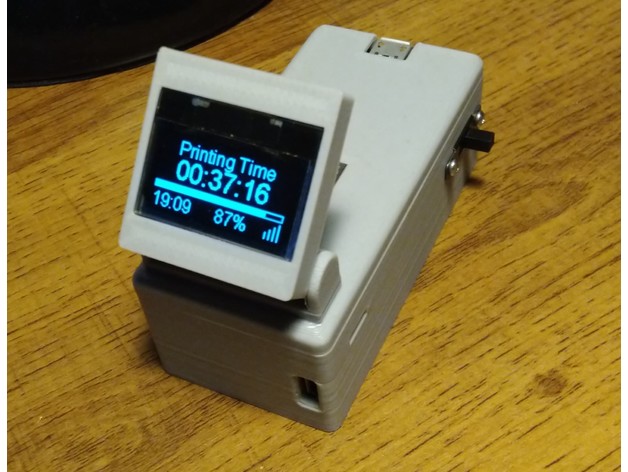
Recently, a small monitor that is currently available for another Pi project (Octoprint running on a Pi, called OctoPi) has been suggested for PiFire...it's such a cute little thing I'm going to have to make one for my printer!
It's a fun and continually evolving project with many cool features and more planned for the future!
The PiFire is a DIY pellet grill controller based on the Raspberry Pi Zero W. There is excellent documentation available online and the project has a GitHub page:
PiFire · PiFire is a Smart WiFi enabled controller for your pellet smoker / grill.
PiFire Raspberry Pi Based Smoker Grill Controller The creator of this project takes no responsibility for any damage that you may do to your person...
nebhead.github.io
GitHub - nebhead/PiFire: PiFire is a Smart WiFi enabled controller for your pellet smoker / grill.
PiFire is a Smart WiFi enabled controller for your pellet smoker / grill. - nebhead/PiFire
github.com
There is also a Discord channel available for online discussion.
The PiFire was originally designed to replace the controller in a Traeger pellet grill. During the design phase, a prototype version was built that could be switched between the OEM controller and the PiFire for debugging purposes. A standalone version can be readily built as well. I have recently built the prototype version and have it mounted in an inexpensive Sam's Club Member's Mark pellet grill.
For those not familiar with the Raspberry Pi (Pi), a Pi is an inexpensive single board computer typically running a version of Debian Linux (Raspbian), although it is capable of running other OSes as well. The Pi was introduced in early 2012 and has had several improvements and revisions since then. I have several of them in use in different applications...as a 3D printer and MPCNC front-end, and of course, a HeaterMeter. This project is based around a Pi Zero W, a stripped down version of the Pi, although any Pi can be used with allowances made for the physical differences between the various Pi versions.
There are some STLs available on Thingiverse for the control cabinet, hopper sensor, and display housing. My main control box is a remix derived from @WeberBox's Traeger design. @nebhead (the creator of PiFire) also has an excellent display design for the Traeger. These items and the source files for the STLs are linked in the PiFire documentation as referenced earlier. The files for the Pi HAT (a printed circuit board that simplifies connection to the Pi) (printed circuit board) and the files for a button board PCB that simplifies switch connections can both be made to order inexpensively. Instructions on how to order PCBs is included in the online documentation referenced earlier. Also, a section of the PiFire Discord channel has been set aside for members to exchange extra boards.
Some pictures:
The main control box. There are 3 boxes in my controller...the main control box, the display box, and the temperature probe box with an OFF-ON switch and power LED.
What's under the hood? Left to right: the 4-relay output board, the Pi HAT, and a 120VAC powered 5VDC 5A power supply. The Raspberry Pi Model B+ v1.2 (not seen) is below the HAT.
A closer look at the 3.2" TFT display. The buttons to the right cycle through various options and the center button makes the selection. Current display: Combustion Fan ON, Auger ON, hopper level FULL, temperature set point 165, current temp 179, probe 1 temp 118, probe 2 temp 0. HOLD indicates which mode the controller is in. The igniter is OFF at this time and the icon is not displayed. Each individual temperature probe can have its own set point (I did not have that set for P1 or P2 here). The colored rings around the temperature display indicate the current status relative to the set point. Note that the current temperature is higher than the set point on the Grill probe...the indicator ring has turned red and the blue bar denotes the set point. Very nice!
The temperature probes plug into a small box that I attached to the bottom of the OEM controller with mounting tape for easy removal as needed. The OFF-ON button can be seen and the LED shows the unit is ON, easily seen from within the house. The display housing is mounted with magnetic strips to the hopper. Note that the cables are short enough that if I knock the display off it won't hit the ground...same with the probe box. The laser sensor is uber cool and exceedingly accurate! No, it won't damage your eyes if you look directly at it...
A side view of the optional pellet sensor, an inexpensive laser measuring device that very accurately monitors pellet level.
The main control mounts up under the hopper where it is protected from the elements and can barely be seen. I've tried to get an upshot picture but had problems with reflections.
There are so many features with this project I can't possibly show them all, but here is a graph from a recent cook. I have been tweaking the PIDs for my grill, which is somewhat different from the Traegers.
I have not had the opportunity to explore all of the slick PiFire features fully as of yet, having only recently completed my installation, but among the PiFire's unique features to date: editable cookfiles created and stored for each cook, a pellet database stored for pellet rating, pellet usage along with current hopper level, and recipe storage. A recipe mode is being thought out for development that will change grill temps based on time, and a lid open routine for what happens when the lid is opened.
Recently, a small monitor that is currently available for another Pi project (Octoprint running on a Pi, called OctoPi) has been suggested for PiFire...it's such a cute little thing I'm going to have to make one for my printer!
It's a fun and continually evolving project with many cool features and more planned for the future!
")