HM version 4 Rpi 3d print case


Tom Kole

TVWBB Pro
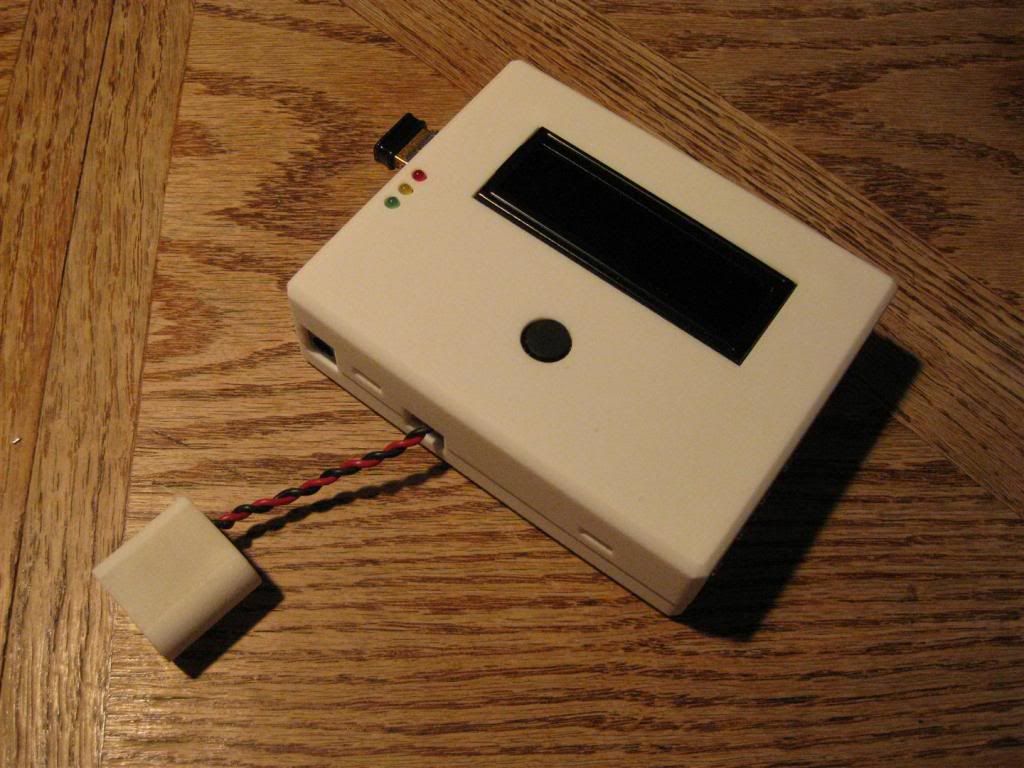
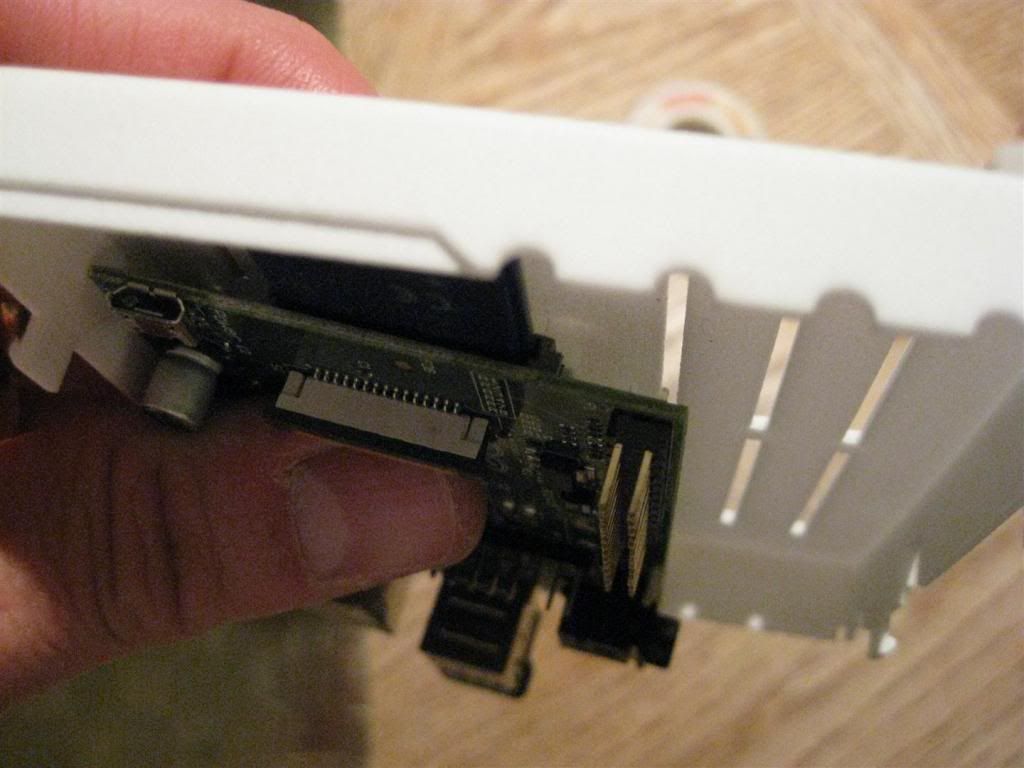
This thread is for discussion and updates of the Heatermeter v4 with raspberry pi 3D print case. The source files were created in autodesk123d and can be found below. You can PM me or Matt (M Miller) to purchase a case. Available colors are: black, red, ivory/white, silver, orange, blue, green. This case requires that the rca jack on the rpi be removed so that the boards come into maximum contact. The unit of measure for the .stl files is in mm and the LEDs should be mounted so that the bottom of the LED is positioned 7 mm above the HM PCB.

Source files were created in autodesk software which can be found here or here.

We will continue to update this post with new versions of the case as they come out.

UPDATE 9/09/13 Version 3.6

Chamfer added to all edges to more closely resemble the initial concept of the case. Versions included for Rpi-A as well as addition of a cat5e or RJ11 jack for servo/fan combo's. Cat5e or RJ11 jack is TECH brand from home depot.
14ccr3a.jpg


Source files


UPDATE 7/06/13 Version 3.4

Square form factor with through and through screw holes and nut traps located on the bottom of the case. Tongue and groove guides were added for greater alignment stability. Button hole recessed for greater accessibility.
2rr7abq.jpg


Source files
.123d


UPDATE 6/25/13 Version 3

Square form factor with through and through screw holes and nut traps located on the bottom of the case. Tongue and groove guides were added for greater alignment stability.
30vp1ed.jpg


Source files
.123d
Top.stl
Bottom.stl


UPDATE 6/22/13 Version 2

There has been another case update to a more square design, reminiscent of the original case, but maintaining the use of screws for closure. Nut traps were placed inside the case.

Source files
.123d


UPDATE 2/13/13 Version 1

There has been a considerable amount of revision and update of the case design since it's original release in October 2012. The original design was created for commercial selective laser sintering printers with the goal of minimizing plastic volume to keep costs down. This price for this case still ran around $60 so alternative methods were sought. The pictures and files for the original case can be found at the bottom of the post for those still interested.

After some experimentation, M Miller came up with a more robust redesign that is suitable for printing using DIY fused deposition printers (aka repraps). Mounting holes were added to the back of the case and there is also a footed version that can stand upright:
2moxklu.jpg


Source files
github


Original Prototype (Version 0)

Only suitable for selective laser sintering (Shapeways, etc.)
24wvhbn.jpg


Source files
Bottom.stl
Top.stl
 
Last edited:
I mounted my LCD using the headers Bryan specified. Is there any advantage to removing the plastic piece of the header to lower the height of the LCD? I think on mine it is above the network jack so it could be lowered.

Looks awesome, I'll be getting one in the near future.
 
I mounted my LCD using the headers Bryan specified. Is there any advantage to removing the plastic piece of the header to lower the height of the LCD? I think on mine it is above the network jack so it could be lowered.

Looks awesome, I'll be getting one in the near future.

Thanks. Removing the plastic could be done which would allow for a slight decrease in the height of the case, but the volume of plastic saved would be very little and wouldn't likely translate into a significant cost savings so I would probably just leave it alone. I have other designs that look exactly like this case but vary the wall thickness in places to try and cut the cost. I'm waiting until I get my reprap so I can experiment with these designs. It's just not cost effective to print multiple prototypes with an online service. With only 5 or so prototypes I could pay for a reprap.
 
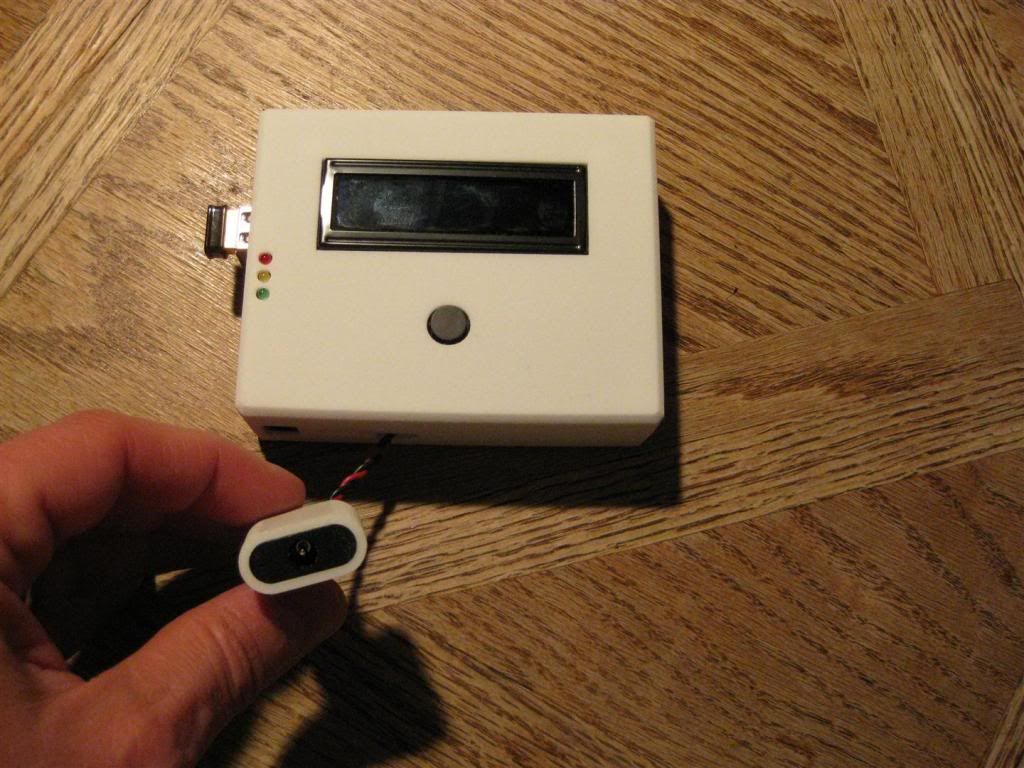
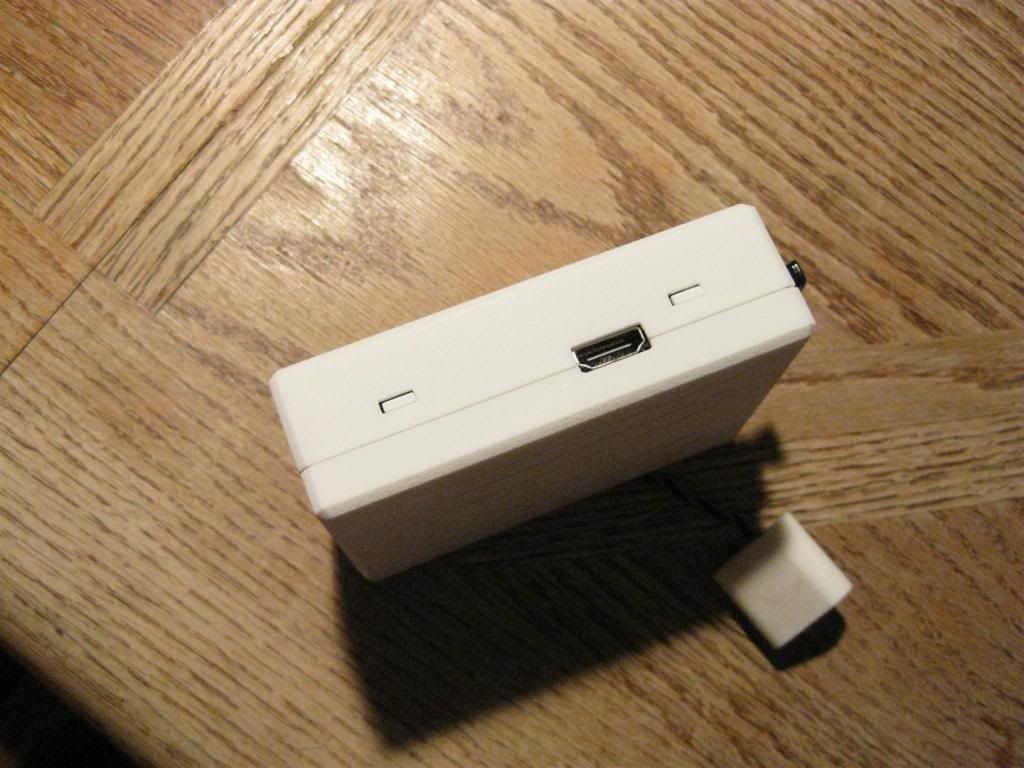
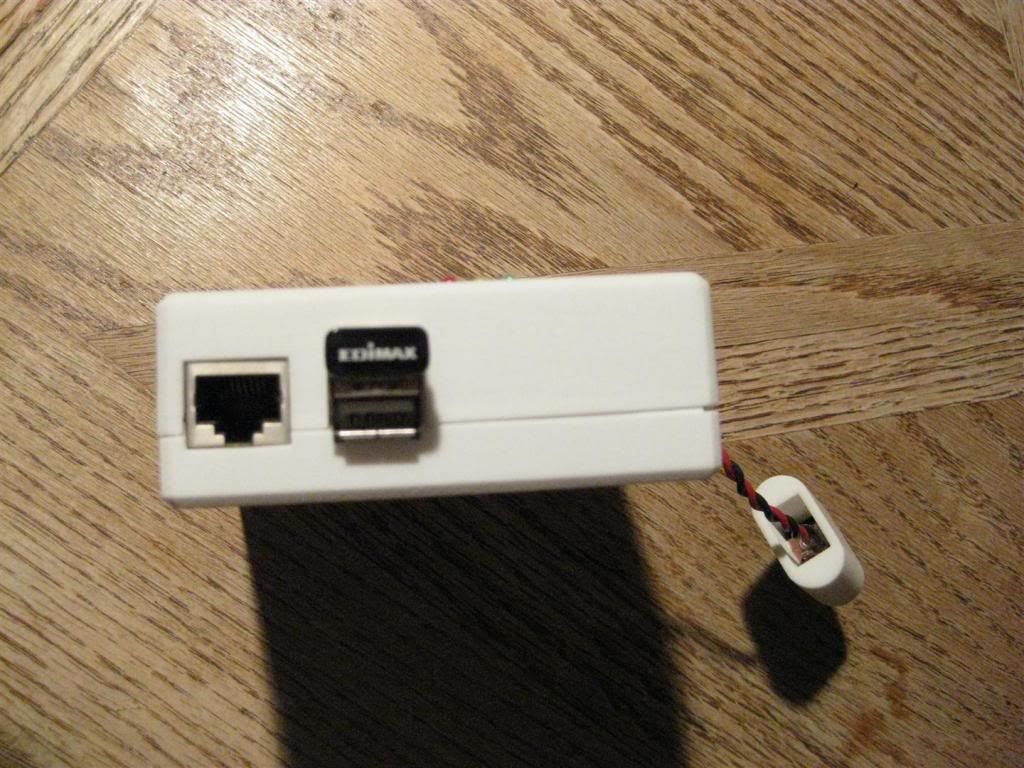
Got mine. I'll post a little more tomorrow. It's a good fit. There is one post that was a little too tall or that probably needs to be moved. Definitely wouldn't go any less than two millimeters thick. I went with a DC power connector instead of the RCA because I have an Auber fan that's already setup that way. I may end up putting the RCA on and then make an adapter.

IMG_3251Large_zps51602d7c.jpg


IMG_3245Large_zpse942e39b.jpg


IMG_3247Large_zps1e1b7dc3.jpg


IMG_3244Large_zps03b9a0e0.jpg


IMG_3248Large_zpsce37d08f.jpg


IMG_3249Large_zpsbb4c3127.jpg
 
Last edited:
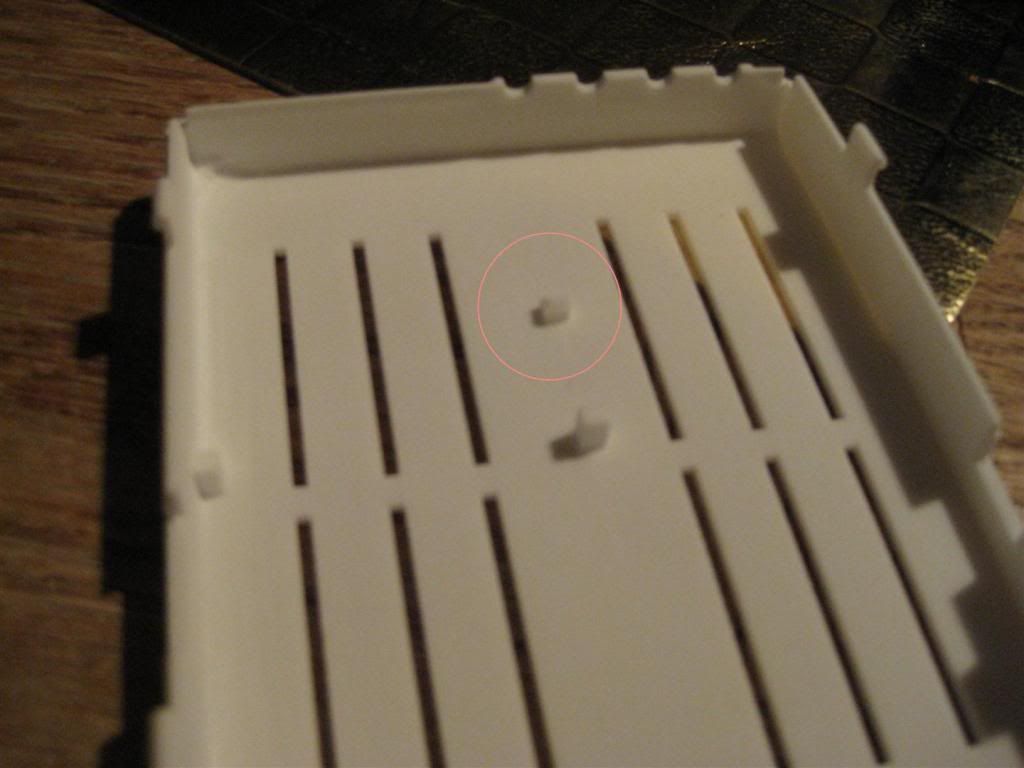
I sincerely apologize about the post that seems to be out of place. That is one that I added for a little more support. I measured it on my pi and it seemed to be very much in the clear. I will check it again tonight. What is it hitting? If anyone runs into the same problem, you can take a razor blade and shave the the post to your desire. Did you mount the LCD with screws yet?

BTW, yours came fast. Where did you order from?
 
No problem with the post. You did a great job.

The post hits the SD card holder frame, almost dead on the center of the black frame. Move it 3mm towards the side that the power connectors are on, and then it should land on the PCB instead.

I haven't mounted it with screws (it looks like only one is going to be accessible). The assembly is still riding a hair high. Perhaps my LCD is mounted a little differently, although I did follow Bryan's direction for case mount installation of the LCD. Perhaps the LCD post should be about 1 to 2 mm higher?

It came from Shapways. Yes, I was surprised that they got it out so quick.

Got to run to work but I'll post a little more after I've had time to work with it some more.
 
Thanks for the feedback. The LCD is supposed to stick out above the case about 1 mm, the posts are just there to secure it to the top because I figured that adding a post to the bottom underneath the LCD for support would be a bit clumsy and also add a substantial volume of plastic to the case.
 
Hot damn that looks so good! I need to start thinking about ordering one for myself. Is the plastic OK to be painted with enamel spraypaint? I'd like to do sort of a dark gloss blue or black and then get some cut vinyl logo or something for the outside.
 
Bryan, if you wait until I finish my reprap I'll make you all the cases you want. You've put in way too much work to be paying for cases.
 
BTW, yours came fast. Where did you order from?

It did come fast. I held off on ordering mine as the ship date gave a time frame that delivery would be while I'm in Texas for a few days.

How is the Reprap coming along Kole? Looks like a fun project.

I spoke to the Teacher who has a 3d printer
dimension-3d-print-pack-products.jpg
that looks something similar to this in her closet. She said I can come over and set it up if I like. I just need some spare time to get over and find the manual. I believe this was only used maybe twice in 2-3 years
 
Tom: It does look like the posts are the right height. I don't have the screws to try it, but I'm going to try and pick something up. I'm not sure if you want to be the official updater, but my suggestions for tweaks would be:

1) Move the control button on the front up 1mm towards the display.
2) Make the HDMI port on the top side 1 mm deeper.
3) Move inner post 3mm towards power side (already mentioned).
4) Move the food probe jacks 1mm closer to the front. Could almost go 2mm, but I'd start with 1mm.

Overall though it looks good.

Bryan: As far as painting it I'm not sure. The surface finish doesn't seem very friendly to paint. It feels like a cross between velvet and extruder polystyrene. Not very smooth at all. And quite a bit of dust. The pictures don't convey what the surface looks and feels like very well. It seems a little fragile to me, but if you do cut into it gets more "solid" the further away from the surface you get. Maybe you could sand it to make it smoother. As far as stickers, you'd have to do some surface prep to get them to stick.

I've checked online a little bit and didn't see anyplace, but I was wondering if there was a company that could CNC it out of a solid chunk of something for the same or less money. Looking at the geometry it seems like CNC would be possible.

Edit: And I'll probably end up putting a goober of silicone caulk to help support the wires for the AC adapter where they attach to the board.
 
Last edited:
Alan, thank you for the suggestions. I will try them out on my first print case on the reprap. I'm just waiting on a few parts that should get here by the end of the week. I have a bunch of extra screws for the LCD. If you pm me your address, I'll put 2 in an envelope a mail them to you.
 
Tom, I was curious if the surface on your's was also rougher than expected, or if perhaps this was a characterstic of the white "plastic".
 
Tom, I was curious if the surface on your's was also rougher than expected, or if perhaps this was a characterstic of the white "plastic".

Mine is the same way. If you go on shape ways and check out some of the videos of their fab process, it doesn't seem like they use a simple plastic extruder for their printing. Like you said earlier, I think a little bit of surface prep could make it nice and smooth.
 
It did come fast. I held off on ordering mine as the ship date gave a time frame that delivery would be while I'm in Texas for a few days.

How is the Reprap coming along Kole? Looks like a fun project.

I spoke to the Teacher who has a 3d printer
dimension-3d-print-pack-products.jpg
that looks something similar to this in her closet. She said I can come over and set it up if I like. I just need some spare time to get over and find the manual. I believe this was only used maybe twice in 2-3 years

Dennis, I would definitely learn how to use that. Should be simple if it has been used before and is known to work. Probably just needs a calibration and cleaning.

Dave, please post on the results of the sandstone material. I looked at that before because it is much cheaper than the flexible plastic. My concern after reading the material properties on shapeways site was it's durability. It will be very interesting to hear your impressions with it.
 
Bryan, if you wait until I finish my reprap I'll make you all the cases you want. You've put in way too much work to be paying for cases.
That's a really nice offer, I might take you up on that at some point. I have no problem paying for a case though-- you've done the hard part of prototyping it out so I'm sure I'll be able to use what I get back. The worthless laser cut case I tried make has turned into an enclosure for a thermostat I built for controlling my beer keg chest freezer. I apparently can not stop building temperature controllers for things.
 
It did come fast. I held off on ordering mine as the ship date gave a time frame that delivery would be while I'm in Texas for a few days.

How is the Reprap coming along Kole? Looks like a fun project.

I spoke to the Teacher who has a 3d printer
dimension-3d-print-pack-products.jpg
that looks something similar to this in her closet. She said I can come over and set it up if I like. I just need some spare time to get over and find the manual. I believe this was only used maybe twice in 2-3 years

Wow, that is real quick.
I ordered mine at 8am on 10/12 and I won't get mine until Thursday.
 
Dennis, I would definitely learn how to use that. Should be simple if it has been used before and is known to work. Probably just needs a calibration and cleaning.

Dave, please post on the results of the sandstone material. I looked at that before because it is much cheaper than the flexible plastic. My concern after reading the material properties on shapeways site was it's durability. It will be very interesting to hear your impressions with it.

will do Tom.


Back
Top