Silver B Frame Bolts


John-NY

TVWBB Pro
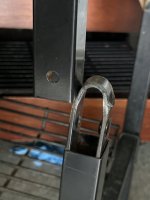
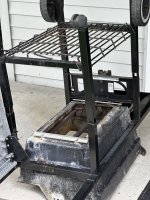
This Silver B frame looks like it’s missing two bolts, one on each leg across from the other.

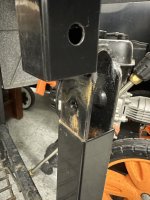
But it looks like the little arch inside the frame is rotated 90 degrees from what I would expect, because the arch looks like it has threads, but they don’t line up with the bolt hole in the frame itself.

Is this normal?
IMG_0142.jpegIMG_0125.jpeg
 
Yah, something is wrong here. Any chance you have pieces from two different frames?
 
The bottom piece holding the wheels needs to be spun around 180 degrees

The bolts on the front of the frame go in from the side. The bolts on the back of the frame go from the back.

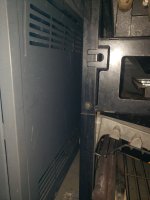
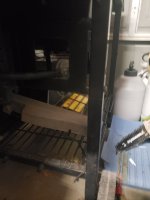
I just looked at a 2002 silver B in the garage and that's how it is put together. Not sure if these pics will show it well.

Here is the front looking at it from under the control panel.

20230817_210509.jpg

and the back, looking at it from under the control panel side.

20230817_210455.jpg
 
The bottom piece holding the wheels needs to be spun around 180 degrees

The bolts on the front of the frame go in from the side. The bolts on the back of the frame go from the back.

I just looked at a 2002 silver B in the garage and that's how it is put together. Not sure if these pics will show it well.

Here is the front looking at it from under the control panel.

View attachment 77275

and the back, looking at it from under the control panel side.

View attachment 77276
90° , 180°, whatever it takes. It's not right. Someone had trouble with the instructions,,😁
 
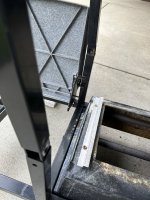
Ok, so actually I’m inclined to believe this is factory built incorrectly.

If I rotate the bottom section, the wheels are on the wrong sides, and the holes still don’t line up.

It’s like the arches themselves were welded 90 degrees off on this crossmember

I’m thinking the only thing to do is drill holes in the crossmember. Thoughts?

Is this like owning a Mickey Mantle misprint rookie card?!

IMG_0159.jpeg
 
I think I see the issue, the challenge is describing it.

There are three pieces for the bottom part.

The caster side "H" piece.
The wheel side "H" piece.
The wire rack.

Remove the wire rack from the two H pieces.

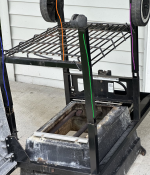
for the caster side "H" piece, change the positions of the legs, so that the leg marked in green is moved to where the leg marked in Blue is and vice versa.

For the wheel side "H" piece, change the position of the legs so Purple goes where Orange is, and vice versa.

The holes should line up at this point.

Then re-install the bottom wire rack.


1692373324857.png
 
I think I see the issue, the challenge is describing it.

There are three pieces for the bottom part.

The caster side "H" piece.
The wheel side "H" piece.
The wire rack.

Remove the wire rack from the two H pieces.

for the caster side "H" piece, change the positions of the legs, so that the leg marked in green is moved to where the leg marked in Blue is and vice versa.

For the wheel side "H" piece, change the position of the legs so Purple goes where Orange is, and vice versa.

The holes should line up at this point.

Then re-install the bottom wire rack.


View attachment 77289
Oh duh. The wire rack was throwing my solution off. Easy easy easy. THANK YOU!

No drilling. And no rookie card.


Back
Top