First Genesis 1000 restoration


KTyler

TVWBB Member
This is been kind of a long project in the making, with just an hour or so here and there where I could find it. But I've gotten some help from folks here and wanted to post my progress in return! This is the first Genesis I've done and I've been thrilled with it so far. I'll post on this the same way I approached the project- I'll try to post bits of the progress as I have a few minutes here and there in the coming days.

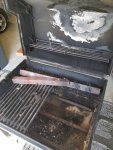
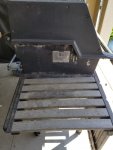
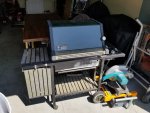
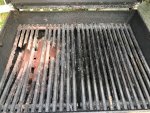
This started out as a mid-90's Genesis 1000 (old owner told me 1100, but I'm not sure what the difference is...). Picked it up for $20 in pretty sad shape. I intended to do a complete teardown and restore though, so no big deal that the guts were rotted out. The frame and firebox were in good shape, and the manifold and regulator were in working order.

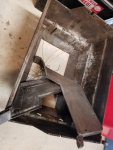
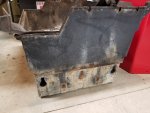
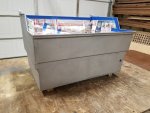
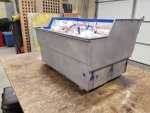
Basic plan was tear down, clean up, repaint the frame and box, rebuild tables, get some nice SS flavorizers and grates, and call it good. 20190714_143659.jpgreceived_2464721580282185.jpeg20190714_143819.jpg20190714_143724.jpg
 
I'm pretty terrible about taking pics in process, so bear with me. About the time I got the grill, I found this forum and saw some of the awesome restorations folks have done and started getting more ideas. This project evolved pretty quickly from a basic clean up to a full-on frame off restoration with all the bells and whistles. I wasted no time tearing everything apart and new wheels, igniter, and burners ordered up. Found a guy locally who could media blast all the aluminum and got those cleaned up for about $50. Well worth it to see all that grime blasted away! Here's the box before and all ready to paint.
20191010_122848.jpg20191010_122840.jpg20191010_121356.jpg20191010_121434.jpg
 
Its gonna be a good one. You are doing all the right things the right way.
Good luck and keep the updates coming.
 
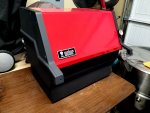
Alright, here's the firebox painted up with Rustoleum High Heat. Got the lid end caps painted too but failed to take a pic mid-process. Cleaned up the red lid pretty well with oven cleaner and then polished it up with simple green and steel wool. Looks like new now!

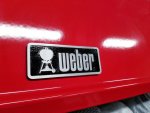
The logo I cleaned up and painted with VHT gloss black brake paint, cured and then face-sanded, then clear coated with VHT brake clear. So much better than the oxidized mess I started with! As a side note, I couldn't easily get the retainer clips that hold the logo to the lid, so I ended up attaching it with a thin layer of high temp rtv. Time will tell how that works but it should do well.

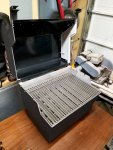
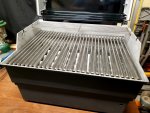
I got my flavorizers and grates from RCP, so had to assemble the firebox to get a peek at what it was going to look like! Those parts are no joke, probably added 30lbs or more to the grill. Expensive, but very heavy duty and well-made. Just wanted to note, he was excellent to work with figuring out exactly what I needed. I ended up getting the grate and diffuser for my WGA from him as well and am thrilled with it!

Replaced the lid bolts and pins with stainless - actually every piece of hardware I could replace I did so with stainless. Might as well at this point! More to come.

20191122_191142.jpg20191101_175133.jpg20191122_191213.jpg20191101_192059.jpg
 
The Red High Temp RTV is what I use on all my logo plates. I have several new push nuts for them, but the Red RTV is just easier. I have never had an issue with mine.
 
The Red High Temp RTV is what I use on all my logo plates. I have several new push nuts for them, but the Red RTV is just easier. I have never had an issue with mine.
Thanks, that's good to know! I was a little concerned but figured the grill shouldn't be getting outside its working heat tolerance .
 
You are doing a great job! That is going to be a fine looking and cooking 1000 when you are finished. Blasting is the way to go if you can find a great price like you did. I had my recently finished restoration blasted. Did you find a donor grill with that red lid, or was it painted over and you uncovered it?
 
Wow, that is looking great! Make sure you get this one tagged for our Grill Restoration sticky.

Those top drawer internals will make your grill work like a charm. Even with that cost you will still beat out the big box junk that can’t come close in quality. Plus, you have the joy of having made this transformation happen with your own effort.

We will look forward to the continuation of the story.
 
You are doing a great job! That is going to be a fine looking and cooking 1000 when you are finished. Blasting is the way to go if you can find a great price like you did. I had my recently finished restoration blasted. Did you find a donor grill with that red lid, or was it painted over and you uncovered it?
Thanks! The lid came from a clapped out donor. Might have been the only solid part on that grill. Worked out perfectly because the green one ended up being thrashed once I started cleaning everything off. Unfortunate though, I really wanted the green! I'll have to keep my eye out for another donor lid...
 
Wow, that is looking great! Make sure you get this one tagged for our Grill Restoration sticky.

Those top drawer internals will make your grill work like a charm. Even with that cost you will still beat out the big box junk that can’t come close in quality. Plus, you have the joy of having made this transformation happen with your own effort.

We will look forward to the continuation of the story.
That was kind of my logic - I might have spent $500 on this when all is said and done but it is going to outcook anything else in that price range. Plus it is cool!
 
After Rich Dahl and Bruce held my hand through the refurbishment project on my Genny I understand the effort that you guys put into them, I didn’t go full on restoration but, this is for personal use and now that I know where to look for things which could become an issue and where to get parts (and watch for donor units) I know I can eliminate problems or repair them when the time comes.
Tyler, your project really looks great! The black to redhead switch is very nice. I’d considered that when I found a redhead but, there was member who was looking for one and to be honest, I really like the “Maroon Giant” (high school sports mascot) more than I expected, it does match the little kettle on the overperformer.
 
No good before pics of the frame components, unfortunately. Really though, they weren't in that bad of shape. A little surface rust on mating edges and just inside the ends of bars but that's it.

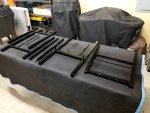
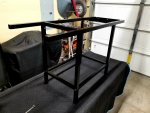
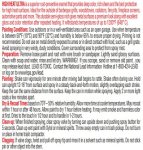
I gave everything a good long citric acid soak to get rid of the rust, neutralized, and coated the inside as best as I could with VHT rust converter. Sanded down the exterior down to 400 grit, and sprayed with Rustoleum High Heat Ultra. Baked as directed to cure, and let sit for a couple weeks before moving on.

I'm not sold on the rustoleum ultra - it looks great but even after baking the paint seems a little soft. Maybe it will cure over time, but I'm going to be careful with it in the meantime. Next project I'll probably use VHT caliper paint, never had a problem with that before.

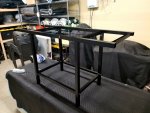
Got everything assembled with some shiny new stainless hardware and it's ready to get parts put back on!

20200405_113926.jpg20200405_113916.jpg20200405_113905.jpg
 
I use Rusto ultra HH on the end caps and on the frame around where the cook box is. I use Rusto 2X gloss black on the entire rest of the frame. There is a bit of a sheen difference, but it isn't very noticable since the cookbox hides most of it. The Rusto 2X gloss looks really nice on the frame and it is less expensive by half and goes on easier.
I use the flat black rusto high heat on the cook box. There is no "baking" with those paints. Just spray, let cure for a couple days and use the grill as normal. But, I always do a burn in for about 20 minutes or so, just to burn off any fumes.


Back
Top