Hi All, John Bostwick built and printed a Heatermeter and RD3 combo for me and mailed them to me in Australia.
I would like to compliment John on the way everything just worked out of the box, and for his advice and assistance in my starting the learning journey.
This is the combo I ordered.

I felt it was appropriate now though that I share my experience here in the forums so that others that are starting out like me can have an opportunity to access the knowledge that I gain by sharing my experiences.
There are only 3 of us in my family though, sometimes we do have friends and family over, I really don't have any use or desire for a huge BBQ.
I have a hooded 4 burner BBQ and I'm quite experienced in using it for steaks and burgers and roasts. Both with and with out using the rotisserie.
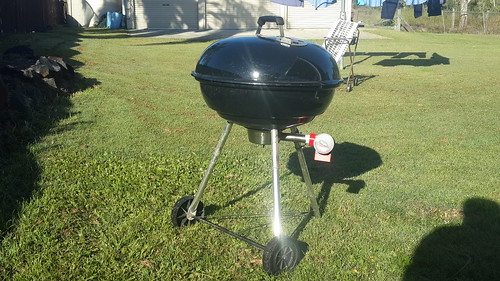
Some time ago I bought a 22 1/2 inch Weber Classic Kettle, with a desire to cook some of the delicious roasts that my Dad used to create with his years ago, when I was a teen.
Unfortunately I wasn't aware that the Weber "Classic" is not the same as the Weber that Dad had, and apparently they are notorious for not being able to maintain a fire.
That is what happens with mine.
If I set a fire... no matter how hot, even with the vents fully open , the fire goes out.
If I lift the lid and introduce some air (by fanning with a piece of cardboard or using a mechanical fan) to the fire I can "stoke it up" so to speak, but it will slowly go out again after the lid is put down.
I'm told that the reason it happens is believed to be due to different air convection because of the design of the shallower bowl.
I could have bought a new one, but I decided to go with a Heatermeter and RD3.
If I can make it do what I want then I will have a far better set up than I would have if I had just changed to the conventional Weber Kettle.
( I may in the future add an extension ring to my Weber Classic as well.)
So I have received my Heatermeter and RD3 combo and had it running on my desk I had to wait for some additional components to be fashioned but its all here now.
I am attaching my RD3 using a Dogs bowl with a pipe welded to it.
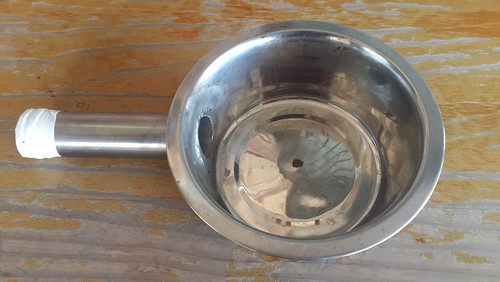
The white tape is silicone self amalgamating tape.
I was not able to source stainless steel tube that would give me a press fit in to the outlet of the RD3.
The sheet metal shop ran a couple of welds round the tube but it was still too loose.
This seems to work fine.
The Dogs bowl is positioned over the vents that were in the bottom of the Weber Bowl.
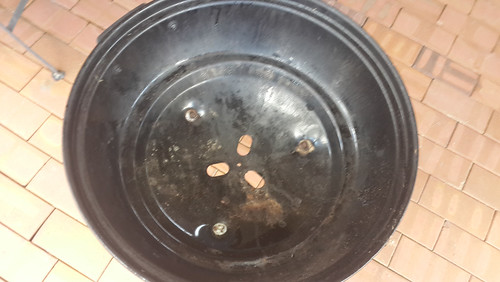
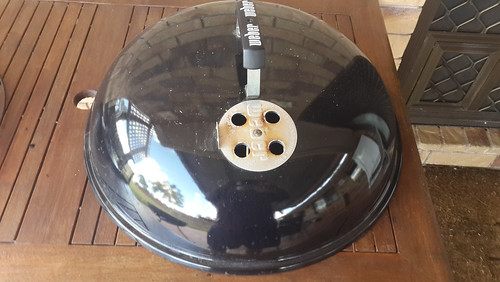
I dont have a photo of the bottom with the original vent in position but it is identical to the one in the lid
(I have removed the rotary sliding ventilation regulator and used the screw hole that held that to attach my dogs bowl.)
I just realised that I didn't take a pic of the Dogs bowl and RD3 in place, so I have taken one just now (not actually in use.)
I did a test cook yesterday.
The results were not great, but it was a test cook... designed to give me a base line with out wasting food.
I'm happy with the data I gained and I have lots of stuff I want to try to make it do what I want.
The Heatermeter and RD3 performed faultlessly, the issues were probably on several fronts that I need to test more to try to resolve.
John said to me "Be conservative with your fire, it's easier to heat a fire up than it is to cool it down."
So I started my test cook very conservative... I believe I was too conservative, but I needed a base line.
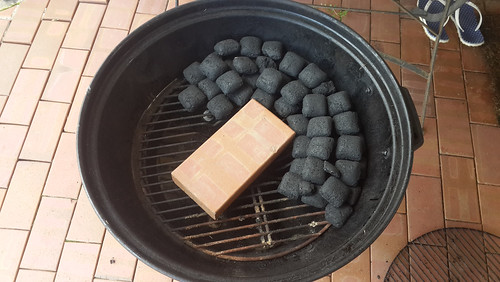
I decided to use a 3+2 "fuse" or "snake" method to build my fire.
I lit 5 briquettes in my chimney and positioned them at the end of the snake.
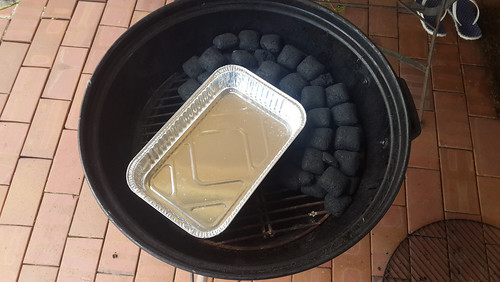
I placed a Paving block and a tray of boiling water as a heat sink and to simulate some meat altering the air flow in the kettle.
I used a potato to hold my meat probe.
The fire increased in temperature very slowly.
I decided to just allow it to go to see where it went.
Continued in my next post due to 10 image limit.
I would like to compliment John on the way everything just worked out of the box, and for his advice and assistance in my starting the learning journey.
This is the combo I ordered.
I felt it was appropriate now though that I share my experience here in the forums so that others that are starting out like me can have an opportunity to access the knowledge that I gain by sharing my experiences.
There are only 3 of us in my family though, sometimes we do have friends and family over, I really don't have any use or desire for a huge BBQ.
I have a hooded 4 burner BBQ and I'm quite experienced in using it for steaks and burgers and roasts. Both with and with out using the rotisserie.
Some time ago I bought a 22 1/2 inch Weber Classic Kettle, with a desire to cook some of the delicious roasts that my Dad used to create with his years ago, when I was a teen.
Unfortunately I wasn't aware that the Weber "Classic" is not the same as the Weber that Dad had, and apparently they are notorious for not being able to maintain a fire.
That is what happens with mine.
If I set a fire... no matter how hot, even with the vents fully open , the fire goes out.
If I lift the lid and introduce some air (by fanning with a piece of cardboard or using a mechanical fan) to the fire I can "stoke it up" so to speak, but it will slowly go out again after the lid is put down.
I'm told that the reason it happens is believed to be due to different air convection because of the design of the shallower bowl.
I could have bought a new one, but I decided to go with a Heatermeter and RD3.
If I can make it do what I want then I will have a far better set up than I would have if I had just changed to the conventional Weber Kettle.
( I may in the future add an extension ring to my Weber Classic as well.)
So I have received my Heatermeter and RD3 combo and had it running on my desk I had to wait for some additional components to be fashioned but its all here now.
I am attaching my RD3 using a Dogs bowl with a pipe welded to it.
The white tape is silicone self amalgamating tape.
I was not able to source stainless steel tube that would give me a press fit in to the outlet of the RD3.
The sheet metal shop ran a couple of welds round the tube but it was still too loose.
This seems to work fine.
The Dogs bowl is positioned over the vents that were in the bottom of the Weber Bowl.
I dont have a photo of the bottom with the original vent in position but it is identical to the one in the lid
(I have removed the rotary sliding ventilation regulator and used the screw hole that held that to attach my dogs bowl.)
I just realised that I didn't take a pic of the Dogs bowl and RD3 in place, so I have taken one just now (not actually in use.)
I did a test cook yesterday.
The results were not great, but it was a test cook... designed to give me a base line with out wasting food.
I'm happy with the data I gained and I have lots of stuff I want to try to make it do what I want.
The Heatermeter and RD3 performed faultlessly, the issues were probably on several fronts that I need to test more to try to resolve.
John said to me "Be conservative with your fire, it's easier to heat a fire up than it is to cool it down."
So I started my test cook very conservative... I believe I was too conservative, but I needed a base line.
I decided to use a 3+2 "fuse" or "snake" method to build my fire.
I lit 5 briquettes in my chimney and positioned them at the end of the snake.
I placed a Paving block and a tray of boiling water as a heat sink and to simulate some meat altering the air flow in the kettle.
I used a potato to hold my meat probe.
The fire increased in temperature very slowly.
I decided to just allow it to go to see where it went.
Continued in my next post due to 10 image limit.
Last edited:


