Heatermeter on Mega2650


Dave Casazza

TVWBB Fan
Hi All,

Matt Miller and I have been playing around with getting the HM code running on the ATMega2650 platform, and I think we have done it. We made some interesting design decisions:

1) 100% compatible with the existing HM4 Arduino code base (more or less).
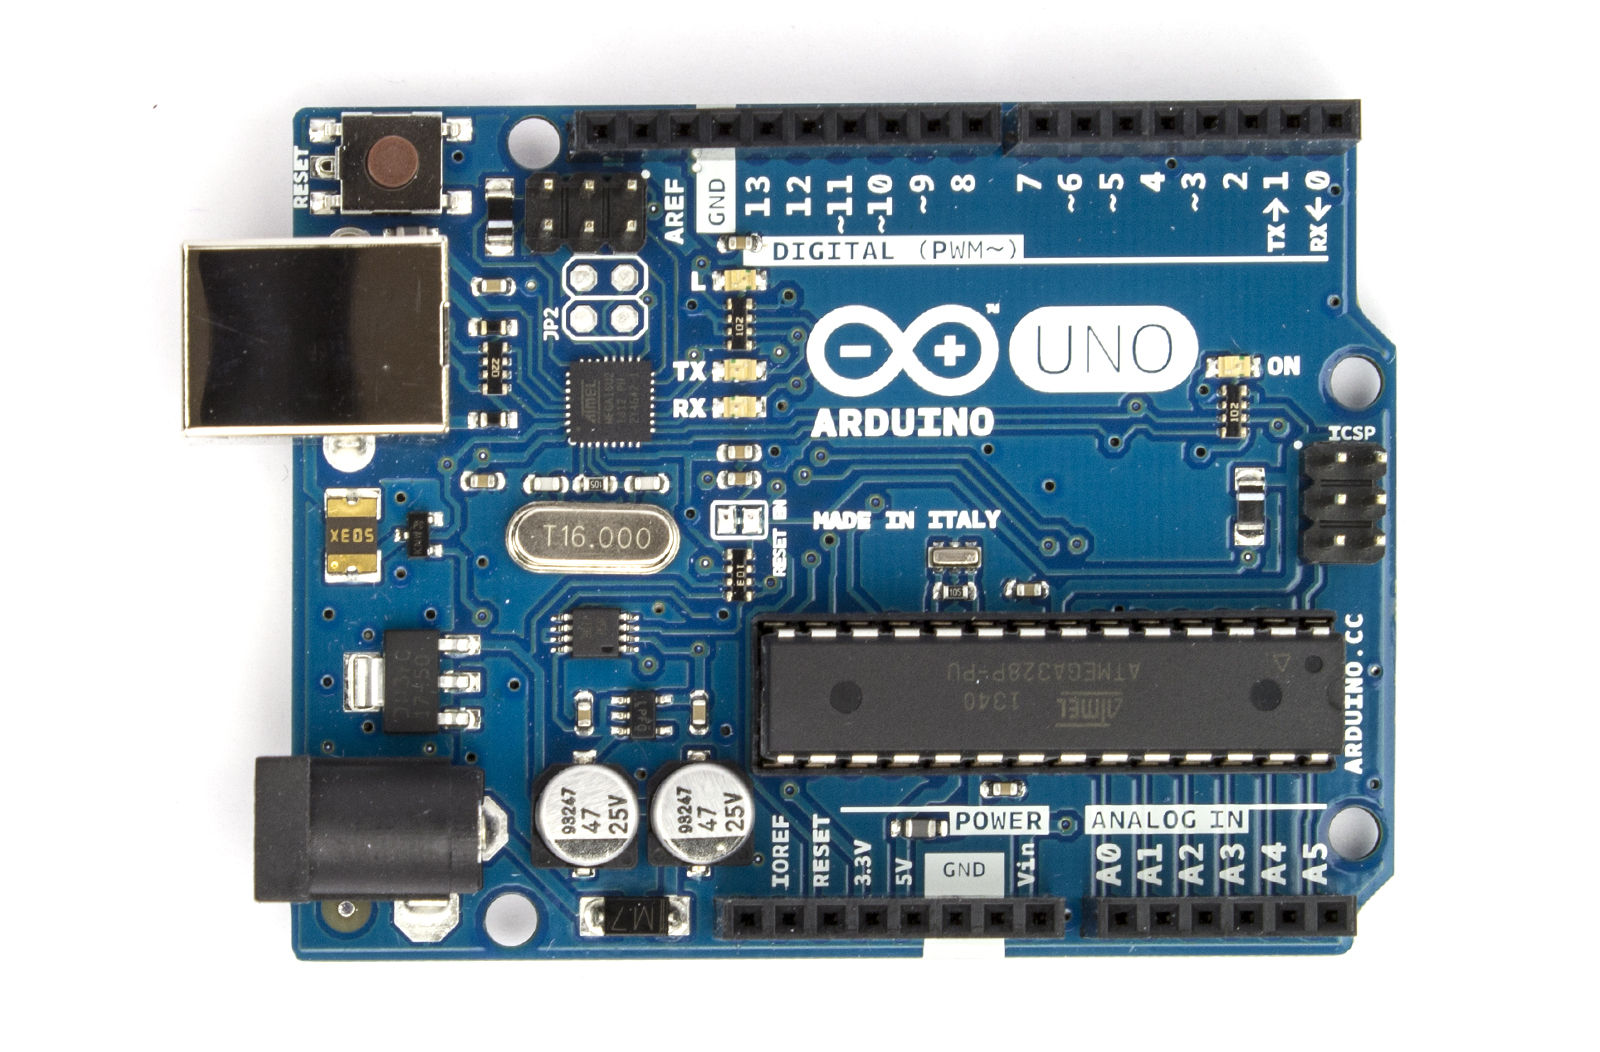
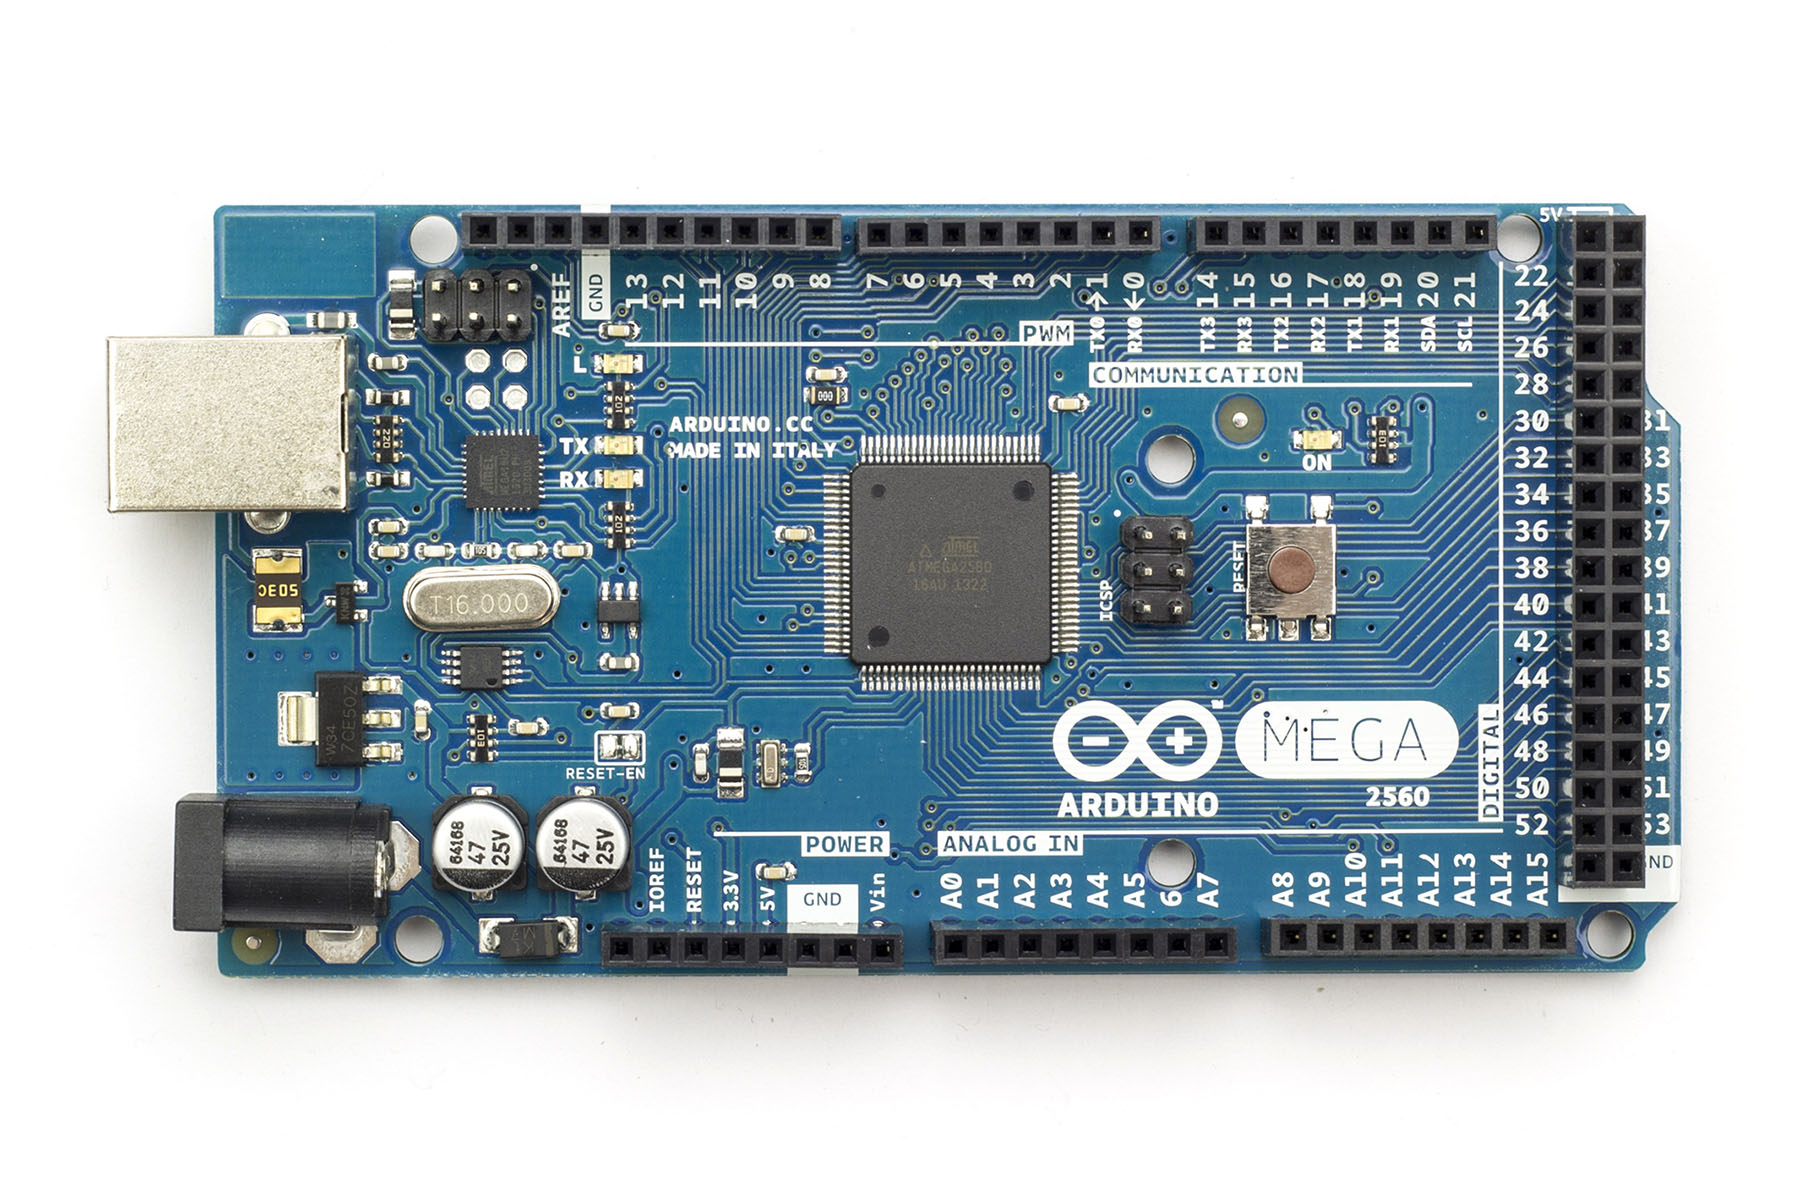
2) Moved to the ATMega2560 Platform, which permits much more code to execute (x4), and many more inputs (x4ish). This permits more inputs (rotary encoder anyone?). See http://arduino.cc/en/Main/arduinoBoardMega2560
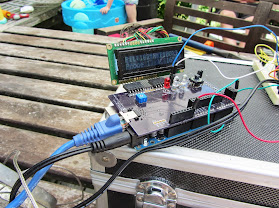
3) Moved to a shield configuration, that mounts a motherboard shield above the ATMega2560 board.
4) Moved the logic of the blower to a daughterboard, connected via RJ45 cable. This allows us to separate/move the expensive stuff (Mega2560, candybar like display) out of the wind/rain from the blower connections and temperature monitoring logic.
5) Added to the daughterboard the ability to extend logic via separate 328P control. This permits us to load different programs on the daughterboard that can drive more stuff simultaneously. The 328P can monitor the blower output, and drive a separate servo for damper control (see picture below). In another scenario, the 328P can monitor the blower, and do precise proportional control to a zero crossing SSR (proportional control to 1/120 of a second increments (the number of times an SSR can zero cross in a second). The proportional control is very nice in controlling an electric based smoker (and probably less important for sous vide application because of the high specific heat for water).

We have figured out how to integrate the 5v logic on the mega to the 3.3 volts on the rPI, so Bryan's Raspberry PI platform works. The integration also includes the SPI logic to the rPI, but flashing the mega requires specific firmware code on the rPI codebase to support.

Here are pictures:

Motherboard Shield, running of ATMega2560 board (you can see wires connecting the shield to the RX/TX for an rPI):
PX28aBIIMSkUNDBMDPmbxvtedgpqU0bnhxx267qwTCw=w279-h208-p-no


Motherboard and daughterboard are connected by standard RJ45 network cables.

Daughterboard, driving both blower and servo damper:
3dsa6ZFMZUhRrKeteoD_fMPfM6OwSTWnCb3-pINag6w=w279-h208-p-no


Daughterboard, driving SSR with 1/120 sec proportional control:
JduSNY0EhStRaYdnpEv_g2vQzBj40ma1p0Hf2vjGusU=w155-h207-p-no

o4AO7ZeHwq0GWN8ACYfc479GbdJgr2vf02yP5ESnxBs=w155-h207-p-no


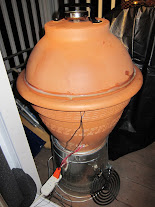
I got tired of charcoal, so I built this electric smoker based on alton brown's flowerpot concept, using a 120V stove-top burner element.
MCwSQj-lDEUjInpu6Uz5Wi3Gc6utoMmk_yZXvCBzYmM=w155-h207-p-no


Any interest in having us publishing the design? It's a way of utilizing the existing code base, but setting up the HM to move beyond the limitations of the 328P chip.

I am also happy to show more pictures of the electric flowerpot smoker design and parts if interested.

Cheers,

Dave
 
Last edited:
I'm interested! At the very least in getting any changes you need into mainline, so the same code can be compiled for both platforms. Also as far as SPI programming, is it just because I only coded the signatures for the 328 parts? I can add the 2650 signatures if that's all that's needed.

Also I'm curious what you did to make the SSR work. I thought they pretty much automatically worked with the standard output. Just slower PWM?
 
The code required minimal edits (really only the code changes specific to shutting down parts of the 328P chip needed to be commented out). Honestly it was so minor to change - just compile the code under the Mega256 board and see what parts of the code failed to compile - like 5 lines. I assume that the firmware needs to then be compiled specifically for the Mega2560 platform and put into the rPI firmware image.

The SSR code running on the daughterboard is a fairly simple PWM decoder - it figures out what is the proportion of the the "on" time for the total cycle time of the blower out, and then translates it to something compatible with running a zero sensing SSR with 60HZ. Its analogous to having the ability to turn on the SSR for a number of 1/120 second segments (the number of times a 60 HZ AC sine wave crosses zero), and then turn it off so that the total count of "on" segments vs "on" plus "off" is equal to the PWM decoder output %.

It's more fine grained than setting up the HM to 100% min setting, but the well known HM workaround will work as well.
 
Last edited:
Nice! That's very similar to the configuration that runs my 3D printer...
The additional inputs will allow control of a blower and a damper I assume, that would be a nice improvement. Any chance this configuration could interface with a thermocouple?

Having the blower and temp probes running on a separate daughter board is an interesting idea, although it would surely be much more convenient if the connection was wireless rather than using a LAN cable. I wouldn't be able to get the main unit out of the rain with a LAN cable attached without leaving a door cracked (for mosquito's to get in LOL). Is there any way to make that connection wireless without turning the world inside out?

Having a ATMEGA2560, a shield, and a daugterboard seems like it is bumping up the hardware quite a bit, do you have an estimate how much the cost to build this flavor Heater Meter would be?
 
Last edited:
I should chime in.

I think the main reason for opening up this thread at this point to really to put the design out for comment. I really want to hear from Bryan and the community what people want to see done with the additional IO available on the Mega2560.

If you're not familiar with the the two boards:

the arduino UNO, which supplies the basic architecture for the HM4:
ArduinoUno_R3_Front.jpg


versus

the Arduino Mega 2560
ArduinoMega2560_R3_Front.jpg


The HM4 is a great platform. This development is in no way a slight to Bryan's work, nor is it trying to supplant it. Rather, it is a tech demo of what is possible with Bryan's code.

The real reason why we started the project was I wasn't happy with leaving an expensive chunk of electronics outside in all sorts of weather conditions. So the idea of a more modular setup came about. So I should talk about the architecture.

This is a shield setup, similar to RAMPS for controlling a 3D printer. The heatermeter interface is contained on the shield - LCD, button and indicator LED's. The rest of the functionality is stripped away to a daughterboard (DB). These daughterboards are connected via standard ethernet cables, so no funky connections. The daughterboards can be purpose-built for specific needs depending on what you're trying to control.

Currently, the DB's have 328p's that handle incoming commands from the Heatermeter head unit and perform certain functions based on that command. For instance, the DB senses 'Blower on, 10%" from the heatermeter and then opens the damper via a servo and then operates the blower at 10%. So some logic has been duplicated, but that was a necessity of not wanting to change the code base.

But that is the current state of the project. We have a working prototype, but I think that we need to get some ideas and opinions from the community about whether this is really something that is needed or not.

Is this a more expensive option? For sure. However, this whole thing can easily be torn apart and re-purposed for other things. Then it can be re-assembled when you need a heatermeter again.

Bryan,
I'm willing to make any changes that you want. Just let me know. Dave is sending you the files for review. There are many things that I can think of off the top of my head that I'd like to improve about the design, but that would involve code and architecture changes.

Laundry list of things:
:Almost triple the amount of AnalogIn - can we run two or three pits/appliances at once? Stacking shields is easy.
:talk to the DB 328p's via SPI and eliminate the need for hard control connections between head and DB.
:several control/input methods - personally, I would love to see the button replaced with a rotary encoder that has a built-in switch.Including the capability to use a membrane switch would be good.

Question: Is this even the best platform? Should the DUE (3.3v) be chosen over the Mega (5v)? Does the code even compile for the DUE?

You can see why we've put this out there - too many design choices. We need your input. :D

@Ralph,

I'm sure you could incorporate thromcouples using a MAX31855. I've given serious thought to adding support for the RFM12b. It would be a nice enhancement in not having that wire running into the house. You'd have to power it locally, but I don't see that as a deal breaker. The only thing about the RFM12b is that it's 3.3V. The Mega operates at 5V. But some extra circuitry makes it work, though I haven't tested it yet.

As far as cost, yes, it is as I like to say mo'spensive fo' sho'. But sometimes it's not about the cost. Also, this isn't meant to be in a permanent configuration like the HM. This way you can spread the costs between projects. Not smoking something and want to use the Rpi as a media server? Pull the Heatermeter SD and go slap the media server SD in. Need to smoke something and you'r not running a 3D print job? Pull the Mega and smoke something.

But at this point I don't have a hard number for the cost. I'd guesstimate that OSHPark would want about $20 for the PCB. I'll bet you can get it way cheaper fro iTead or seeedstudio. As time goes on we'll get the costs nailed down.

Matt
 
I'm confused perhaps, is there still a rPi used in this configuration? Is the shield board a custom made module? Can you show a good pic of the shield?

I'm wondering how much current the base module would consume? Probably a decent amount with the display connected, but it would be nice if it could run on battery's? Perhaps if you run a display without a backlight on....? Or build a rechargeable battery into the unit? It would be awesome if the control unit was completely wireless....

Thermocouple support would be nice for sure, it would be nice to be able to use better temp sensing devices that could handle higher temperatures. Although I'm pretty sure I've convinced the sales lady at Vishay to send me out a sample of their 1000C thermistor to test. If I can get that working with the heater meter thermocouple support wouldn't be quite as important (to me). This thing is supposed to have long term stability at 900C! WOW!

As far as disassembling the boards and using them for other purposes, I don't find that to be very practical. I ran my HM without a case for a good while and it was a PITA. I always had to worry about shorting something out on any metal, or the braided probe leads, and having the boards come apart etc. So the boards really need to be inside some kind of case. Once it's in a case you are less likely to disassemble it. Also, after you spend the time and money to build the project I think people tend to use it a lot, at least I do. Perhaps if you live in a colder climate you would pull it apart for the winter, but I grill year round no matter how cold it is, I think I will appreciate the HM even more in the winter when it is tending my grill in the cold. (though I haven't tested the HM in the cold to see how low it can operate?)

I do like the idea that it could be used to control multiple pits, I never thought I would need that but since I've cooked for a few people I'm getting a lot of requests to cook for parties etc where I could use more pit space and/or cook at different temps for say ribs and chicken....

Having the ability to control a damper on the fan is a key improvement, for Kamado style grills you really need to be able to choke off the air flow to keep temps under control. I've been working on a gravity damper type system that would help, but it would be much better to have real control over the damper on the fan, and top vent for that matter...

I think the idea is pretty cool and would probably build one just because I like to experiment and keep my mind active and hands busy...
 
Last edited:
Ralph,

none of the images so far show the shield with the Rpi. The newest iteration has a direct connection to the Rpi, which is underneath the Arduino Mega. This minimizes the physical footprint. I'll post a pic of the shield tonight.

I don't know what the full power draw is, but we can but a kill-a-watt on it to see. Fully wireless would be nice. The right battery would be needed. LiPo?

Sure, a case is entirely doable. Probably necessary to keep the works together. And if you wanted to you could certainly keep it all sewn up. But the ability to split it up easily and re-task is nice.

Honestly, what I look forward to the most is the ability to use the core heatermeter with lots of other appliances. The HM4 core code is so powerful now that I think it makes sense to reach out to other devices and apply this logic to them. Granted, this forum is about smoking things. But Bryan's code is mature an robust. It's really begging to be used on things other than smokers. :)

For instance, what about a coffee maker driven entirely by the heatermeter? It has the capability. Why not hack into an el-cheapo coffee maker, place an interface board in there, wire it up and plug the heatermeter into it? It would probably brew the best coffee you've ever had given that the average coffee pot is just about useless at maintaining 195-202F - the ideal temp range for extraction. But I bet the heatermeter could do it in a snap. http://www.technivorm.com/ for cost comparison.

Gotta run!
 
I got the schematics in my email and I'll check them out over the next day. Folks have asked before about splitting the two pieces, the HeaterMeter and the I/O into two boards, which of course brings up the wireless question, which my answer has always been that at that point why aren't you just using a web-enabled device as the remote and leave all the guts connected. Especially considering the cost difference of a I/O board vs a fullon HeaterMeter w/ rPi (A) is about $40, it never seemed practical.

Power draw of just a HeaterMeter board is about 20mA + LCD backlight, which makes it about 40mA. RFM12B transmitters use about 25mA to transmit, but idle at less than 1mA if you're not receiving. Everything could run a day or two easily off a 2000mA LiPO, about the size as what's in a cellphone. However you need to power a blower (150mA+ @12V) or a servo which could kill that battery in a few hours. Not sure about the servo though, it probably could make it 20 hours.

Coffee maker you probably couldn't do, because you still need to heat water to boiling to get it to go up the tube from the reservoir to the basket.

These ideas are cool though, and just because I didn't think that's a path I would go down doesn't make them less valid. That's the beauty of this project, that you get to prove me wrong and surprise me with how well you can things work despite my cursory evaluations of them!
 
I was thinking battery power for the "brain box" but still using a wall wart for the daughterboard that powers the fan outside. Since the fan and probes connect to that board it will be stationary so being tethered to the power supply isn't a hindrance. If you go as far as to make the connection between the daughterboard at the grill and the "brain box" controller wireless I would think running the controller completely wireless from a battery would be the way to go. It would be nice to have the control unit in your hand when you are outside setting up the grill, then be able to walk inside out of the weather with it while it remains connected and in control. If the batteries were rechargeable you could just plug the unit in like a cell phone to recharge or for longer cooks.

I dont know what the simplest/cheapest method to get the daughterboard WIFI connected would be, but if it requires putting a rPi or other sophisticated device on the daughterboard then that kinda defeats the point...
 
Last edited:
One of the nicest features of the HM4 is how compact and portable it is. I like the added inputs that you get with the mega but is it really worth making the unit so clumsy? I don't really understand the argument for a servo combined with a fan. If you are getting too much air intake when the fan is powered off, then you don't have your mounting system optimized. Anyone that owns an Auber fan can tell you how well a simple gravity based damper works.
 
Well, like Bryan said, the beauty of open source is that it can evolve to suite the needs of anyone who wants to put the work in, and can be used in many forms....

Just the Heater Meter if you want bare bone control over a pit....

Add the rPi if you want advanced graph's and web features....

or build the Mega2560 version if you want to control multiple pits, or control dampers as well as fans.

I know most people use the Heater Meter for smoking low and slow, but I've been trying to adapt it for high heat pizza cooks. If the high heat thermistors work out I might be able to use the extra processing power of the Mega and the extra I/O to run a fan to stoke up the fire, and a servo to control the top vent. With thermistors on the pizza stone and in the pit I'm thinking the fan and servo controlled top vent could be automated to balance the temperature of the stone VS the ambient temp in the grill so your crust is just right and the toppings are cooked perfectly at the same time.

Also, with my Char-Griller FauxMado grill the Heater Meter is pretty much useless with the standard blower due to constant runaway temperatures. A servo damper would add the control needed to tame that beast. I know the gravity flap can work, and I had been planing on designing and printing one (if you know of a printable design that already exists please let me in...), but right now I don't have an Auber fan nor a home made gravity damper so I am SOL on my Fauxmado and it is kinda frustrating TBHWY.

Having a fan and servo damper would allow fast stoking of a fire and and the servo takes over when the pit comes to temp. Lots of things could be done with a little more inputs and processing power...

Maybe the Mega version isn't for everyone, but you can still build a Link Meter, or HM standalone, or rPi version too... pick a flavor! I like options, the more the better...
 
Ralph,

Your comment about having a damper with a blower was the initial reason why we developed this new approach. I couldn't get my small smoker to maintain controlled temps - runaway temps prevented effective low-and-slow.

With a damper + blower, it all worked. The daughterboard 328P watched the blower output and managed the servo damper - and there were no code changes necessary!

The great think about this approach is that it is evolutionary and revolutionary at the same time. We can continue to use Bryan's code base unchanged, but at the same time, we can see Bryan's good work has been hampered by the 328P's limitations (both code size and inputs), so this permits future growth.

With this new platform, we can consider things like:
* Easy to use rotary inputs, instead of buttons. Rotary inputs allow quick/smooth selection of options directly from the HM Arduino code.
* Eventually moving damper control to the HM platform (it's possible now with the increased inputs) (no more either/or between blower and damper).
* Circulation fan control within the smoker (for more even temps within the smoker). Ever had the problem where there was 30 degrees difference between the top and bottom racks? Stick in a heat resistant fan in the smoker, and control it.

You hit the head on the nail - the more options the better!

Cheers,

Dave
 
Cant wait for this!! I would love the option of blower and servo, using blower for fast heat up and servo for cook. Any idea when the daughter card plans will be available, will they be shield style maybe with the cable connection optional,
 
Hi Dale,

The nice thing about the approach is the modularity. Use a simple daughterboard (DB) for connecting a normal blower to a fire based smoker (without the 328P on the DB). Want to do something more complex? Pop in the 328P and control a damper. Want to do more precise SSR control with an electric smoker of sous vide - swap with a new DB that has the code to control the SSR at 1/120 second precision.

The motherboard/daughterboard combo is actually not the evolutionary thing to consider - really the question should be 1) are we out of room on the 328P architecture? I think the answer is yes - we are struggling with how to implement combined blower + damper (not just one or the other) control on the 328P platform because of limitations of outputs. What if we wanted to integrate a high temperature digital input for Pizza cooking (a recent thread topic) - no can do - we are out of inputs.

Eventually all of the things that we have to do on the daughterboard can be moved to the ATMega2560 board, but in the mean time we have a possible path forward.

Cheers, and thanks for chiming in that you would like to see this!

Dave
 
Which encoder part do you use? I used a 24 detent encoder on another project and really hate it. When you're adjusting a number, it's great to be able to scroll really quickly through the values but the menus I find too difficult to navigate. It is hard to land on the exact menu item you want (there being only 1/24th of a revolution to hit) even with a knob on it. I experimented with requiring 2 'clicks' to change menus and 1 click per numeric change. Then it didn't feel right on the menus when the encoder would click and nothing would happen. I was wondering if 12 detent encoders would work better and then you can just software accelerate the output if the user is turning it quickly.

The other thing I don't like about it is that it sticks out a lot. A 1" thick device with a 1" knob sticking out looks silly.

I do prefer the encoder in theory, but I haven't found a part that I really like yet. Which have you gone with?
 
I don't think this is a settled item just yet.

I'm right in-line with your experience. They can be difficult to use with menus, but can't be beat for quickly changing values.

And yeah, the standard ones are a bit goofy - too long. I'll try to find a form factor that is appropriate.

I'm going on a a parts hunt...later. I've got too much to do at work today. :(
 
I have a mega, 2 extra RBPi and 2 wifi dongle and couple of 328p looking for new project I'm just itching to build this, I can help test and prototype, don’t know coding but want to learn it. have 2 328p sitting on the desk waiting for use.
 
Last edited:


Back
Top