HM/LM not connecting to WiFi after Step 8 of Configuring LinkMeter WiFi


HughMcMillan

New member
I am trying to configure my HeaterMeter to work over my WiFi network. Upon reaching Step 8 of the "Configuring LinkMeter WiFi" wiki, and while "waiting for changes to be applied...", my WiFi connection to the HeaterMeter is dropped and I am placed back on my home WiFi network. I have repeatedly followed the steps in outlined in the "HeaterMeter wifi issues" thread. http://tvwbb.com/printthread.php?t=57052&pp=10&page=1

I reflashed the Raspberry Pi SD card and added "norestore" to the text file. I then reinstalled the SD card in the HeaterMeter and followed steps 1-7 in the wiki on both a Mac and a PC. The PC disconnected from the HeaterMeter WiFi automatically after 18 seconds before I clicked the link to Step 9.

Does anybody have any suggestions? This is more than a little frustrating...

Thank you.
 
Have you tried using a LAN cable connected to rPi RJ45 jack?
Do this:
Plug your wifi adapter in and a rj45 cable into the Pi side of the Heatermeter (not the one you soldered on)
Plug the other end into your computer and power on the Heatermeter
Go into your computer settings and manually change your IP for your Ethernet connection to 192.168.200.2
Then go to your browser and type in the address bar 192.168.200.1 and see if you can get in and configure your WiFi
 
Thanks for the help.

First, I purchased the HeaterMeter from Auber Instruments as electronics are not my forte. I interpreted your instructions to be to plug an ethernet cable into the ethernet looking port/RJ45 with I/O
lights. I assigned the IP address 192.168.200.2 to my computer in its network preferences and plugged the other end of the ethernet cable into my iMac's ethernet port. I then attempted to type the proper IP address (192.168.200.1) into my browser (Safari). Safari reported that there was no network connection.

I unpowered the HeaterMeter and moved the ethernet cable to the RJ45 port with no I/O lights next to the USB ports. I then powered the unit on again (the IP address was still assigned to the computer) and entered the browser's IP address. In network preferences, the ethernet connection was now reported as active and had the IP address 192.168.200.2. Safari still reported no connection when I entered the IP address 192.168.200.1 in the URL bar.

Should I be using some internal RJ45 port?

I don't really understand why the HeaterMeter keeps failing after Step 8 in the WiFi connection wiki.
 
Auber doesn't provide any support for the HeaterMeter. They send everybody who purchases one to this forum for support.

Basically I'm at your mercy...
 
Dave,

Thanks for the reply.

Initially my problem was in Step 6-> Step 7 of the link you copied. I had earlier written Step 8 but it was really after Step 6 where one is "Waiting for changes to be applied..."
I could not actually reach Step 7 where the Network/Interface tab is selected.
It is a mystery why the "Waiting for changes to be applied..." message appears and never goes away or when it does disappear EVERYTHING, meaning the WiFi, goes away and the HeaterMeter WiFi is nowhere to be found.

And initially I was strictly over WiFi and kept losing the HeaterMeter WiFi network either on a Mac or a PC. It was in searching for solutions here that I saw the directions at

http://tvwbb.com/showthread.php?57052-HeaterMeter-wifi-issues&highlight=lost+wifi

which suggested reinitializing the SD card and entering "no restore" in the text file. This didn't change anything so J Winn kindly suggested doing it hard wired between the Mac/PC and the HeaterMeter box.
That method is the only one where I was hard-wired. Not that it worked either.

Thanks for the input.
 
So you got through all the steps to 8 and waited 15 sec like it said? What probably happened is that everything worked fine then and its connecting to your wifi network and your router has assigned it a new IP address.
Do this:
Unplug the power to the HM as well as the Ethernet cable to your computer but leave the wifi adapter in.
Plug in the HM power and watch the screen for about 10-15 sec I would guess.
It should display an IP address.
Put that address into your browser and you should connect.
You will want to set a static IP on your router for the HM as well to make life easier in the future.(this is different on all routers so I can't walk you through that)
On a side note, it seems kinda crap that Auber is happy to sell you a HM but provide no support for it.
 
Last edited:
J. Winn,

I tried your instructions but they are the same as I have been following. By the way, is an ethernet cable involved in your directions? I have had to re-flash the card as well as add "no restore" to the end of the appropriate line each and every time I do this and it is getting really old.

The IP address that always works initially is 192.168.201.1. This IP address is not displayed on the HeaterMeter or the HeaterMeter Devices web page. The HeaterMeter Devices web page lists the Ethernet (wired) IP address as 192.168.200.1, status down and the WiFi (wireless) IP address as 10.0.1.184, status up. Incidentally, IP address 10.0.1.184 is the address which is displayed on the HeaterMeter display after booting. The only IP address I have been able to use successfully over WiFi to access the web interface is 192.168.201.1.

I have attempted to use an ethernet cable between the HeaterMeter and the computer but I am never able to connect to the web interface, regardless of IP address. This is after assigning my computer one of the three aforementioned IP addresses. I have no idea what my subnet mask would be or even if it is important.

I can see why Auber doesn't want to provide support for this. It isn't exactly easy to troubleshoot.
I was impressed with the basic $141 Auber unit because of the AmazingRibs review but it didn't support a second/meat probe or give any support to a graph and I was anxious to be able to look at a trend line. That led me to "upgrade" to their assembled HeaterMeter unit for $381.01 with two probes and a 10 CFM fan.

BTW, had I bought a kit from Bryan he states on his web page,

"Be aware all products are sold without warranty or technical support. I do guarantee that the thermocouple amplifier is operational before shipment; however due to the DIY nature of the kit and varying levels of soldering and assembly expertise, I can not provide replacement parts for possibly non-functional components. All assembly support questions should be directed to the tvwbb.com forums and I will not diagnose hardware problems via email."

I can't blame Bryan and I am sure he has contributed more than his share of support in spite of his disclaimer. And he is a fellow Hillsborough County resident so I have respect for him on that level! I do not have the same warm feelings for Auber and I am very tempted to ship this all back to them and go with another solution entirely. Stoker? Even though AmazingRibs did NOT recommend it? I feel I am back to square one.

I appreciate your help very much. I sure wish someone with Apple experience had been involved with this process as then software pages wouldn't simply sit there in some kind of "Waiting for changes to be applied..." limbo. No offense intended to those PC users.
 
Ok so your HM is connecting to your wifi network. Your router has assigned it an IP address (10.0.1.184). There is no issue using a Mac; I have a MacBook and a laptop running Linux both of which have no problem connecting it seems you may just have some network setting issues. Let's try again.
At this point you do not need to connect with the Ethernet cable anymore as it appears the HM is connecting to your wifi network just fine. On your Mac go into network settings and select your wireless adapter from the list on the left. This should be setup to DHCP. Your Mac should have an IP address of 10.0.1.X (X could be any number it doesn't matter). You shouldn't be messing with any subnet settings just leave the default settings.
Once you have verified these settings on your Mac then plug in your HM power (make sure your wifi adapter is in before you power on the HM). Give it a few seconds and watch the screen like I said before. If you didn't set a static IP for the HM the IP address may have changed from 10.0.1.184 to 10.0.1.X(again the X could be any number). Whatever this number is type it into your browser and the HM screen should show up. Step 9 is not really necessary for the HM to function correctly, you are just renaming the connection. You can do it if you like just scroll to the bottom and click Configuration and pick up at step 9.

The reason Bryan has his disclaimer is because he is selling DIY kits which if you don't know what you are doing you can ruin components or not put together correctly; all of which he has no control over. He is more or less doing this as a convince to help people out I don't think he is making much or anything on selling kits. Also, disclaimer or not he is very helpful from what I have seen. Auber on the other hand is selling a complete product which they should support in my opinion.
 
Last edited:
If both your macbook ( or any wireless computer ) and heatermeter are powered up and both have a 10.0.1.X IP, but you aren't able to access the IP of the heatermeter, you might need to check the network / security settings in your wireless router to make sure that "AP Isolation Mode" isn't turned on. This would prevent wireless clients from being able to communicate with each other.
 
Good point Steve, I had been thinking it could possibly be an issue like that with his router settings too...
He might try forwarding port 80 to the HM wireless IP in the router and then try to connect from a wired PC rather than wireless.
I've been reluctant to chime in because the OP bought from Auber who should support their product if they are selling it IMHO.Plus the PC bashing and general tone, comments like "at our mercy", etc.... none of that made me eager to help TBHWY.
 
The Auber site states that they don't offer tech support. Based on the selling prices, I find it hard to believe that there's much profit being made. I'm also surprised that Auber would sell a DIY style device, since most everything else they sell is far from DIY.

While I do own a house full of Apple products and like the basic "it just works" effect of it all, I love the fact that the heatermeter is not a closed / walled garden type of ecosystem, but with that, you will find some folks end up having a very hard time with it all, but that can't really be avoided.

To quote Oscar Wilde "Nowadays people know the price of everything and the value of nothing". If you're only interested in the heatermeter because it can save you a few bucks compared to another controller and not for the love of DIY, you're probably going to have a tough time with it.
 
I think Auber has had an all SMD HM made? I bet you could get them done up pretty cheap in China if you have the $$ to invest in a boat load of them, so there's probably more profit in it for them than you would think. (if looking at it from the cost of a one at a time DIY build) I agree with you, I am surprised they are selling it, which makes me pretty sure they figured out a way to make a decent profit from itl.....
 
Maybe Hugh can post photos of the heatermeter PCB that Auber ships. My guess is that Auber isn't doing anything mass produced and that Bryan is supplying them to Auber.

Edit: I see the boards are posted on the Auber site. No "all SMD" board from the look of it. Just the main v4.2.4 board and a one-off board that includes 2 x TC probes + 1 x thermistor probe.

HeaterMeter_TwoBoards_w.jpg
 
Last edited:
You're right, that's not SMD... I guess I had just assumed that would be the only viable commercial route to go. That does leave me to wonder who is assembling the board for them, I assumed it was cheap mass production they were using...
 
Re:Steve_M, at 8:50 PM

Steve,

Thanks for the suggestion. I went through my settings for my Apple AirPort Extreme (latest/current model used with a cable modem ((w/o router or WiFi)) and I looked in every setting in the AirPort Utility for "AP Isolation Mode" and found nothing.
So I tried Google and at first learned that Apple AirPorts have never supported Isolation Mode and I almost quit there. But I kept reading and discovered the following, "For some routers the term "isolation" mode is used to configure a wireless network that allows clients, that are connected, to access only the Internet but not other clients on the local network. This s similar to what the Guest Network feature on the Apple routers." This was concerning some trying to use a Chromecast an an Apple WiFi network. While ultimately this did not prove to be the issue perhaps my having Enable Guest Network not enabled (off), as it negatively impacts overall speed, does indeed, somehow, limit a device on the network such as the HeaterMeter. Now I do have many devices on my network sharing access to the net; Ecobee thermostat, Nest Protect smoke alarms, Miele dishwasher & washing machine that talk to the factory in Germany should there be a problem, Lutron RadioRa2 lighting and shades, Philips Hue lightbulbs and a garage door opener to name a few.

Re: RalphTrimble at 9:21 PM

Ralph,

"PC bashing and general tone..."
I am not a total idiot on these matters but I am not that comfortable outside my Apple universe. I bought a 128K Mac the week they shipped. A single sided 400k floppy disk held the system, app(s) as well as data. I have always used a Mac although I have an HP laptop with Windows 10 that I use for things that only speak to a Windows system (Meridian surround sound system.) I am not comfortable in that world but I can usually get done what I need to do. I do enjoy reading directions and following them. Usually that works. This is not one of those times. And I am sorry you mistook my frustration with this WiFi set up as bashing. I have pointed out however that it seems silly to have a process in this set-up which announces that it is "Waiting for changes to be applied..." and it never goes away. That doesn't make sense to me and when my failure in the process begins at that point it gets annoying after I have reflashed the flash drive for the umpteenth time. Would a log file be too much to ask for? I'm not saying that I could read it but if it existed then it might make it easier for all of us on this thread to understand one another.

I had not thought of Port Forwarding but perhaps it is worth trying, thanks.


Re Steve_M, at 9:50 PM

Steve,

WRT Auber, well, I thought I explained that. The AmazingRibs reviewed ATC devices. The Auber SYL-1615SYS-W (catchy name, no?) was the highest rated and the cheapest. I wanted to get that one but I had bought a Maverick ET732 remote thermometer unit on the site's recommendation and was frustrated because without a graph of the temperature(s) I could not see trends or stability unless I wanted to manually log the readout values every so many minutes. In an effort to solve that lack of visual data I bought an iGrill2. It was terrific although it had no pit air thermocouple in the box and that was ~$30 more with shipping. All was good until I found out that my desk was just barely out of range from my WSM 22.5 which was 30 paces away. Now I thought I knew what I needed was WiFi enabled, minimum of 2 probes for pit and meat and something accurate. I also wanted to be able to use my iPhone 6+ for a display if possible, like I did with the iGrill probes. I looked at the usual suspects. One was not suggested by Amazing Ribs. One popular unit seemed to no longer sell/stock a WiFi unit. Some units had rave reviews on Amazon that said Customer Service was great because when my unit arrived DOA they promptly sent me a new one. Hummmm Other reviews said that after the replacement failed they didn't have the best service experience. I wasn't sold on any but I did discover that Auber had a unit that fit all of my desires and then some. Yes, it was a RPi device but a guy in Tampa (Tampa! I live on a canal off, Tampa Bay! How cool is that?) has built this unit that turns the RPi into exactly what I wanted. And I could get the nice probes I used to use up North when I heated my house with a Finnish soapstone contraflow wood-burning pizza oven! (Contraflow means the smoke has to travel DOWN which smoke doesn't like doing.) So, although $381.01 was a lot more than the $141 the catchy name one cost I went for it. Little did I know that I would be paying more to Auber than anyone on this site that builds them for people who are not adept at soldering or that Auber never gave so much as a 6 pack of craft beer to the genius behind it. I was anxious to use my new WSM and while I didn't mind sitting next to it for 4 hours to monitor cooking baby backs I wasn't anxious to commit that amount of effort to Boston Butts. I had done that with an original Kamado close to two decades ago and I wanted to take advantage of the progress in technology. BTW, my Kamado was the large one on wheels and it was the first to have red glazed large tiles on it. It was a beauty.
Anyway, I wasn't trying to save money but I won't pretend I wanted to put it together myself either. I don't feel good about Auber knowing what I know now. I was nervous about the service but I had read the Wiki and it seemed fairly straightforward. I COULD actually cook w/o WiFi as you know but I really wanted to get it to work.

I appreciate you Mac sentiments. Plug n' play has always been nice, or at least post SCSI.

Re: Steve_M at 10:38 PM

Steve,

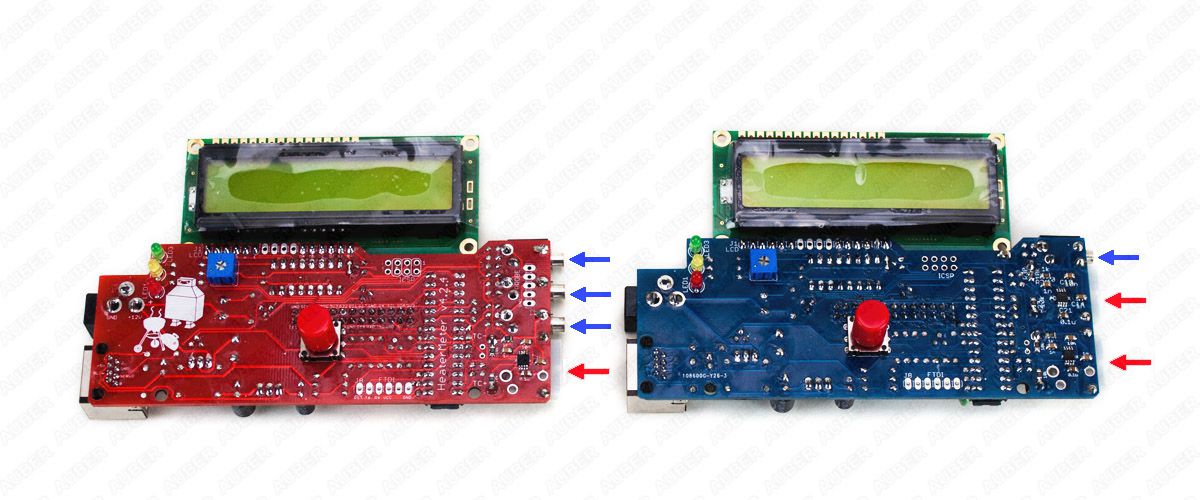
Mine is the Blue one as I wanted two yellow plug sockets for that style of probe. My Maverick ET732 has a unique socket/plug design that I am not wild about because they don't really fit well in the HeaterMeter from what I have read. I don't know if I am being a thermocouple snob or not. It's not my intention.
 
J Winn at 8:20 PM

J,

Thanks so much for the reply.
So after every Step 6/7 failure I have understood, from another thread I read, that one had to refresh the card and add "no restore" to the end of a line so that the card would be able to be set up again. Is this true? Or can I simply hope it took the data I entered prior to the Wiki Wireless Client Setup step-by-step, steps 1-4? Step 5 is the "Don't touch a cotton pickin' thing..." one and 6 is the one where it is "Waiting for changes..." forever. Clicking on Network -> Interfaces drops all WiFi connections with the HM every time.

You wrote, "On your Mac go into network settings and select your wireless adapter from the list on the left." And then "Once you have verified these settings on your Mac then plug in your HM power (make sure your wifi adapter is in before you power on the HM).

Am I understanding you correctly that I should have the HM OFF (unplugged from mains) and the wireless adapter plugged into my iMac? (Auber sold me a TRENDnet TEW-648UBM 150 Mbps Micro Wireless N USB Adapter Green WiFi) I would think at this point the HM is off so the only way I can see the wireless adapter is to plug it into a USB port on my iMac, verify it and then remove it and plug it into the HM prior to booting it.

I totally understand Bryan's disclaimer for the reasons you stated concerning hardware issues during building as well as PITA issues from people like me who don't have a smooth time in the configuration of something. I bought prebuilt from Auber before I really knew about Bryan and those people who built kits for people like me. I was at Auber's site thanks to the AmazingRibs review and I was anxious to get such an elegant solution so quickly. I do agree with you that Auber should do more to support an item that they sell which is all assembled and typically, I would think, in a complete kit with all the things anyone would need. They do have an FAQ but it is very very short.

I will attempt your solution on Monday. Thanks for the assistance.

Well, I see that I have failed to actually thank the other people who posted and that was never my intention.
Thank you Steve and Ralph.
And of course, Bryan.


Back
Top